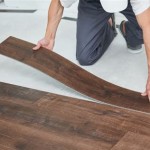
Eliminating Vinyl Flooring In Just A Few Easy Steps
Vinyl flooring is a popular choice for many homeowners due to its durability, affordability, and ease of installation. However, there may come a time when you need to remove vinyl flooring, whether you're renovating your home or simply want to update the look of your floors. While removing vinyl flooring may seem like a daunting task, it's actually quite easy to do with the right tools and a little bit of know-how.
In this guide, we'll walk you through the essential steps of eliminating vinyl flooring in just a few easy steps. We'll cover everything from preparing the area to removing the flooring itself, so you can get the job done quickly and efficiently.
Step 1: Prepare the Area
Before you start removing the vinyl flooring, it's important to prepare the area by clearing out all furniture and other obstacles. You should also protect the surrounding walls and floors with drop cloths or plastic sheeting. This will help to prevent damage from any debris or tools that may fall during the removal process.
Step 2: Remove the Baseboards
Once the area is prepared, you can start removing the vinyl flooring by removing the baseboards. Baseboards are typically held in place by nails or screws, so you can use a pry bar or screwdriver to remove them. Be careful not to damage the walls when removing the baseboards.
Step 3: Remove the Vinyl Flooring
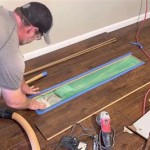
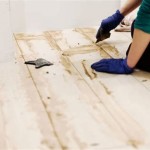
With the baseboards removed, you can start removing the vinyl flooring itself. Vinyl flooring is typically glued or stapled to the subfloor, so you will need to use a tool such as a putty knife or flooring scraper to loosen the flooring and remove it. Start by scoring the vinyl flooring with a utility knife, then use the putty knife or flooring scraper to pry up the flooring. Be careful not to damage the subfloor when removing the vinyl flooring.
Step 4: Clean the Subfloor
Once the vinyl flooring has been removed, you will need to clean the subfloor to remove any remaining adhesive or debris. You can use a vacuum cleaner or a broom and dustpan to clean the subfloor. If there is any adhesive residue left on the subfloor, you can use a commercial adhesive remover to remove it.
Step 5: Install New Flooring
Once the subfloor is clean, you can install new flooring of your choice. There are a variety of flooring options available, so you can choose the one that best suits your needs and budget. If you are installing new vinyl flooring, be sure to follow the manufacturer's instructions for installation.
Tips for Removing Vinyl Flooring
Here are a few tips for removing vinyl flooring:
- Use a sharp utility knife to score the vinyl flooring before using a putty knife or flooring scraper to remove it.
- Be careful not to damage the subfloor when removing the vinyl flooring.
- If there is any adhesive residue left on the subfloor, you can use a commercial adhesive remover to remove it.
- Wear gloves and safety glasses when removing vinyl flooring.
- Dispose of the vinyl flooring properly.
Conclusion
Removing vinyl flooring is a relatively easy task that can be completed in a few hours with the right tools and a little bit of know-how. By following the steps outlined in this guide, you can safely and easily remove vinyl flooring from your home.

How To Remove Vinyl Flooring The Home

How To Remove Vinyl Floor Stains Easily

Tips How To Clean Vinyl Flooring 4 Easy Steps Expert Advice

8 Easiest Ways To Clean Vinyl Floors

How To Soundproof Vinyl Flooring Cow

10 Beginner Mistakes Installing Vinyl Plank Flooring Fixthisbuildthat

How To Clean Vinyl Floors

How To Install Vinyl Plank Flooring In A Bathroom Fixthisbuildthat

How To Prepare A Concrete Floor For Vinyl Flooring Parrys

Common Mistakes When Laying Laminate Flooring Next Day Floors
See Also
