Essential Aspects of Grouting Vinyl Tiles for a Lasting and Stylish Floor
Vinyl tiles have become increasingly popular flooring choices due to their durability, affordability, and ease of installation. However, achieving a professional-looking and long-lasting floor requires proper grouting techniques. Here are the essential aspects to consider when grouting vinyl tiles:
Tile Preparation
Before grouting, ensure the tile surface is clean and free of any debris or dust. Any existing grout should be removed using a grout saw or a utility knife. The tiles should be firmly adhered to the subfloor with no loose or moving tiles.
Grout Selection
Choose a grout specifically designed for vinyl tiles. Vinyl tile grout typically contains antimicrobial properties to resist mold and mildew growth. The color of the grout should complement the tiles and the overall interior décor.
Grout Mixing
Follow the manufacturer's instructions carefully when mixing the grout. Use clean water and mix the grout until it reaches a creamy, workable consistency. Avoid adding too much water, as it will weaken the grout.
Grout Application
Using a grout float, apply the grout evenly onto the tile joints. Press the grout into the spaces and remove any excess. Ensure the grout is flush with the tile surface to prevent water penetration.
Grout Curing
Allow the grout to cure for the recommended time specified by the manufacturer. This typically ranges from 24 to 72 hours. During this period, the grout will harden and bond securely to the tiles.
Grout Sealing
Once the grout is fully cured, apply a grout sealer to protect it from stains and moisture. Grout sealers are available in various finishes, from matte to glossy.
Maintenance
Regular cleaning and maintenance will help extend the life of your grouted vinyl tile floor. Wipe the floor with a damp mop regularly and avoid using harsh cleaners. If necessary, re-seal the grout every few years to maintain its防水ing properties.
Additional Tips for Success
- Use a grout release tool to remove excess grout from the tile surface after application.
- If the grout is too wet, add a small amount of dry grout to firm it up.
- If the grout is too dry, add a small amount of water and mix until you reach the desired consistency.
- Allow the grout to dry completely before walking on the floor.
By following these essential aspects and tips, you can achieve a professionally grouted vinyl tile floor that will last for many years to come. Its durability, ease of maintenance, and stylish appearance will enhance the aesthetic appeal and functionality of any space.

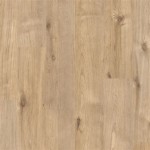
Kitchen Groutable Vinyl Tile I Can T Believe This Is Flooring

Diy Grouted Vinyl Floor Tiles Show Off Decorating And Home Improvement Blogdiy Blog

How To Grout L And Stick Tiles A Easy Floor Update 50 One Afternoon Of Work This Diy Life

Diy Grouted Vinyl Floor Tiles Show Off Decorating And Home Improvement Blogdiy Blog

Groutable Vinyl Tile An Easy Installation Diy

Does Luxury Vinyl Tile Flooring Require Grout Supers Edmonton

How To Install Groutable L And Stick Tile In Your Bathroom

Groutable Vinyl Tile An Easy Installation Diy

Groutable Luxury Vinyl Tile Floor An Update Jenna Burger Design Llc Interior Architectural Consulting

Groutable Vinyl Tile At Com
See Also