How Does Vinyl Plank Flooring Stay In Place On Concrete Floor?
Vinyl plank flooring has become a popular choice for homeowners and businesses alike due to its durability, aesthetic appeal, and ease of installation. One of the most common subfloors on which vinyl plank is installed is concrete. Understanding how vinyl plank flooring stays securely in place on a concrete subfloor involves examining several key factors including the type of vinyl plank, the preparation of the concrete surface, and the installation methods employed.
The stability and longevity of a vinyl plank floor installed over concrete depend significantly on addressing potential issues within the concrete itself, such as moisture content and surface irregularities. Furthermore, the specific adhesive or locking mechanism utilized plays a crucial role in maintaining the floor's position and preventing movement over time.
Understanding Different Types of Vinyl Plank Flooring
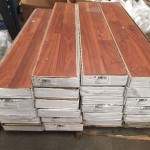
Vinyl plank flooring is broadly categorized into several types, each with its own installation requirements and methods for securing to a concrete subfloor. These types include glue-down vinyl plank, click-lock vinyl plank (also known as floating vinyl plank), and loose-lay vinyl plank.
Glue-down vinyl plank, as the name suggests, relies on a strong adhesive to bond directly to the concrete subfloor. This type of installation provides a secure and stable connection, minimizing movement and reducing the likelihood of gaps forming between planks. The adhesive used must be specifically formulated for vinyl flooring and compatible with concrete. The selection of an appropriate adhesive is critical to prevent premature bond failure due to moisture or alkalinity in the concrete.
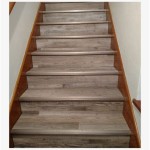
Click-lock vinyl plank, or floating vinyl plank, utilizes an interlocking system along the edges of each plank. These planks connect to each other, creating a continuous surface that "floats" over the concrete subfloor. While not directly adhered to the concrete, the weight of the planks and the friction between the planks and the subfloor keep the flooring in place. This type of installation typically requires an underlayment to provide cushioning and noise reduction, as well as to mitigate minor imperfections in the concrete surface. The underlayment also acts as a moisture barrier, preventing moisture from the concrete from affecting the vinyl planks.
Loose-lay vinyl plank is designed to stay in place primarily through its own weight and a high-friction backing. This type of vinyl plank typically has a thicker construction and a specialized backing that grips the subfloor. While it does not require adhesive or interlocking, it is essential to ensure that the subfloor is perfectly level and smooth to prevent movement or shifting. Loose-lay vinyl plank is best suited for smaller areas or areas with minimal foot traffic.
Concrete Subfloor Preparation: A Critical Step
Proper preparation of the concrete subfloor is essential for ensuring the successful installation and long-term stability of vinyl plank flooring, regardless of the installation method. This preparation involves several key steps aimed at addressing potential issues that could compromise the bond or stability of the flooring.
The first step is to thoroughly clean the concrete surface. This involves removing any existing debris, such as dust, dirt, paint, adhesives, or sealers. Sweeping and vacuuming are essential, followed by scrubbing with a suitable cleaning solution to remove stubborn stains or residues. In some cases, mechanical methods like grinding or shot blasting may be necessary to remove old adhesives or coatings.
Moisture testing is a critical aspect of concrete subfloor preparation. Concrete is porous and can absorb moisture from the ground, which can lead to adhesive failure or warping of the vinyl planks. A moisture meter should be used to measure the moisture content of the concrete. If the moisture level exceeds the manufacturer's recommended limits for the specific vinyl plank and adhesive, mitigation measures must be taken. These measures can include applying a moisture barrier coating to the concrete surface or allowing the concrete to dry for an extended period.
Leveling the concrete surface is another crucial step. Vinyl plank flooring is relatively thin and will conform to any unevenness in the subfloor. This can result in unsightly bumps or dips in the finished floor, as well as potential damage to the vinyl planks over time. Self-leveling concrete compounds can be used to fill in low spots and create a smooth, level surface. Larger cracks and imperfections should be filled with a concrete patching compound before applying the self-leveling compound. The self-leveling compound must be allowed to dry and cure completely before proceeding with the vinyl plank installation.
Finally, the concrete surface should be primed. Priming helps to improve the adhesion of the adhesive to the concrete and can also help to seal the surface, preventing moisture from migrating up into the vinyl planks. The primer used should be compatible with both the concrete and the adhesive being used. The primer should be applied evenly and allowed to dry completely before proceeding with the installation.
Installation Techniques and Adhesive Selection
The specific installation techniques employed, as well as the choice of adhesive (for glue-down installations), play a significant role in ensuring that vinyl plank flooring stays securely in place on a concrete subfloor. Following the manufacturer's instructions carefully is paramount for a successful installation.
For glue-down installations, the adhesive should be applied evenly to the concrete surface using a notched trowel, following the adhesive manufacturer's recommendations for trowel size and application rate. The vinyl planks should be placed carefully onto the adhesive, ensuring that they are properly aligned and that there are no gaps between the planks. A heavy roller should be used to press the planks firmly into the adhesive, ensuring a strong bond. Excess adhesive should be wiped away immediately to prevent it from drying on the surface of the planks.
For click-lock installations, the planks are connected to each other using the interlocking system. The first row of planks should be carefully aligned along the edge of the room, leaving a small expansion gap between the planks and the wall. Subsequent rows are then connected to the previous row, ensuring that the planks are properly aligned and that the interlocking system is fully engaged. A tapping block and a mallet can be used to gently tap the planks together to ensure a tight fit. The expansion gap should be maintained around the perimeter of the room to allow for expansion and contraction of the flooring due to temperature and humidity changes.
The choice of adhesive for glue-down installations is critical. The adhesive must be specifically formulated for vinyl flooring and compatible with concrete. It should also be resistant to moisture and alkalinity, as concrete can release alkaline compounds that can degrade some adhesives. Low-VOC (volatile organic compound) adhesives are often preferred to minimize indoor air pollution. The adhesive manufacturer's recommendations for application rate, open time, and curing time should be followed carefully. Using the wrong adhesive or applying it incorrectly can result in premature bond failure, leading to loose planks and an unstable floor.
For loose-lay installations, the most important aspect is ensuring a perfectly level and smooth subfloor. Any imperfections in the subfloor will be noticeable and can cause the planks to shift or move over time. Double-sided tape can be used around the perimeter of the room to help secure the planks in place, but this is not always necessary if the subfloor is sufficiently level and smooth.
In addition to the adhesive or locking mechanism, the overall environment can affect the stability of vinyl plank flooring. Maintaining a stable temperature and humidity level within the room can help to prevent excessive expansion or contraction of the flooring, which can put stress on the adhesive or interlocking system. Direct sunlight can also cause the vinyl planks to fade or warp over time, so it is important to use window coverings to protect the flooring from excessive exposure.
Regular maintenance, such as sweeping and mopping, can help to keep the vinyl plank flooring clean and free of debris, which can scratch or damage the surface. Using appropriate cleaning products specifically formulated for vinyl flooring is also important to prevent damage to the finish. Heavy furniture should be equipped with felt pads to protect the flooring from scratches and dents.
By understanding the different types of vinyl plank flooring, properly preparing the concrete subfloor, and employing appropriate installation techniques and adhesive selection, it is possible to ensure that vinyl plank flooring stays securely in place on a concrete floor for many years to come.

How To Prepare A Concrete Floor For Vinyl Flooring Parrys

Tips For Installing Vinyl Plank Over Concrete Floors Lemon Thistle

Lvp Flooring Installation Over Concrete Subfloor Full Instructional Builds By Maz Flooret

10 Beginner Mistakes Installing Vinyl Plank Flooring

Easy Ways To Install Vinyl Plank Flooring On Concrete

Installing Vinyl Plank Flooring How To Fixthisbuildthat

A Beginner S Guide To Installing Vinyl Plank Flooring Dumpsters Com

Installing Vinyl Plank Flooring How To Fixthisbuildthat

How To Install Glue Down Vinyl Plank Flooring Bathroom Concrete Floor

Tips For Installing Vinyl Plank Over Concrete Floors Lemon Thistle
See Also