How to Apply Vinyl Flooring Over Tile Floor
Vinyl flooring offers a cost-effective and aesthetically versatile alternative to traditional flooring options. Its durability, water resistance, and ease of installation make it a popular choice for homeowners seeking to update their interiors without extensive renovations. While vinyl can be installed directly on a subfloor, applying it over existing tile presents a viable option, eliminating the need for messy and time-consuming tile removal. However, proper preparation is critical to ensure a smooth, long-lasting, and visually appealing result. This article provides a comprehensive guide on how to successfully install vinyl flooring over tile.
Before embarking on the project, it is crucial to understand the specific requirements and potential challenges involved. The suitability of laying vinyl over tile depends heavily on the condition of the existing tile floor and the type of vinyl flooring being used. Ignoring these factors can lead to issues such as uneven surfaces, poor adhesion, and premature wear and tear.
Assessing the Existing Tile Floor
The first and arguably most important step is a thorough assessment of the existing tile floor. This evaluation determines whether the tile is a suitable base for vinyl flooring and identifies any necessary repairs or preparations. Several key aspects need to be considered:
Tile Condition: Examine each tile for cracks, chips, or loose pieces. Any damaged tiles must be repaired or replaced before proceeding. Loose tiles will create voids beneath the vinyl, leading to potential sinking and cracking. Cracked tiles, even if seemingly stable, can propagate the cracks through the vinyl over time. Minor chips can be filled, but extensively damaged tiles require replacement.
Surface Level: The tile surface must be as level as possible. Significant variations in height between tiles will telegraph through the vinyl, creating an uneven and unsightly appearance. Use a long level or straight edge to check for any dips or humps. Consider using a self-leveling compound to address uneven areas. A slight texture is generally acceptable and can even aid in adhesion, but pronounced variations must be corrected.
Grout Lines: Grout lines are naturally recessed and can also telegraph through the vinyl, resulting in a grid-like pattern on the finished surface. The depth and width of the grout lines will determine the extent of this issue. Narrow grout lines may not require extensive filling, while wider or deeper lines will necessitate the application of a filler to create a smooth, even surface. The type of filler used should be compatible with both the tile and the vinyl adhesive.
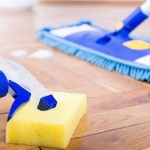
Cleanliness: Thoroughly clean the tile floor to remove any dirt, grease, wax, or other contaminants. These substances can interfere with the adhesion of the vinyl flooring. Use a degreasing cleaner and scrub the surface vigorously. Rinse thoroughly and allow the floor to dry completely before proceeding.
Moisture: Assess the moisture level of the tile floor. Excess moisture can lead to adhesive failure and mold growth. If the tile is installed on a concrete slab, conduct a moisture test to ensure that the slab is adequately dry. Use a concrete moisture meter or a calcium chloride test kit to obtain accurate readings. If moisture levels are high, consider installing a moisture barrier before applying the vinyl flooring.
Preparing the Tile Surface for Vinyl Flooring
Once the existing tile floor has been assessed, the next step is to prepare the surface for vinyl installation. This process involves cleaning, repairing, and leveling the tile to create a suitable substrate for the vinyl flooring. The specific steps required will depend on the condition of the tile floor and the type of vinyl being used.
Repairing Damaged Tiles: Replace any loose or severely damaged tiles. Carefully remove the old tile using a chisel and hammer. Clean the underlying surface and apply a thin-set mortar to the back of the new tile. Press the tile firmly into place and ensure it is level with the surrounding tiles. Allow the mortar to cure completely before proceeding. For minor chips and cracks, use a tile repair epoxy to fill the imperfections. Smooth the epoxy flush with the surrounding tile surface.
Filling Grout Lines: Filling grout lines is crucial for creating a smooth and level surface. Use a cement-based grout filler or a self-leveling compound specifically designed for filling grout lines. Apply the filler according to the manufacturer's instructions, making sure to completely fill the grout lines. Use a wide putty knife or trowel to smooth the filler flush with the tile surface. Allow the filler to dry completely before sanding. Sand the filled grout lines with fine-grit sandpaper to create a perfectly smooth surface. Remove all dust and debris before proceeding.
Applying a Skim Coat (Optional): For floors with significant imperfections or unevenness, consider applying a skim coat of self-leveling compound over the entire tile surface. This will create a perfectly level and smooth base for the vinyl flooring. Apply the skim coat according to the manufacturer's instructions. Use a notched trowel to spread the compound evenly over the surface. Allow the skim coat to dry completely before sanding. Sand the surface with fine-grit sandpaper to remove any imperfections. Remove all dust and debris before proceeding.
Priming the Surface: Applying a primer can improve the adhesion of the vinyl flooring to the tile surface. Use a primer specifically designed for use with vinyl flooring. Apply the primer according to the manufacturer's instructions. Allow the primer to dry completely before installing the vinyl flooring. The primer helps to create a strong bond between the tile and the vinyl adhesive, preventing peeling and bubbling.
Installing the Vinyl Flooring
With the tile surface properly prepared, the final step is to install the vinyl flooring. The installation process will vary depending on the type of vinyl flooring being used, such as sheet vinyl, vinyl tiles, or vinyl planks. It's beneficial to acclimate the vinyl flooring to the room's temperature for at least 48 hours before installation. This allows the material to expand or contract, minimizing the risk of buckling or gaps after installation.
Sheet Vinyl: Sheet vinyl offers a seamless surface, ideal for areas prone to moisture. Begin by unrolling the sheet vinyl and positioning it correctly in the room, allowing for excess material around the perimeter. Use a utility knife to carefully trim the vinyl to fit the room's dimensions, leaving a small gap (approximately 1/4 inch) around the edges for expansion. Apply adhesive to the tile floor according to the manufacturer's instructions. Carefully roll the sheet vinyl back into position and smooth out any air bubbles or wrinkles using a floor roller. Trim any excess vinyl around the edges and install baseboards to conceal the expansion gap.
Vinyl Tiles: Vinyl tiles are available in various sizes and patterns, offering design flexibility. Begin by finding the center of the room and laying out the tiles in a grid pattern, working outwards from the center. Use a chalk line to ensure that the tiles are aligned correctly. Apply adhesive to the tile floor according to the manufacturer's instructions. Press each tile firmly into place, ensuring that it is aligned with the adjacent tiles. Use a floor roller to ensure proper adhesion. Cut tiles as needed to fit around walls and fixtures. Some vinyl tiles come with peel-and-stick backing, simplifying the installation process.
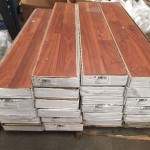
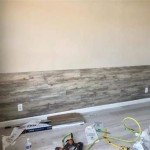
Vinyl Planks: Vinyl planks mimic the look of hardwood flooring, offering a stylish and durable alternative. Similar to vinyl tiles, begin by finding the center of the room and laying out the planks in a staggered pattern, working outwards from the center. Use a chalk line to ensure that the planks are aligned correctly. Apply adhesive to the tile floor according to the manufacturer's instructions. Press each plank firmly into place, ensuring that it is aligned with the adjacent planks. Use a tapping block and hammer to ensure a tight fit. Cut planks as needed to fit around walls and fixtures. Many vinyl planks feature click-lock systems, eliminating the need for adhesive.
Post-Installation: After installing the vinyl flooring, allow the adhesive to cure completely according to the manufacturer's instructions. Avoid heavy traffic on the floor during the curing process. Install baseboards to conceal the expansion gap around the perimeter of the room. Clean the floor with a mild detergent and water. Avoid using harsh chemicals or abrasive cleaners.
Proper preparation and careful installation are essential for achieving a successful and long-lasting vinyl flooring installation over tile. By following these guidelines, homeowners can achieve a beautiful and durable floor that enhances the look and value of their homes.

Transform Your Home Installing Vinyl Flooring Over Ceramic Tiles City Wall And Floor

How To Install Vinyl Flooring Over Tiles Linoleum Thrift Diving

How To Install Vinyl Or Laminate Flooring Over Existing Ceramic Tile

Can You Lay Vinyl Flooring Over Tile Mersey

How To Install Vinyl Plank Tiles In A Bathroom

Can You Put Lvp Over Tile Wc Supply Whole Cabinet

Should You Install Vinyl Floor Over Tile

How To Install Vinyl Plank Floors In A Bathroom Over Tile

Can You Put Vinyl Flooring Over Tile A Complete Guide Teka

How To Install Floating Vinyl Flooring Over Old Floors Simply2moms
See Also