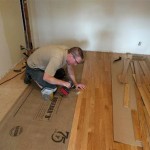
How To Change a Damaged Laminate Floor Board with New Ones
Replacing a damaged laminate floorboard can seem daunting, but with the right tools and approach, it's a manageable DIY project. This article provides a comprehensive guide to replacing a single damaged plank, minimizing disruption and cost compared to replacing the entire floor.
Tools and Materials Required
Gathering the necessary tools and materials beforehand streamlines the replacement process:
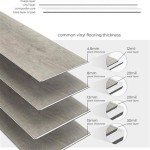
- Replacement Laminate Plank: Ensure it matches the existing flooring in color, texture, and thickness.
- Laminate Flooring Cutter or Circular Saw with a fine-tooth blade
- Pull Bar
- Tapping Block
- Hammer or Mallet
- Safety Glasses
- Measuring Tape
- Pencil or Marker
- Vacuum Cleaner
- Wood Glue (optional, depending on the locking system)
Preparing the Damaged Plank for Removal
Before removing the damaged plank, preparations must be made to avoid damaging surrounding boards:
- Clear the area: Remove any furniture or objects covering the damaged plank and the surrounding area.
- Clean the damaged plank: Vacuum or sweep the area to remove any debris that might interfere with the process.
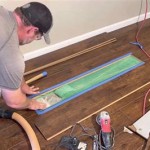
Cutting the Damaged Plank
Cutting the damaged plank into smaller sections makes it easier to remove without disturbing the surrounding flooring:
- Mark cutting lines: Using a measuring tape and pencil, mark several cutting lines across the damaged plank. These lines should be spaced a few inches apart.
- Score the plank: Using a utility knife, score along the marked lines. This helps prevent chipping and splintering during the cutting process.
- Cut the plank: Using a laminate flooring cutter or circular saw, carefully cut along the scored lines. Be sure to wear safety glasses.
Removing the Damaged Pieces
With the plank now in smaller sections, removing the pieces is the next step:
- Remove the center pieces first: Carefully pry up the cut sections of the plank, starting from the center. A chisel or putty knife might be helpful for this step.
- Remove the edges: Once the center pieces are removed, use a pull bar and hammer to carefully remove the remaining edges of the plank, working from the edges towards the center.
- Clean the area: Vacuum the area thoroughly to remove any remaining debris or adhesive.
Preparing the Replacement Plank
The new plank must be prepared for installation to ensure a proper fit:
- Measure and Cut: Measure the area where the damaged plank was removed and cut the replacement plank to the correct size. Ensure it matches the length and width of the original plank.
- Cut the Tongue: Using a utility knife or laminate cutter, carefully remove the bottom lip (tongue) along the long edge and one short edge of the replacement plank. This allows the new plank to slide into place against the existing flooring.
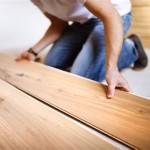
Installing the New Plank
Installation requires careful alignment and pressure to ensure a secure fit:
- Apply Adhesive (if necessary): If the flooring system uses adhesive, apply a thin bead of wood glue along the tongue and groove of the surrounding planks.
- Angle and Insert: Angle the replacement plank at a slight angle and gently slide the tongue edge into the groove of the adjacent plank. Use a tapping block and hammer to gently tap the new plank into place.
- Secure the Plank: Use a pull bar and hammer to ensure the new plank is snugly fitted against the adjacent planks. Be careful not to damage the surrounding flooring.
Finishing Touches
Final steps ensure the new plank sits flush and the area is clean:
- Check for Gaps: Inspect the edges of the new plank to ensure it sits flush with the surrounding flooring. If any gaps are present, gently tap the plank down further using the tapping block and hammer.
- Clean the Area: Vacuum or sweep the area to remove any remaining debris.
These detailed steps offer a comprehensive guide to successfully replacing a damaged laminate floorboard. Following these steps ensures a smooth and efficient repair, restoring the floor's aesthetic and functionality.

Laminate Floor Repair Diy Family Handyman

How To Replace A Damaged Laminate Board That S In The Middle Of Floor

Replace A Damaged Board In Laminate Floor Rw Supply Design

How To Replace Lock Vinyl Flooring

Replace A Damaged Board In Laminate Floor Rw Supply Design

How To Replace A Damaged Hardwood Floor Board Diy Family Handyman

How To Do A Laminate Board Replacement On Floor Step By

How To Repair Damaged Laminate Floor Checkatrade

How To Fix A De Laminated Board Without Removing The

Replace A Damaged Board In Laminate Floor Rw Supply Design
See Also