How to Fix Broken Floor Boards
Maintaining the integrity of a floor is crucial for both aesthetic appeal and structural safety within a building. Broken floor boards can present a tripping hazard, compromise the overall stability of the floor, and detract from the room's appearance. Addressing these issues promptly and effectively is essential. This article provides a comprehensive guide on how to repair broken floor boards, covering preparation, assessment, repair techniques, and preventative measures.
Assessing the Damage and Determining the Cause
Before initiating any repair work, a thorough assessment of the damage is paramount. The initial step involves identifying the extent of the breakage. Is it a clean break, a splintered fracture, or widespread decay? Understanding the specific nature of the damage dictates the appropriate repair method. Minor cracks or splinters may only require filling and sanding, while a completely severed board necessitates replacement or reinforcement.
The next crucial step is to determine the underlying cause of the breakage. Common culprits include water damage, insect infestation, excessive weight, structural settling, or simply the age and wear of the wood. Water damage often manifests as discoloration, warping, or a spongy texture. Insect infestations, such as termites or carpenter ants, can leave visible tunnels and frass (insect excrement). Identifying the cause of the damage is crucial; otherwise, the repair will only be a temporary fix, and the problem will likely resurface. If water damage is suspected, addressing the leak or source of moisture is essential. If insect infestation is present, professional pest control services may be required.
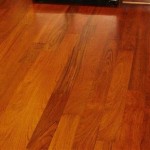
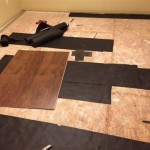
The type of wood also influences the repair approach. Hardwoods, such as oak or maple, are more durable and resistant to damage than softwoods like pine. The grain pattern and finish of the existing floor boards should be considered when selecting replacement materials or fillers to ensure a seamless blend. Furthermore, the age of the floor can impact the color and texture of the wood, requiring careful matching to maintain uniformity. Evaluate whether the broken board is tongue-and-groove flooring or a simple plank. Tongue-and-groove boards interlock, requiring specific techniques for removal and replacement. Lastly, note the subfloor material (plywood, OSB, or solid wood). The type of subfloor will affect how the new boards are fastened.
Tools and Materials Required
Having the right tools and materials readily available significantly streamlines the repair process and improves the quality of the finished work. The specific items needed will vary depending on the extent and nature of the damage, but a general list includes:
- Safety Gear: Safety glasses, gloves, and a dust mask are essential to protect the eyes, hands, and respiratory system from wood splinters, dust, and potentially harmful chemicals.
- Pry Bar and Hammer: These tools are used to carefully remove damaged floor boards. A pry bar with a wide, flat blade is preferable to minimize damage to surrounding boards.
- Circular Saw or Hand Saw: A circular saw allows for precise cuts when trimming replacement boards to fit the existing floor. A hand saw provides more control for intricate cuts or in tight spaces.
- Chisel and Utility Knife: These tools are helpful for removing old adhesives, cleaning edges, and shaping replacement pieces.
- Drill and Screwdriver: A drill is needed for pre-drilling pilot holes to prevent splitting when fastening replacement boards. A screwdriver is required for installing screws.
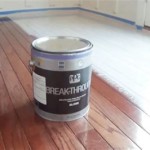
- Wood Glue: Provides a strong bond for securing replacement pieces and filling cracks. Choose a high-quality wood glue suitable for the type of wood being used.
- Wood Filler: Used to fill small cracks, gaps, and imperfections. Select a color that closely matches the existing floor or can be stained to match.
- Sandpaper: Various grits of sandpaper (coarse, medium, and fine) are needed to smooth repaired areas and blend them with the surrounding floor.
- Putty Knife or Spatula: Used to apply wood filler evenly and smoothly.
- Clamps: Clamps are useful for holding replacement pieces in place while the glue dries.
- Measuring Tape and Pencil: Accurate measurements are crucial for ensuring a proper fit of replacement boards.
- Replacement Floor Boards: Obtain replacement boards that are identical in species, width, thickness, and grain pattern to the existing floor. If exact matches are unavailable, consider sourcing boards from a salvage yard or antique store.
- Stain and Finish: Matching the existing stain and finish is essential for a seamless repair. Take a sample of the existing floor to a paint store for color matching.
Repair Techniques for Different Types of Damage
The approach to repairing a broken floor board depends on the severity and type of damage. Here are several common scenarios and corresponding repair techniques:
Minor Cracks and Splinters:
For minor cracks and splinters, the repair process is relatively straightforward. Begin by thoroughly cleaning the affected area, removing any loose debris or dirt. Use a utility knife to carefully trim away any protruding splinters. Apply wood glue to the crack, ensuring it penetrates deeply. Clamp the area together to hold it in place while the glue dries completely (typically 24 hours). Once the glue is dry, remove the clamp and sand the area smooth using progressively finer grits of sandpaper. Apply wood filler to fill any remaining gaps or imperfections. Allow the filler to dry completely before sanding it smooth. Finally, stain and finish the repaired area to match the surrounding floor.
Replacing a Severely Damaged Board:
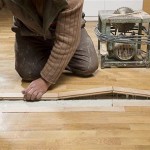
Replacing a completely severed or severely damaged floor board requires a more involved process. First, carefully remove the damaged board. If it is a tongue-and-groove board, use a pry bar to gently lift the board, working along its length to avoid damaging adjacent boards. It may be necessary to score the board along its tongue and groove with a utility knife to facilitate removal. If the board is nailed or screwed to the subfloor, use a nail set or screw extractor to remove the fasteners. Once the damaged board is removed, clean the area thoroughly, removing any old glue or debris. Cut a replacement board to the exact length and width of the removed board. If it is a tongue-and-groove board, carefully trim the replacement board to match the existing profile. Apply wood glue to the edges of the replacement board and to the adjacent boards. Position the replacement board in place and gently tap it into alignment with a rubber mallet. Secure the replacement board to the subfloor using nails or screws, pre-drilling pilot holes to prevent splitting. Countersink the fasteners and fill the holes with wood filler. Allow the filler to dry completely before sanding the area smooth. Finally, stain and finish the repaired area to match the surrounding floor.
Reinforcing a Weakened Board:
In some cases, a floor board may be weakened but not completely broken. In such instances, reinforcement may be a viable alternative to replacement. Begin by cleaning the underside of the weakened board and the surrounding subfloor. Cut a piece of plywood or solid wood to fit snugly underneath the weakened board, spanning several joists for added support. Apply construction adhesive to the plywood or wood support and position it underneath the weakened board. Secure the support to the subfloor using screws, ensuring they do not penetrate through the top of the floor board. Allow the adhesive to dry completely before applying weight to the area. For added stability, consider filling the gap between the weakened board and the support with wood shims. Once the adhesive is dry, sand the surface smooth and apply a matching stain and finish.
Repairing Water Damaged Floor Boards
Repairing water-damaged floor boards necessitates addressing the source of the moisture before any structural repairs are commenced. Allowing the affected area to completely dry is the first step, often requiring several days or even weeks, utilizing fans or dehumidifiers to expedite the process. Warped boards may be flattened using a combination of moisture and weight, placing damp towels over the board and applying heavy objects to encourage flattening. Once dried and flattened, the damaged sections are carefully removed, following the procedures outlined for replacing severely damaged boards, ensuring the subfloor is also inspected and treated for mold or rot. Replacement boards must be kiln-dried to minimize future warping or shrinkage, and a waterproof sealant should be applied to the edges to prevent future water intrusion. The repaired area must match the grain and finish of the surrounding floor to maintain aesthetic consistency.
Preventative Measures
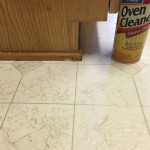
Preventing floor board damage is just as important as knowing how to repair it. Several preventative measures can significantly extend the lifespan of a floor and minimize the need for repairs. Regular cleaning is essential to remove dirt, dust, and debris that can scratch or damage the finish. Avoid using harsh chemicals or abrasive cleaners, as these can strip the finish and dull the wood. Instead, opt for a mild soap and water solution or a wood-specific cleaner. Use doormats at entrances to trap dirt and moisture before they can be tracked onto the floor. Place rugs in high-traffic areas to protect the floor from wear and tear. Consider using furniture pads under the legs of tables, chairs, and other heavy objects to prevent scratches and dents. Promptly clean up spills to prevent water damage. Check for leaks around plumbing fixtures and appliances regularly. Maintain proper humidity levels in the home, as excessive humidity can cause wood to warp and swell. Inspect the floor periodically for signs of damage, such as cracks, splinters, or loose boards. Addressing these issues early can prevent them from escalating into more significant problems.

How To Replace Damaged Floor Boards

How To Repair Floorboards Ideas Advice B Q

Removing Replacing A Damaged Hardwood Flooring Board

How To Fix A De Laminated Board Without Removing The

Repairing Damaged Wood Floors Before Sanding

Replacing Damaged Wide Plank Floor Boards

Hardwood Floor Repair Easy Steps That Work

How To Repair Floorboards Ideas Advice B Q

How To Replace A Damaged Hardwood Floor Board Diy Family Handyman

How To Repair Floorboards Ideas Advice B Q
See Also