How To Fix Loose Laminate Floor Boards
Loose laminate floorboards can be a nuisance, causing creaking, instability, and a generally unprofessional appearance. Fortunately, addressing this issue is often achievable with common household tools and readily available materials. This article outlines several methods for fixing loose laminate flooring, addressing various causes and levels of difficulty.
Before beginning any repair, it's crucial to identify the root cause of the looseness. Common reasons include inadequate underlayment, moisture damage, improper installation, or simply wear and tear over time. Accurately diagnosing the problem will guide the selection of the most effective repair strategy.
Using a Laminate Floor Repair Kit
Laminate floor repair kits offer a convenient and relatively simple solution for minor looseness and lifting. These kits typically contain a pull bar, suction cups, and adhesive. The pull bar assists in tightening the planks, while the suction cups help lift slightly raised boards. The adhesive secures the planks back to the underlayment or adjacent boards.
To use a repair kit, carefully lift the loose plank using the suction cups. Apply the adhesive as directed by the kit’s instructions, focusing on the areas where the plank connects to neighboring boards or the underlayment. Reposition the plank and use the pull bar to tighten it against adjacent planks, ensuring a snug fit. Wipe away any excess adhesive immediately.
Securing Loose Planks with Glue
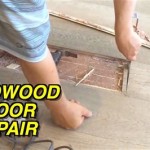
For planks that have separated from adjacent boards, wood glue can provide a strong and lasting bond. A syringe or toothpick can be used to apply the glue precisely along the tongue-and-groove edges of the planks. Once the glue is applied, reassemble the planks, ensuring a tight fit. Excess glue should be cleaned immediately with a damp cloth.
Using glue is particularly effective when the locking mechanism of the laminate planks has been compromised. It’s important to choose a glue that is compatible with laminate flooring and allows for some flexibility to accommodate the natural expansion and contraction of the flooring material.
Addressing Underlayment Issues
Inadequate or compressed underlayment can contribute significantly to loose laminate floors. If the underlayment is the source of the problem, it might be necessary to remove the affected section of flooring to access and replace or repair the underlayment. This involves carefully disassembling the floorboards, starting from the wall closest to the affected area, and working towards the loose section. Once the underlayment is addressed, the flooring can be reassembled.
When replacing the underlayment, ensure it’s appropriate for laminate flooring and provides adequate cushioning and moisture protection. Using a high-quality underlayment can prevent future issues with loose planks and extend the lifespan of the flooring.
Dealing with Moisture Damage
Moisture can cause laminate flooring to warp, swell, and loosen. If moisture damage is suspected, it's essential to identify and address the source of the moisture. This could involve repairing leaks, improving ventilation, or using dehumidifiers. Affected planks may need to be replaced entirely, as moisture damage can compromise their structural integrity.
Before replacing the damaged planks, allow the subfloor to dry completely. This can take several days or even weeks, depending on the extent of the moisture damage. Rushing the process can lead to recurring problems with mold, mildew, and further damage to the flooring.
Fixing Loose Planks near Walls
Loose planks near walls can often be secured by using a tapping block and a rubber mallet. The tapping block distributes the force evenly, preventing damage to the planks. Gently tap the plank towards the wall, ensuring it fits snugly against the spacer blocks. This method is effective for minor adjustments and can help eliminate gaps between the flooring and the wall.
Ensure adequate spacing is maintained between the flooring and the wall to allow for expansion and contraction. Typically, a gap of ¼ to ½ inch is recommended. This space can be maintained by using spacer blocks during installation and ensuring they remain in place during repairs.
Preventing Future Loosening
Preventing future loosening involves proper installation techniques, regular maintenance, and addressing potential moisture issues promptly. Ensuring a level subfloor, using appropriate underlayment, and following the manufacturer’s installation instructions are crucial for long-term stability.
Regular cleaning and avoiding excessive moisture exposure can also help prevent issues with loosening. Promptly addressing any leaks or spills can minimize the risk of moisture damage, preserving the integrity of the flooring and preventing future repairs.
By adhering to these methods and carefully assessing the specific cause of the looseness, homeowners can effectively address loose laminate floorboards and maintain a stable and attractive floor surface.

Sagging Floorboard Repair No Damage To Floorboards

How To Fix A De Laminated Board Without Removing The

Repair Laminate Floor Sliding Out Of Place Home Improvement Stack Exchange

How To Fix Uneven Loose Laminate Vinyl Lvp And Engineered Floors Diy Tutorial Tips Tricks

How To Fix Floating Floor Gaps The Easy Way

Laminate Floor Repair Diy Family Handyman

How To Safely Repair Floor Boards Help Advice Leader Floors

What To Do When Your Laminate Floors Are Raising Flooring Liquidators

Laminate Flooring Repair To Fix Soft Spot For Uneven Underlayment

How To Close Gaps In Laminate Flooring 3 Easy Methods
See Also