How to Install Distressed Laminate Flooring
Installing distressed laminate flooring is a relatively simple do-it-yourself project that can add a touch of rustic charm to any home. Distressed laminate flooring is designed to look like old, worn wood, and it can be a great way to add character to a room. Here are the steps on how to install distressed laminate flooring:
Step 1: Prepare the Subfloor
The first step is to prepare the subfloor. The subfloor should be level, dry, and smooth. If the subfloor is not level, you will need to level it with a self-leveling compound. If the subfloor is not dry, you will need to let it dry completely before installing the flooring. If the subfloor is not smooth, you will need to sand it until it is smooth.
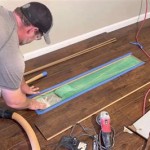
Step 2: Install the Underlayment
Once the subfloor is prepared, you will need to install the underlayment. The underlayment will help to protect the flooring from moisture and noise. There are a variety of different types of underlayment available, so be sure to choose one that is appropriate for your needs. Some types of underlayment come with a built-in vapor barrier, which is recommended if you are installing the flooring in a humid area.
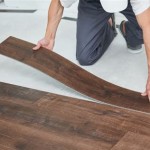
Step 3: Install the First Row of Flooring
Once the underlayment is installed, you can begin installing the flooring. Start by installing the first row of flooring along the longest wall in the room. Be sure to leave a 1/4-inch gap between the flooring and the wall to allow for expansion. You can use a spacer to help you maintain the gap.
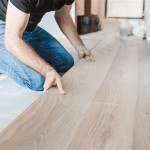
Step 4: Lock the Planks Together
Once the first row of flooring is installed, you can begin locking the planks together. To do this, simply insert the tongue of one plank into the groove of another plank and then press down until the planks are locked together.
Step 5: Continue Installing the Flooring
Continue installing the flooring by locking the planks together until you reach the end of the row. Once you reach the end of the row, you will need to cut the last plank to fit. To do this, measure the distance from the last plank to the wall and then mark the plank. Cut the plank along the mark using a saw.
Step 6: Install the Last Row of Flooring
Once you have cut the last plank, you can install the last row of flooring. To do this, simply lock the planks together until you reach the end of the row. Once you reach the end of the row, you will need to cut the last plank to fit.
Step 7: Trim the Flooring
Once the flooring is installed, you will need to trim the flooring around the edges of the room. To do this, use a saw to cut the flooring to fit. Be sure to leave a 1/4-inch gap between the flooring and the walls to allow for expansion.
Step 8: Install the Moldings
Once the flooring is trimmed, you can install the moldings. Moldings will help to hide the gaps between the flooring and the walls and will also give the room a finished look. There are a variety of different types of moldings available, so be sure to choose ones that match the style of your room.

Installing Distressed Pine Flooring

How To Make Distressed Wood Floors The Craftsman Blog

How To Lay Laminate Flooring Installation Guide Factory Direct

Waterproof Laminate Flooring Installation

Waterproof Laminate Flooring Installation

What Is Distressed Wood Flooring

Carlisle Introduces Watermill Distressed Wood Flooring Wide Plank Floors

Loire Bearskin Distressed Heavy Brushed 15mm Engineered Floor

Emperor Distressed Vintage Oak Engineered Wood Flooring 15mm

Mixed Width Grey Laminate Flooring Distressed Look
See Also