How To Install Floating Floor Boards
Floating floors offer a relatively straightforward and cost-effective way to update a room's appearance. Unlike traditional hardwood floors, they don't require nailing or gluing to the subfloor. Instead, they "float" over the existing surface, connected by a click-lock system. This guide will provide a step-by-step process for installing floating floor boards.
Preparing for Installation
Proper preparation is crucial for a successful floating floor installation. This involves assessing the subfloor, gathering necessary tools and materials, and acclimating the flooring.
* Assess the subfloor: Ensure the subfloor is clean, level, and dry. Any unevenness greater than 3/16” over a 10-foot span should be addressed. Existing flooring like linoleum or vinyl can often serve as a subfloor, provided they are securely attached. * Gather tools and materials: Essential tools include a measuring tape, utility knife, tapping block, pull bar, saw (circular saw or jigsaw), and safety glasses. Materials include the flooring, underlayment, moisture barrier (if necessary), and spacers. * Acclimate the flooring: Allow the flooring to acclimate to the room's temperature and humidity for at least 48 hours before installation. This prevents expansion or contraction issues after installation. *
Clean the subfloor:
Sweep or vacuum the subfloor thoroughly to remove any debris or dust. This ensures a smooth and even surface for the underlayment. *Inspect the flooring:
Before starting the installation, inspect each plank for any defects or damage.Installing the Underlayment
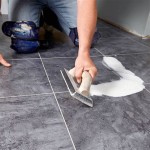
The underlayment provides cushioning, sound insulation, and a moisture barrier (if applicable). Its proper installation is essential for the longevity and performance of the floating floor.
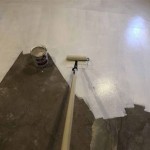
* Roll out the underlayment: Lay the underlayment in the same direction as the intended flooring layout, overlapping seams by several inches. * Tape the seams: Secure the underlayment seams with appropriate tape, creating a continuous layer. * Trim excess underlayment: Trim the underlayment flush against the walls using a utility knife.
Laying the First Row
The first row sets the stage for the entire installation. Accuracy and precision are paramount in this initial stage.
* Place spacers: Position spacers along the starting wall to create an expansion gap. This gap allows the flooring to expand and contract with temperature and humidity changes. * Connect the planks: Begin by connecting the planks end-to-end, ensuring a tight and secure click-lock engagement. * Ensure straightness: Use a straight edge to verify the first row is perfectly straight. Any deviations will propagate throughout the installation, so corrections are crucial at this stage.
Continuing the Installation
With the first row in place, the remaining installation involves a repetitive process of connecting planks row by row.
* Stagger planks: Stagger the end joints of planks in adjacent rows to enhance the floor's stability and aesthetics. Aim for a minimum of 6 inches of offset between end joints. * Angle and tap: Use the tapping block and pull bar to gently angle and tap the planks into place, ensuring a tight and seamless connection between rows. * Maintain spacers: Keep spacers along all walls to maintain the necessary expansion gap around the perimeter of the room. *
Cut planks as needed:
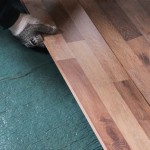
Use a saw to cut planks to fit at the ends of rows and around obstacles such as doorways or pipes. Measure carefully and make precise cuts for a professional finish.Finishing Touches
Once all planks are installed, a few final steps ensure a complete and polished look.
* Remove spacers: Carefully remove all spacers around the perimeter of the room. * Install baseboards or trim: Baseboards or quarter-round molding conceal the expansion gap and provide a finished appearance. Consider using a flexible caulking for gaps between the flooring and the wall in the event that wider expansion gaps are left as a result of floor warping. * Clean the floor: Sweep or vacuum the floor to remove any dust or debris from the installation process.
Doorway Transitions
Handling doorways requires specific techniques to ensure a smooth and professional transition between rooms.
* Undercutting door jambs: Undercut door jambs to allow the flooring to slide underneath, creating a seamless transition. * T-moldings: Use T-moldings for transitions between rooms with different flooring heights or materials. *
Reducer strips:
Consider using reducer strips to bridge height differences between flooring surfaces.Difficult Cuts
Certain areas, such as pipes or curved walls, require more intricate cutting techniques.
* Templating: Create templates from cardboard or paper to accurately trace the shape onto the flooring plank. * Jigsaw: Use a jigsaw for curved cuts and intricate shapes. * Cope saw: Implement a cope saw for irregular shapes, especially those around existing moldings.

How To Install Laminate Flooring For Beginners

How To Install A Floating Floor

Installing Laminate Flooring For The First Time Home Renovation

Our Step By Guide For Laying Laminate Flooring

Laminate Floor Installation For Beginners 9 Clever Tips

Guide To Installing Laminate Flooring Diy Family Handyman

How To Install Lock Engineered Hardwood Flooring

What Is A Floating Floor Easy Installation Benefits Best Practices Flooring Guide

20 Tips For A Great Vinyl Plank Flooring Installation

Golden Rules For Laying A Wooden Floor Discountflooring Co Discount Flooring Blog
See Also