How To Install Glue Down Vinyl Plank Flooring On Concrete Slab
Installing glue down vinyl plank flooring on a concrete slab requires careful preparation and precise execution to ensure a durable and aesthetically pleasing result. By following the steps outlined below, you can successfully install vinyl plank flooring on your concrete slab.
Materials Required:
- Glue down vinyl planks
- Concrete adhesive
- Notched trowel
- Tape measure
- Chalk line
- Utility knife
- Rubber mallet
- Tapping block
- Spacer blocks
Step 1: Prepare the Concrete Slab
Begin by thoroughly cleaning the concrete slab to remove any dirt, dust, or debris. Use a vacuum cleaner or broom to remove loose particles, and then mop the floor with a cleaning solution to remove any remaining residue. Allow the floor to dry completely before proceeding.
Step 2: Plan the Layout
Measure the room and determine the starting point for installing the planks. Snap a chalk line along the longest wall to serve as a guide for installing the first row. Use spacer blocks along the perimeter walls to ensure a consistent gap.
Step 3: Spread the Adhesive
Select a concrete adhesive specifically designed for vinyl flooring. Using a notched trowel, spread the adhesive evenly over a small section of the concrete slab, following the manufacturer's instructions. The size of the section will depend on the recommended open time of the adhesive.
Step 4: Install the First Plank
Place the first plank along the chalk line and spacer blocks. Press the plank firmly into the adhesive, ensuring that it is level and aligns correctly with the adjacent wall. Use a tapping block and rubber mallet to gently tap the plank into place.
Step 5: Continue Installing Planks
Continue installing the planks by spreading the adhesive in sections and placing the planks accordingly. Interlock the planks by angling the long edge of a new plank under the short edge of the previous one. Use the tapping block and mallet to secure the planks firmly.
Step 6: Stagger the Joints
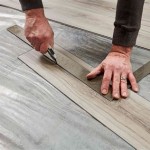
To create a more realistic wood-like appearance, stagger the joints of the planks by starting each row with a different sized piece. Cut the planks to the desired lengths using a utility knife and straight edge.
Step 7: Trim Around Obstacles
For areas where the planks need to be cut around obstacles, such as pipes or doorways, measure and mark the cuts carefully. Use a utility knife to make precise cuts and ensure a snug fit.
Step 8: Clean Up and Allow to Cure
Once all the planks are installed, remove any excess adhesive with a damp cloth. Allow the adhesive to cure completely according to the manufacturer's instructions before walking on or placing furniture on the floor.
Tips:
- Use a level to ensure the floor is flat and even throughout the installation process.
- Wear knee pads or a thick kneeling mat to protect your knees while working on the floor.
- Allow the adhesive to set for the recommended time before moving heavy objects or placing furniture on the floor.
- Keep the room at a consistent temperature during installation and the curing process.

How To Install Glue Down Vinyl Plank Flooring Bathroom Concrete Floor

How To Install Glue Down Vinyl Plank

How To Install Glue Down Vinyl Plank

How To Install A Glue Down Floor Diy Flooring

How To Prepare A Concrete Floor For Vinyl Flooring Parrys

How To Install Glue Down Vinyl Plank

Post Nbl Express Eco Flooring

How To Install Vinyl Flooring On Concrete Floor Ers

Easy Ways To Install Vinyl Plank Flooring On Concrete

20 Tips For A Great Vinyl Plank Flooring Installation
See Also


