How To Install Interlocking Garage Floor Tiles
Interlocking garage floor tiles offer a durable, aesthetically pleasing, and relatively easy-to-install flooring solution. They protect the underlying concrete from stains, damage, and wear, while also providing a comfortable and slip-resistant surface. This guide outlines the necessary steps for a successful installation.
Planning and Preparation: Accurate measurements are crucial for determining the number of tiles required. Measure the length and width of the garage and multiply them to calculate the square footage. It is recommended to purchase 5-10% extra tiles to account for cuts and potential errors. Select tiles based on the desired aesthetic and intended use. Factors to consider include material (e.g., PVC, rubber, polypropylene), thickness, and texture.
Gathering Necessary Tools and Materials: Proper tools facilitate a smooth and efficient installation. Assemble the following items: tape measure, chalk line, safety glasses, work gloves, rubber mallet, utility knife or tile cutter, level, and a broom or shop vacuum for cleaning. Depending on the specific tile type, additional adhesive or tape might be required.
Preparing the Garage Floor: A clean and level surface is essential for proper tile adhesion and a professional-looking finish. Thoroughly clean the existing garage floor to remove dirt, debris, oil stains, and grease. A degreasing cleaner may be necessary for stubborn stains. Repair any cracks or imperfections in the concrete using a suitable concrete patching compound. Allow adequate drying time according to the manufacturer's instructions. Ensure the floor is completely dry before proceeding with tile installation.
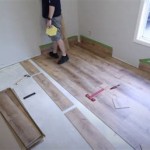
Establishing a Starting Point: Determine the optimal layout by dry-fitting several tiles in the center of the garage. This helps visualize the final pattern and minimize awkward cuts around the perimeter. A straight line established with a chalk line serves as a guide for the first row of tiles. Consider expansion gaps, particularly in areas subject to temperature fluctuations, by leaving a small space between the tiles and the wall. The manufacturer’s instructions will specify the recommended expansion gap.
Installing the First Row: Carefully align the first tile with the chalk line, ensuring it is flush against the adjacent wall or expansion gap. Interlock the adjoining tiles along the first row, tapping them firmly together with a rubber mallet to ensure a secure connection. Maintain consistent spacing between tiles throughout the row.
Continuing the Installation: Work outward from the first row, interlocking each subsequent tile with the previous one. Follow the established pattern, using the interlocking mechanism of the tiles to guide placement. Periodically use a level to check for evenness across the surface. Address any unevenness immediately to prevent further issues.
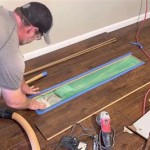
Cutting Tiles for Edges and Corners: Tiles along the edges and corners of the garage will likely require cutting to fit. Measure the required dimensions accurately. A utility knife or a tile cutter can be used depending on the tile material and thickness. Score the tile multiple times along the cutting line before snapping it cleanly. For intricate cuts, a jigsaw or other specialized cutting tools might be necessary.
Installing Cut Tiles: Carefully fit the cut tiles into place, ensuring a snug fit against the wall or other obstructions. Maintain consistency with the spacing and pattern of the surrounding tiles. Use the rubber mallet to gently secure the cut tiles into position.
Final Inspection and Clean-up: Once all tiles are installed, inspect the entire floor for any loose or improperly fitted tiles. Tap down any raised edges or uneven areas with the rubber mallet. Thoroughly sweep or vacuum the floor to remove any dust or debris generated during the installation process.
Allowing for Settling Time: Avoid heavy traffic or placing heavy objects on the newly installed floor for the recommended settling time specified by the manufacturer. This allows the tiles to acclimate and the interlocking mechanism to fully engage.
Regular Maintenance: Regular sweeping or vacuuming helps maintain the appearance and prolong the lifespan of the interlocking garage floor tiles. Clean spills promptly to prevent staining. Avoid using harsh chemicals or abrasive cleaners, which can damage the tile surface. Consult the manufacturer's guidelines for recommended cleaning products and procedures.
Following these steps will ensure a successful and long-lasting installation of interlocking garage floor tiles, providing a durable and attractive flooring solution for years to come.

How To Install Interlocking Garage Floor Tiles Locktile Pvc Tileslocktile

Tips To Prepare Your Garage Floor For Interlocking Tiles All Floors

Here S How You Fit Interlocking Garage Floor Tiles Step By Quick Easy Gftc

How To Install Interlocking Garage Floor Tiles Modutile Full Explanation

Interlocking Garage Floor Tiles Get The Real Facts All Floors

How To Install Garage Flooring Ecotile Interlocking Floor Tiles In Small

Interlocking Garage Floor Tiles Get The Real Facts All Floors

Diamond Top Garage Floor Tiles Interlocking Flooring By Modutile

Cleaning And Maintaining Interlocking Garage Floor Tile Armorpoxy

Interlocking Vented Garage Floor Tiles Get Lit Led Lighting
See Also