How To Install Lifeproof Flooring On Concrete
Lifeproof flooring, known for its durability and stylish aesthetics, is a popular choice for homeowners looking to enhance their living spaces. Installing Lifeproof flooring on concrete can be a DIY project, but it requires careful preparation and attention to detail to ensure a successful outcome. This article outlines the essential steps involved in the installation process, providing a comprehensive guide for homeowners.
Preparing the Concrete Subfloor
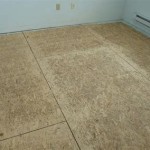
Before installing Lifeproof flooring, it's crucial to prepare the concrete subfloor adequately. This step involves ensuring the subfloor is level, clean, and dry. The following steps are involved:
- Leveling the Subfloor: Uneven concrete surfaces can cause the flooring to become uneven, creating a tripping hazard and affecting the overall appearance. Use a self-leveling compound to address any significant inconsistencies in the subfloor. This compound spreads easily and dries quickly, creating a level surface for the flooring installation.
- Cleaning the Subfloor: Clean the concrete subfloor thoroughly to remove any dirt, debris, grease, or other contaminants. These substances can interfere with the adhesive used for installing the flooring. A shop vacuum and a mild detergent solution are effective tools for cleaning the subfloor.
- Drying the Subfloor: Moisture can damage Lifeproof flooring and compromise the adhesive bond. Ensure the subfloor is completely dry before installing the flooring. Allow ample time for proper drying, especially in humid environments.
Installing the Underlayment
Underlayment serves as a cushioning layer between the concrete subfloor and the Lifeproof flooring. It helps to provide insulation, sound absorption, and a more comfortable walking surface. The type of underlayment required depends on the specific Lifeproof flooring product. Some options include foam underlayment, cork underlayment, and rubberized underlayment. To install the underlayment:
- Measure and Cut: Measure the area where the Lifeproof flooring will be installed and cut the underlayment to the appropriate size. Use a utility knife to cut the underlayment, ensuring clean edges for a smooth installation.
- Laying the Underlayment: Starting from one corner of the room, lay down the underlayment, ensuring that the seams are aligned. Overlap the seams by at least 6 inches to prevent gaps. Use a staple gun to secure the underlayment to the concrete subfloor, ensuring the staples are driven in straight and flush with the surface.
- Seaming the Underlayment: If the underlayment needs to be joined, use specialized underlayment tape to secure the seams. This helps to create a smooth transition between the sections of underlayment.
Installing the Lifeproof Flooring
Once the subfloor and underlayment are prepared, it's time to install the Lifeproof flooring. The installation process may vary depending on the specific type of Lifeproof flooring chosen. Here's a general overview:
- Laying the First Row: Begin by laying the first row of flooring planks along one wall. Ensure the planks are aligned and flush with the wall. You may need to trim the first row to fit the space. Use a jigsaw or a circular saw to cut the planks to the desired size.
- Clicking the Planks Together: Lifeproof flooring typically uses a click-and-lock installation system. Align the tongue of one plank with the groove of the adjacent plank and press them together. This creates a secure and seamless connection.
- Continuing the Installation: Continue laying the planks row by row, ensuring that each row is properly aligned with the previous one. Use a tapping block and a rubber mallet to ensure that the planks are securely locked together.
- Finishing the Installation: The final row of flooring may require cutting to fit the space. Measure and cut the planks to the appropriate size, ensuring that they fit snugly against the wall. Install the last row of planks, paying attention to the alignment and ensuring that they are securely locked in place.
Installing Lifeproof flooring on concrete requires careful preparation and attention to detail. By following these steps and using the appropriate tools and materials, homeowners can achieve a successful installation that enhances the beauty and functionality of their living spaces.

How To Install Vinyl Plank Flooring Lifeproof Over Concrete

Lvp Flooring Installation Over Concrete Subfloor Full Instructional Builds By Maz Flooret

How To Install Lifeproof Flooring The Home

How To Install Lifeproof Flooring The Home

Tips For Installing Vinyl Plank Over Concrete Floors Lemon Thistle

How To Install Lifeproof Vinyl Flooring

Installing Lifeproof Vinyl Plank Flooring Our Diy Guide Exquisitely Unremarkable

How To Install Lifeproof Flooring The Home

Why We Chose Lifeproof Vinyl Flooring And How To Install It

How To Install Vinyl Plank Flooring Lifeproof Lvp
See Also