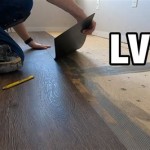
How to Install Luxury Vinyl Plank Flooring on Concrete
Luxury vinyl plank flooring (LVP) is a popular choice for homeowners who want the look of hardwood or tile without the high cost or maintenance. LVP is easy to install, durable, and waterproof, making it a great option for any room in your home.
If you're planning to install LVP flooring on concrete, there are a few things you need to do to prepare the surface.
1. Clean the concrete
The first step is to clean the concrete floor thoroughly. This will remove any dirt, dust, or debris that could interfere with the installation of the flooring.
To clean the concrete, you can use a broom and dustpan to remove any loose dirt. Then, use a mop and water with a mild detergent to clean the floor. Be sure to rinse the floor thoroughly with clean water and let it dry completely before continuing.
2. Level the concrete
If the concrete floor is not level, you will need to level it before installing the flooring. This will help to prevent the flooring from buckling or warping.
To level the concrete, you can use a self-leveling compound. This is a liquid material that you can pour onto the concrete floor. The compound will self-level, creating a smooth and even surface.
3. Install an underlayment
An underlayment is a thin layer of material that is installed between the concrete floor and the flooring. The underlayment helps to protect the flooring from moisture and provides a cushion for the flooring.
There are many different types of underlayment available, so you can choose the one that is best for your needs. Some of the most common types of underlayment include cork, rubber, and foam.
4. Install the flooring
Once the underlayment is installed, you can begin installing the flooring. LVP flooring is typically installed using a click-lock system. This system allows you to simply click the planks together without the use of glue or nails.
To install the flooring, simply start at one corner of the room and work your way out. Be sure to stagger the joints between the planks to create a more natural look.
5. Trim the flooringOnce the flooring is installed, you will need to trim the edges of the flooring to fit the room. To do this, you can use a utility knife or a circular saw.
Be sure to measure the flooring carefully before you cut it. You don't want to cut the flooring too short or too long.
6. Install the baseboards
The final step is to install the baseboards. Baseboards help to cover the gap between the flooring and the wall. They also add a finished look to the room.
To install the baseboards, simply nail them into the wall. Be sure to use a nail gun for this task.
Installing LVP flooring on concrete is a relatively easy project that can be completed in a weekend. By following these steps, you can ensure that your flooring is installed correctly and will last for many years to come.
How To Prepare A Concrete Floor For Vinyl Flooring Parrys

Tips For Installing Vinyl Plank Over Concrete Floors Lemon Thistle

How To Install Vinyl Plank Flooring On Concrete Step By Tutorial

10 Beginner Mistakes Installing Vinyl Plank Flooring

Tips For Installing Vinyl Plank Over Concrete Floors Lemon Thistle

Installing Luxury Vinyl Plank Over Concrete Your Next Summer Diy Project

Lvp Flooring Installation How To Install Luxury Vinyl Plank In A Basement Diy

Installing Vinyl Plank Flooring For Beginners Anika S Diy Life

Laying Vinyl Planks The Right Way Expert Guide By Fantastic Handyman

How To Install Luxury Vinyl Flooring On Concrete Honey Built Home
See Also


