How To Install Pine Flooring On Concrete Slab
Installing pine flooring on a concrete slab presents unique challenges due to the inherent moisture and temperature fluctuations associated with concrete. To achieve a successful and long-lasting installation, it is crucial to address these concerns and follow a carefully planned process. This article will provide a comprehensive guide to installing pine flooring on a concrete slab, covering essential steps and considerations.
Preparing the Concrete Slab
Before installing pine flooring, it is essential to prepare the concrete slab adequately. This involves ensuring the slab is level, clean, and free of moisture.
1. Leveling and Repairing Uneven Surfaces
Concrete slabs often have minor imperfections and variations in height. To achieve a smooth and even surface for the flooring, consider using a self-leveling compound. This compound can be applied to fill in any gaps or depressions, creating a level surface for the floorboards. Alternatively, using a leveling screed can also be employed to create a level surface.
2. Cleaning and Removing Debris
The concrete slab needs to be thoroughly cleaned before installing the flooring. Use a broom or dustpan to remove debris and dirt from the surface. For stubborn stains, a mild detergent and water solution can be used. Allow the slab to dry completely before proceeding further.
3. Moisture Control
Concrete slabs are susceptible to moisture issues, which can damage the pine flooring. This moisture can be caused by leaks, humidity, or even ground moisture seeping through the slab. To address this issue, a moisture barrier is essential. A vapor barrier, typically made of polyethylene plastic sheeting, should be laid directly on the concrete surface. This barrier prevents moisture from migrating upward and damaging the flooring.
Installing the Subfloor
Installing a subfloor over the concrete slab provides a sturdy and stable base for the pine flooring. This layer helps to minimize the transfer of sound and vibration from the concrete to the floorboards. There are two common subfloor options for concrete slab installations: plywood and structural panels.
1. Plywood Subfloor
Plywood is a popular choice for subfloors due to its affordability and availability. It offers good strength and stability, providing a solid foundation for the pine flooring . The plywood sheets should be laid perpendicular to the direction of the joists, ensuring proper support and minimizing deflection.
2. Structural Panels
Structural panels, often made of oriented strand board (OSB) or cement board, offer greater strength and resilience compared to plywood. They are also more resistant to moisture, making them ideal for concrete slab applications.
Regardless of the chosen subfloor material, ensure it is securely fastened to the concrete slab using appropriate screws or nails. Use a moisture meter to ensure that the subfloor moisture content is within the recommended range for the type of pine flooring you are installing.
Installing the Pine Flooring
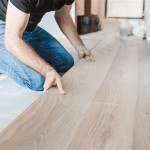
Once the subfloor is prepared, it is time to install the pine flooring. The installation process involves attaching each floorboard to the subfloor using a variety of methods, including glue down, floating, or nailing.
1. Glue Down Installation
Glue down installation is a popular method that provides a durable and secure bond between the pine flooring and the subfloor. This method is particularly suitable for rooms with high traffic or where stability is crucial. A specialized flooring adhesive is used to bond the floorboards to the subfloor, ensuring a tight and secure fit.
2. Floating Installation
Floating installation involves fitting the pine floorboards together without attaching them directly to the subfloor. The floorboards are held in place by a tongue-and-groove system and a perimeter molding. This method is ideal for rooms with potential movement or settling.
3. Nail Down Installation
Nail down installation involves attaching the pine floorboards to the subfloor using nails. This method requires a nail gun or hammer and is often used in conjunction with a subfloor that has a groove for nails.
Regardless of the installation method chosen, ensure that the floorboards are installed at a 90-degree angle to the subfloor joists, ensuring proper support and stability. Also, leave a small expansion gap around the perimeter of the room to account for natural wood expansion and contraction over time.
Final Considerations
After installing the pine flooring, it is essential to finish the installation with proper sanding, staining, and sealing. This ensures a beautiful and protective finish for your new pine floor.
Remember to carefully follow the manufacturer's instructions for installation and finishing. This will help ensure the longevity and performance of your pine flooring in the unique environment of a concrete slab.

Installing Wood Flooring Over Concrete Diy

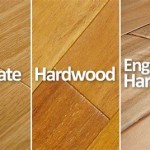
Installing Hardwood Floors On Concrete Subfloors

Installing Engineered Hardwood On Concrete Faqs Checklist

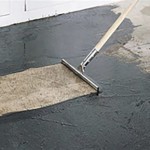
Tar And Screed Wood Floor Installation Hardwood Floors

Tongue Groove Flooring Installation On Underlay Start To Finish

Tar And Screed Wood Floor Installation Hardwood Floors

How To Install Vinyl Plank Flooring Tutorial For Beginners Home Reno
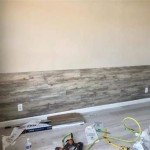
.jpg?strip=all "Laying A Rustic Pine Floor Ibuildit Ca")
Laying A Rustic Pine Floor Ibuildit Ca

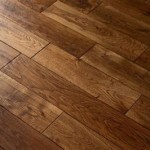
Design Considerations For A Wide Plank Hickory Floor Carlisle Floors
.jpg?strip=all "Antique Wooden Floors Original Pine Floorboards")
Antique Wooden Floors Original Pine Floorboards
See Also