How to Install Vinyl Flooring on Tiles: A Comprehensive Guide
When it comes to flooring projects, installing vinyl flooring over tile is a popular choice for homeowners seeking an affordable and durable solution. Vinyl flooring is not only water-resistant and easy to clean but also offers a wide range of styles and finishes to enhance any décor. While the installation process itself is not overly complex, there are specific steps that need to be followed to ensure a successful outcome.
In this comprehensive guide, we will walk you through the essential aspects of installing vinyl flooring on tiles, covering everything from preparation to finishing touches. By following these steps carefully, you can achieve a professional-looking and long-lasting vinyl floor.
1. Preparation and Tile Inspection
Before you begin installing vinyl flooring, it is crucial to prepare the tile surface thoroughly. Start by removing any existing baseboards, mouldings, or fixtures that may hinder the installation process. Inspect the tiles for any damage, cracks, or loose grout. If any issues are found, they should be repaired or replaced before proceeding.
Next, clean the tile surface thoroughly using a mop and a mild cleaning solution. Rinse the tiles with clean water and allow them to dry completely. The tiles must be free of dirt, debris, or grease to ensure proper adhesion of the vinyl flooring.
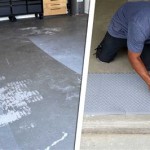
2. Underlayment Installation
Installing an underlayment is an optional but highly recommended step that can enhance the performance and longevity of your vinyl flooring. Underlayment provides extra cushioning, reduces noise, and helps level any minor imperfections in the tile surface. Choose an underlayment that is appropriate for your vinyl flooring and follow the manufacturer's instructions for installation.
3. Vinyl Flooring Acclimation
Before you start laying the vinyl flooring, it is essential to allow the material to acclimate to the room temperature. Place the vinyl flooring boxes in the room where it will be installed and leave them unopened for at least 24 hours. This process allows the vinyl to adjust to the surrounding environment, reducing the risk of buckling or warping after installation.
4. Layout and Cutting
Before you begin installing the vinyl flooring, plan the layout to determine how the planks will align with the room's dimensions. Use a measuring tape and a pencil to mark guide lines on the tile surface. Start installing the vinyl planks from a corner of the room, working your way outwards.
Use a utility knife or a vinyl flooring cutter to cut the planks to the desired length and shape. Always measure twice and cut once to avoid mistakes. Ensure that the cuts are straight and clean for a seamless appearance.
5. Installation Adhesion
There are two main methods for adhering vinyl flooring to tiles: peel-and-stick and glue-down.
Peel-and-Stick: Peel-and-stick vinyl flooring has an adhesive backing that allows for easy installation without the need for additional glue. Simply peel off the backing and press the plank firmly onto the tile surface.
Glue-Down: Glue-down vinyl flooring requires a separate adhesive to be applied to the tile surface before the planks are installed. Use a notched trowel to spread the adhesive evenly and follow the manufacturer's instructions for drying time.
6. Rolling and Trimming
Once the vinyl flooring is installed, use a heavy roller to press the planks firmly into place and remove any air bubbles. Start from the center of the room and work your way outwards. Use a sharp utility knife to trim any excess vinyl flooring around the edges of the room and any fixtures or obstacles.
7. Finishing Touches
The final step is to install the baseboards, mouldings, and any other fixtures that were removed during the preparation phase. This will give your vinyl flooring a finished and polished look. Use matching caulk or adhesive to seal any gaps between the flooring and the walls or baseboards.
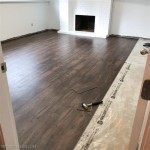
Congratulations! You have successfully installed vinyl flooring on tiles. Enjoy your new flooring and take pride in your accomplishment.

Vinyl Tile Installation A Comprehensive Guide Gc Flooring Pros

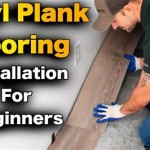
How To Install Vinyl Plank Flooring As A Beginner Home Renovation

How To Install Vinyl Plank Flooring As A Beginner Home Renovation

How To Install Vinyl Plank Flooring In A Bathroom Fixthisbuildthat

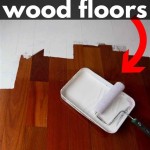
How To Install Floating Vinyl Flooring Over Old Floors Simply2moms

How To Lay Tile Over An Existing Vinyl Floor Today S Homeowner

Should You Install Vinyl Floor Over Tile

Installing Vinyl Plank Flooring How To Fixthisbuildthat

A Complete Guide How To Stagger Vinyl Plank Flooring Whole Cabinet Supply

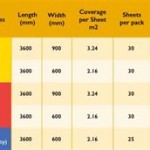
How To Lay Vinyl Flooring Sheets Tiles And Planks Tarkett
See Also