How To Install Vinyl Flooring With Adhesive
Vinyl flooring is a popular choice for homeowners and businesses alike because it is durable, easy to clean, and relatively inexpensive. It is also available in a wide variety of colors and patterns, so you can find the perfect look for your home.
If you are considering installing vinyl flooring in your home, you have two options: you can either install it yourself or hire a professional. If you are comfortable with do-it-yourself projects, installing vinyl flooring is a relatively easy project that can be completed in a few hours.
To install vinyl flooring with adhesive, you will need the following tools and materials:
- Vinyl flooring
- Adhesive
- Notched trowel
- Utility knife
- Measuring tape
- Pencil
- Roller
Once you have gathered your tools and materials, you can begin the installation process.
1. Prepare the subfloor
The first step is to prepare the subfloor. The subfloor must be clean, dry, and level. If the subfloor is not level, you will need to level it using a self-leveling compound.
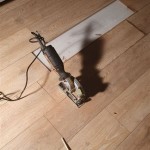
2. Lay out the vinyl flooring
Once the subfloor is prepared, you can begin laying out the vinyl flooring. Start by measuring the room and cutting the vinyl flooring to size. Be sure to leave a gap of about 1/4 inch around the perimeter of the room for expansion.
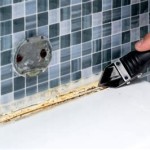
3. Apply the adhesive
Once the vinyl flooring is cut to size, you can begin applying the adhesive. Use a notched trowel to apply the adhesive to the subfloor. Be sure to follow the manufacturer's instructions for the specific adhesive you are using.
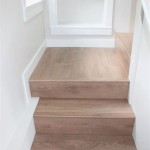
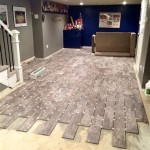
4. Install the vinyl flooring
Once the adhesive is applied, you can begin installing the vinyl flooring. Start by placing the first plank in the corner of the room. Press the plank into the adhesive and use a roller to smooth it out. Continue installing the vinyl flooring, one plank at a time, until the entire room is covered.
5. Trim the excess vinyl flooring
Once the vinyl flooring is installed, you will need to trim the excess around the perimeter of the room. Use a utility knife to score the vinyl flooring and then snap it off. Be sure to leave a gap of about 1/4 inch around the perimeter of the room for expansion.
6. Seal the seams
Once the vinyl flooring is trimmed, you will need to seal the seams. Use a seam sealer to seal the seams between the planks. This will help to prevent water from seeping into the seams and damaging the flooring.
Installing vinyl flooring with adhesive is a relatively easy project that can be completed in a few hours. By following these steps, you can install vinyl flooring in your home that will last for years to come.

How To Install Glue Down Vinyl Plank

How To Install Glue Down Vinyl Plank

Adhesive Vinyl Flooring 4 Ways To Install Planeo

How To Install Glue Down Vinyl Plank

How To Install L And Stick Vinyl Tiles Houseful Of Handmade

Ivc Lvt Igrip Glue Down Installation With Trowel Full

How To Lay Vinyl Flooring Sheets Tiles And Planks Tarkett

Installing Vinyl Plank Flooring For Beginners Anika S Diy Life

Commercial Vinyl General Laying Techniques Applying An Adhesive

Tips For Installing Self Adhesive Vinyl Flooring
See Also