Install Vinyl Plank Flooring in Basement Floor and Walls: A DIY Guide
Transforming your basement into a cozy and functional space can involve various upgrades, including the installation of vinyl plank flooring. Vinyl planks offer numerous advantages, including durability, water resistance, and ease of installation. This guide will provide a step-by-step approach to installing vinyl plank flooring on both the floor and walls of your basement, helping you create a stylish and practical living area.
1. Preparation is Key
Before you begin the installation, it is essential to prepare the basement floor and walls to ensure a smooth and successful process. Remove existing flooring or wall coverings and repair any damaged subfloors or drywall. Ensure the surfaces are clean, dry, and level. If necessary, use self-leveling compound or shims to level out uneven areas.
2. Choose a Vinyl Plank Type
There are two main types of vinyl planks: click-lock and glue-down. Click-lock planks have interlocking edges that snap together without the need for glue, while glue-down planks require adhesive to secure them to the subfloor or wall. Consider the size and shape of your basement, as well as your desired look, when selecting the appropriate plank type.
3. Determine Plank Layout
Plan the layout of your vinyl planks to minimize cuts and waste. Start by determining the center point of the room and work your way outward, ensuring that the planks are parallel to the longest wall. Stagger the joints of adjacent rows to enhance the overall strength and aesthetic appeal of the flooring.
4. Installing on the Floor
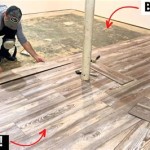
If using click-lock planks, simply insert the first plank into the starting corner and snap the next planks into place one by one. For glue-down planks, apply a thin layer of adhesive to the subfloor and press the planks into place. Use spacers to maintain even gaps between the planks and a tapping block to ensure they are firmly seated.
5. Installing on the Walls
Installing vinyl planks on the walls follows a similar process. Measure and cut the planks to fit the desired height and width of the wall. Apply adhesive to the back of the planks and press them into place. Use a level to ensure they are aligned correctly. Trim any excess planks around the edges and moldings.
6. Finishing Touches
Once the vinyl planks are installed, install baseboards or moldings to conceal the edges and enhance the overall look. If desired, you can also apply grout or caulk to the joints between the planks for a more finished appearance. Allow the adhesive to dry completely before walking on the new flooring or hanging items on the walls.
Conclusion
Installing vinyl plank flooring in your basement floor and walls is a straightforward process that can transform your living space. By following these steps and using high-quality materials, you can create a durable, water-resistant, and stylish flooring solution that will enhance the functionality and aesthetic appeal of your basement for years to come.

Lvp Flooring Installation How To Install Luxury Vinyl Plank In A Basement Diy

Installing Luxury Vinyl Plank Flooring In Our Basement Week 5 Of The One Room Challenge Willow Bloom Home

Best How To Install Vinyl Plank Flooring Four Generations One Roof

Lvp Flooring Installation How To Install Luxury Vinyl Plank In A Basement Diy

Best How To Install Vinyl Plank Flooring Four Generations One Roof

Installing Luxury Vinyl Plank Flooring First Phase Of Finishing My Basement

Tips For Installing Vinyl Plank Over Concrete Floors Lemon Thistle

Easy Ways To Install Vinyl Plank Flooring On Concrete

Best How To Install Vinyl Plank Flooring Four Generations One Roof

Finishing Our Basement 27 Painting Walls Installing Vinyl Plank Flooring From Ollie S
See Also


