How To Install Vinyl Plank Flooring in a Bathroom Over Linoleum
Installing new flooring is a common bathroom renovation project, often undertaken to refresh the appearance and improve functionality. Vinyl plank flooring has emerged as a popular choice for bathrooms due to its water resistance, durability, and ease of installation. While a complete subfloor replacement is sometimes necessary, it is often possible and advantageous to install vinyl plank flooring directly over existing linoleum. This article details the step-by-step process for installing vinyl plank flooring in a bathroom over existing linoleum, focusing on proper preparation, installation techniques, and essential considerations.
Before initiating any flooring project, it's crucial to understand the benefits and drawbacks of installing vinyl plank over linoleum. The primary advantage is time and cost savings. Removing old linoleum can be labor-intensive and may require professional assistance if asbestos is suspected. Installing directly over linoleum bypasses this step, simplifying the process. Additionally, the existing linoleum can act as an additional layer of insulation and cushioning. However, certain conditions must be met for this method to be successful. The linoleum must be in good condition, securely adhered to the subfloor, and relatively level. Failure to address these factors can lead to problems such as uneven flooring, plank separation, and potential moisture issues.
Assessing the Existing Linoleum and Subfloor
The initial step involves a thorough assessment of the existing linoleum and the subfloor beneath it. This examination determines the suitability of the linoleum as a stable base for the new vinyl plank flooring. Begin by visually inspecting the linoleum for any signs of damage, including cracks, tears, bubbling, or loose areas. Small cracks may be repairable, but extensive damage indicates that the linoleum is unsuitable and should be removed. Pay particular attention to areas around the toilet, sink, and shower, as these are prone to moisture damage.
Next, assess the adhesion of the linoleum to the subfloor. Walk over the entire surface, paying attention to any areas that feel soft, spongy, or sound hollow when tapped. These areas indicate delamination, where the linoleum has separated from the subfloor. Delaminated areas must be addressed before installing the vinyl plank flooring. Small, isolated areas can sometimes be repaired by injecting adhesive beneath the linoleum, but extensive delamination necessitates removal. A stable and well-adhered base is essential for a successful and long-lasting vinyl plank installation.
Finally, evaluate the levelness of the floor. Unevenness can cause the vinyl planks to flex and potentially separate over time. Use a long level (at least six feet) to check for any dips or high spots. Minor imperfections can often be corrected with a self-leveling compound, but significant unevenness may require more extensive subfloor repairs. Check for screws or nails that are not flush with the floor. Countersink or remove any fasteners that could interfere with the installation of the vinyl plank flooring. Ensure that the subfloor itself is structurally sound and free from rot or water damage. Repair any damaged areas before proceeding.
Preparing the Linoleum for Vinyl Plank Installation
Once the linoleum has been assessed and determined to be suitable, prepare the surface for the new vinyl plank flooring. This preparation involves cleaning, leveling, and ensuring a proper bonding surface for the adhesive (if using glue-down planks) or creating a smooth, stable surface for click-lock planks.
Begin by thoroughly cleaning the linoleum. Use a vacuum cleaner to remove loose debris, dust, and dirt. Then, scrub the surface with a mild detergent and water. Avoid using harsh chemicals or abrasive cleaners, as these can damage the linoleum and interfere with the adhesion of the vinyl planks. Rinse the floor thoroughly with clean water to remove any detergent residue. Allow the floor to dry completely before proceeding to the next step. Drying can be expedited using fans or dehumidifiers.
Next, address any minor imperfections in the linoleum. Fill small cracks and chips with a patching compound designed for resilient flooring. Follow the manufacturer's instructions for application and drying time. For more significant unevenness, apply a self-leveling compound. Self-leveling compounds are designed to create a smooth, level surface. Mix the compound according to the manufacturer's instructions and pour it onto the floor. Use a gauge rake or trowel to spread the compound evenly and ensure it flows into low spots. Allow the compound to dry completely before proceeding. Depending on the product, this may take several hours or even overnight.
Finally, prepare the surface for adhesion. If using glue-down vinyl planks, lightly sand the linoleum with fine-grit sandpaper (120-150 grit) to create a textured surface that will improve the bond. Remove any sanding dust with a vacuum cleaner and a tack cloth. If using click-lock vinyl planks, this step is generally not necessary, but ensuring a clean and smooth surface is still important. Ensure that the surface is free of any wax or polish, as these can interfere with the stability of the click-lock mechanism.
Installing the Vinyl Plank Flooring
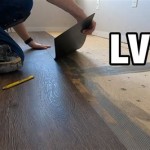
With the linoleum properly prepared, the installation of the vinyl plank flooring can commence. This process involves careful planning, precise cutting, and secure installation, whether using glue-down or click-lock planks.
Begin by planning the layout. Determine the direction in which the planks will run. In bathrooms, planks are often installed parallel to the longest wall to create a sense of spaciousness. Consider the placement of planks in relation to doorways and other features. To avoid narrow strips along the walls, calculate the width of the room and divide it by the width of a plank. If the result is a fraction, adjust the starting row by cutting the first row of planks. This will ensure that the final row is not too narrow. It is also good practice to dry-fit a few rows of planks to visualize the layout and make any necessary adjustments.
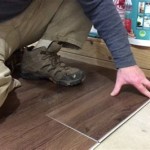
For glue-down vinyl planks, apply adhesive to the prepared linoleum using a trowel with the appropriate notch size, as recommended by the plank manufacturer. Work in small sections to prevent the adhesive from drying out before the planks are installed. Carefully position each plank and press it firmly into the adhesive. Use a rolling pin or floor roller to ensure good contact between the plank and the adhesive. Immediately wipe away any excess adhesive with a damp cloth. For click-lock vinyl planks, begin by placing the first plank in a corner of the room, leaving a small expansion gap along the wall. The expansion gap allows for movement due to temperature and humidity changes. Use spacers to maintain a consistent gap. Engage the next plank by aligning the interlocking edges and clicking them together. Continue this process until the entire floor is covered.
Cutting vinyl planks is essential for fitting them around obstacles and along walls. Use a utility knife and a straight edge to score the plank along the desired cut line. Snap the plank along the scored line. For more intricate cuts, use a jigsaw or a vinyl plank cutter. Ensure the cuts are precise and clean for a professional-looking finish. When installing around toilets, sinks, and other fixtures, use a template to create accurate cutouts. Silicone caulk can be used to seal the perimeter of fixtures to prevent water damage.
Once the flooring is installed, remove the spacers along the walls. Install baseboards or quarter-round molding to cover the expansion gap and provide a finished look. These moldings should be attached to the wall and not to the flooring, allowing the flooring to expand and contract freely. Clean the floor thoroughly with a damp mop and allow it to cure for the recommended time before heavy use. This will allow the adhesive (if used) to fully cure and the planks to settle. Follow the manufacturer's instructions for cleaning and maintenance to ensure the longevity of the vinyl plank flooring.

How To Install Vinyl Plank Flooring In A Bathroom Fixthisbuildthat

Install L And Stick Vinyl Floor Planks In The Bathroom More To Mrs E

How To Install Vinyl Plank Flooring In A Bathroom

How To Install Vinyl Plank Floors In A Bathroom Over Tile

Install L And Stick Vinyl Floor Planks In The Bathroom More To Mrs E

How To Install Luxury Vinyl Tile Over Linoleum Noting Grace

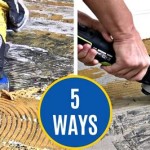
Can You Should Put Vinyl Planks Over Linoleum Ready To Diy

How To Install Vinyl Plank Flooring In A Bathroom Fixthisbuildthat

How To Install Vinyl Plank Flooring In A Bathroom As Beginner Home Renovation

Install L And Stick Vinyl Floor Planks In The Bathroom More To Mrs E
See Also