How To Install Vinyl Plank Flooring On A Wall In Singapore
Installing vinyl plank flooring on a wall offers a unique and durable design element. This process, while similar to floor installation, requires specific considerations to ensure a secure and aesthetically pleasing result. This guide provides a comprehensive walkthrough of the process, tailored to the Singaporean climate and building practices.
1. Wall Preparation and Material Selection
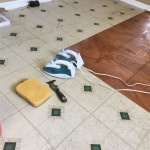
Proper wall preparation is crucial for a successful installation. Begin by thoroughly cleaning the wall surface, removing any dust, debris, or existing wallpaper. Patch any holes or imperfections with a suitable filler and allow it to dry completely. In Singapore's humid climate, ensuring the wall is free of moisture is particularly important. Use a moisture meter to check for dampness, which can lead to mold growth and adhesive failure. A primer designed for the chosen adhesive and wall type should then be applied to create a smooth and uniform surface.
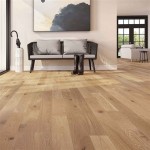
Choosing the right vinyl plank flooring is equally important. Thinner, more flexible planks are generally easier to work with on walls. Click-lock systems can simplify the installation process, but adhesive application provides a more secure bond, especially in humid environments. Consider the aesthetic of the planks in relation to the room's design. Opting for planks with a waterproof core is highly recommended in Singapore's climate to mitigate the risk of moisture damage.
When selecting adhesives, choose a product specifically designed for vinyl flooring and suitable for vertical application. High-quality construction adhesives are readily available in Singapore. Ensure the adhesive is compatible with both the wall material and the vinyl planks.
2. Acclimation and Measurement
Acclimation is a vital step, particularly important in a climate like Singapore's. Allow the vinyl planks to acclimate to the room's temperature and humidity for at least 48 hours before installation. This prevents expansion or contraction after installation, which can lead to warping or buckling. Unpack the planks and lay them flat in the room where they will be installed.
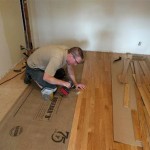
Accurate measurements are essential for a professional finish. Measure the wall area carefully to calculate the required number of planks. Factor in any cuts or adjustments needed for windows, doors, or electrical outlets. Having extra planks is recommended to account for waste and potential errors. Plan the layout to minimize seams and create a visually appealing pattern. Consider starting the installation from the most visible corner of the room and working outwards.
3. Installation Techniques
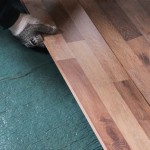
The installation process can vary depending on the chosen vinyl plank flooring system. For click-lock systems, begin by attaching starter strips to the bottom of the wall. These strips provide a secure base for the first row of planks. Subsequent planks are then clicked into place, working upwards row by row. Ensure each plank is fully engaged to prevent gaps. Use spacers to maintain consistent gaps between the planks and the surrounding walls, allowing for expansion and contraction.
For adhesive application, apply the adhesive to the back of each plank using a notched trowel. Ensure even coverage to create a strong bond. Press the plank firmly against the wall, holding it in place for a few seconds. Use spacers to ensure consistent gaps between the planks and the surrounding walls. Clean away any excess adhesive immediately with a damp cloth. Continue this process row by row, ensuring proper alignment and a tight fit.
When encountering obstacles such as electrical outlets, carefully measure and mark the plank. Use a jigsaw or utility knife to cut the plank to the required shape. Ensure the cuts are clean and precise for a professional finish.
4. Finishing Touches
Once the installation is complete, remove the spacers and inspect the finished wall. Address any minor gaps or imperfections with color-matched caulk or sealant. This creates a seamless and polished appearance. Clean the wall surface with a damp cloth to remove any remaining dust or debris.
Consider installing trim or molding around the edges of the wall to provide a finished look and conceal any uneven edges. This also adds a decorative element to the room. Select trim that complements the vinyl plank flooring and the overall room design. Secure the trim using appropriate fasteners and adhesive, ensuring a secure and long-lasting finish.
Regular maintenance helps preserve the beauty and longevity of the vinyl plank wall covering. Clean the surface periodically with a damp cloth and a mild cleaning solution. Avoid abrasive cleaners or scouring pads, which can damage the surface. Promptly address any spills or stains to prevent permanent discoloration. With proper care and maintenance, the vinyl plank wall will remain a visually appealing and durable feature in the Singaporean home or office.

Diy Vinyl Flooring For Your Home In Singapore

Diy Vinyl Flooring For Your Home In Singapore

Installing Vinyl Flooring How To Make This Work From Home Diy A Success The Floor Gallery

How To Lay Vinyl Flooring Pergo

How To Lay Vinyl Flooring Pergo

Post Nbl Express Eco Flooring

How To Lay Vinyl Flooring

How To Lay Vinyl Flooring Pergo

16 We Laid Our Own Vinyl Flooring Diy Installation Singapore Re Condo Reno

Can Vinyl Flooring Be Used On Walls Home Expo Asia
See Also