How to Install Vinyl Plank Flooring on Concrete Steps
Installing vinyl plank flooring on concrete steps can enhance the aesthetics and functionality of your home. Here's a detailed guide to help you achieve a professional-looking installation: ### Materials Required: - Vinyl plank flooring - Measuring tape - Pencil or marking tool - Utility knife - Circular saw or miter saw - Adhesive specific for vinyl flooring - Notched trowel - Spacers ### Step 1: Measure and Plan Thoroughly measure the steps to determine the required amount of vinyl planks. Plan the layout to minimize cuts and waste. ### Step 2: Prepare the Surface Ensure the concrete steps are clean, level, and dry. Remove any dirt, debris, or old flooring materials. ### Step 3: Cut the Planks Using a utility knife or circular saw, cut the planks to the desired length and shape to fit the steps. Make accurate measurements and use a miter saw for precise angle cuts. ### Step 4: Apply Adhesive Apply the vinyl flooring adhesive to the concrete surface using a notched trowel. Follow the manufacturer's instructions for the specific adhesive used. ### Step 5: Install the First Plank Start by installing the first plank on the bottom step, aligning it with the edge. Gently press the plank into the adhesive, ensuring it is fully seated. ### Step 6: Install Subsequent Planks Interlock the subsequent planks into the first plank and continue installing them row by row. Use spacers to maintain consistent gaps between the planks. ### Step 7: Fit Around Obstacles When encountering obstacles such as handrails or light fixtures, carefully measure and cut the planks to fit around them. Use a jigsaw or utility knife for precise cuts. ### Step 8: Secure the Planks Once all the planks are installed, use a rolling pin or heavy object to secure them firmly into the adhesive. Apply even pressure to ensure a strong bond. ### Step 9: Finish the Edges Trim any excess planks along the edges of the steps using a utility knife or saw. Install molding or baseboards to conceal the edges and enhance the finished look. ### Additional Tips: - Use a level to ensure each step is installed evenly. - Allow the adhesive to dry completely before using the steps. - Seal the joints between the planks with caulk to prevent water damage. - Regularly clean the vinyl flooring to maintain its appearance and durability. By following these steps carefully, you can achieve a durable and visually appealing vinyl plank flooring installation on your concrete steps.
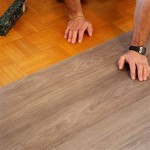
Easy Ways To Install Vinyl Plank Flooring On Concrete

Easy Ways To Install Vinyl Plank Flooring On Concrete

Easy Ways To Install Vinyl Plank Flooring On Concrete

Easy Ways To Install Vinyl Plank Flooring On Concrete

Easy Ways To Install Vinyl Plank Flooring On Concrete

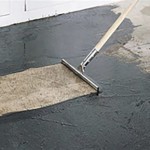
How To Prepare A Concrete Floor For Vinyl Flooring Parrys

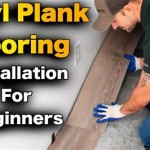
Installing Vinyl Plank Flooring For Beginners Anika S Diy Life

Easy Ways To Install Vinyl Plank Flooring On Concrete

How To Install L And Stick Vinyl Plank Flooring The Nifty Nester

How To Install Vinyl Plank Flooring As A Beginner Home Renovation
See Also