How to Install Vinyl Plank Flooring on Walls and Ceilings: A Comprehensive Guide
Vinyl plank flooring is a versatile material that can be used for both walls and ceilings. It's easy to install and maintain, and it's available in a wide range of colors and styles. If you're looking for a quick and easy way to update your home, vinyl plank flooring is a great option.
Gather Your Materials
Before you start installing vinyl plank flooring, you'll need to gather a few supplies:
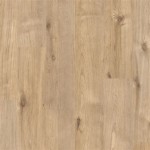
- Vinyl plank flooring
- Adhesive
- Caulk gun
- Caulk
- Level
- Measuring tape
- Utility knife
- Miter saw (optional)
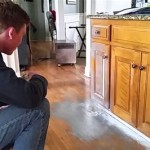
Prepare the Surface
The first step is to prepare the surface where you'll be installing the vinyl plank flooring. Make sure the surface is clean, dry, and free of any dust or debris. If the surface is uneven, you may need to level it before you can begin installing the flooring.
Apply the Adhesive
Once the surface is prepared, you can start applying the adhesive. Use a caulk gun to apply a thin, even layer of adhesive to the back of each vinyl plank. Be sure to spread the adhesive evenly, and don't apply too much or it will squeeze out from the sides of the planks.
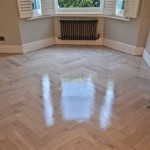
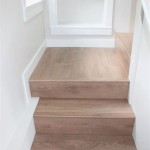
Install the Vinyl Plank Flooring
Now it's time to install the vinyl plank flooring. Start by placing the first plank in the corner of the room. Use a level to make sure the plank is level, and then press it into place. Continue installing the planks, one by one, until you reach the other side of the room.
If you need to cut a plank to fit, use a utility knife or a miter saw. Be sure to measure the plank carefully before you cut it, and make sure the cut is straight.
Caulk the Seams
Once the vinyl plank flooring is installed, you'll need to caulk the seams between the planks. This will help to seal out moisture and prevent the planks from moving.
To caulk the seams, apply a thin bead of caulk to the seam between each plank. Use a caulk gun to apply the caulk, and be sure to smooth it out with your finger or a putty knife.
Tips for Installing Vinyl Plank Flooring on Walls and Ceilings
- Make sure the surface is clean, dry, and free of any dust or debris.
- Apply a thin, even layer of adhesive to the back of each vinyl plank.
- Use a level to make sure each plank is level before you press it into place.
- If you need to cut a plank to fit, use a utility knife or a miter saw.
- Caulk the seams between the planks to seal out moisture and prevent the planks from moving.
Conclusion
Installing vinyl plank flooring on walls and ceilings is a quick and easy way to update your home. By following these simple steps, you can create a beautiful and durable finish that will last for years to come.

Diy Ceiling Planks From Laminate Flooring Your Home Renewed

Lvp Flooring Installation How To Install Luxury Vinyl Plank In A Basement Diy

How To Install Vinyl Plank Flooring On Walls Europine

Eurox Vinyl Flooring 05

Diy Wood Accent Wall Using Vinyl Planks Love Renovations

Diy Ceiling Planks From Laminate Flooring Your Home Renewed

Installing Luxury Vinyl Plank Flooring In Our Basement Week 5 Of The One Room Challenge Willow Bloom Home

How To Install Laminate Flooring On Your Ceiling

Installing Luxury Vinyl Plank Flooring In Our Basement Week 5 Of The One Room Challenge Willow Bloom Home

Diy Plank Ceiling Installation
See Also