How To Install Vinyl Plank Flooring With Adhesive
Upgrading your flooring to vinyl planks can transform the look and feel of your home. Vinyl plank flooring is durable, water-resistant, and available in various colors and styles.
Installing vinyl plank flooring with adhesive is a relatively straightforward process that you can complete yourself with the proper tools and materials. Here's a step-by-step guide to help you get started:
Step 1: Gather Your Materials
* Vinyl plank flooring * Adhesive * Trowel * Tape measure and pencil * Utility knife * Tapping block * Safety glassesStep 2: Prepare the Subfloor
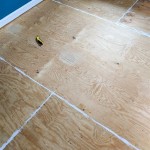
* Ensure the subfloor is level, clean, and dry. * Remove any existing flooring, baseboards, or quarter rounds. * If necessary, use a self-leveling compound to smooth out any uneven areas.Step 3: Lay Out the Planks
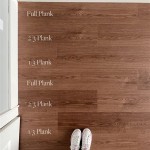
* Determine the center point of the room and snap a chalk line. * Start laying the planks from the center point, working your way outward. * Stagger the joints of the planks to create a more durable and appealing finish.Step 4: Apply Adhesive
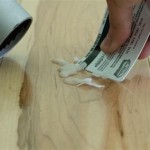
* Using a trowel, spread a thin layer of adhesive over a small section of the subfloor. * Follow the manufacturer's instructions for spreading the adhesive.Step 5: Install the Planks
* Place the first plank into the adhesive, aligning it with the chalk line. * Tap the plank firmly into place using a tapping block. * Continue installing planks, applying adhesive and tapping them into place.Step 6: Trim and Fit Planks
* Measure and trim any planks that need to be cut to fit around obstacles or walls. * Use a utility knife to score the plank and snap it along the score line.Step 7: Remove Excess Adhesive
* Once all the planks are installed, remove any excess adhesive that may have squeezed out. * Use a damp cloth or adhesive remover to clean up the excess.Step 8: Install Baseboards and Quarter Round
* Reinstall the baseboards and quarter rounds to cover the edges of the flooring. * Secure the baseboards and quarter rounds using nails or screws.Tips:
* Wear safety glasses throughout the installation process. * Allow the adhesive to dry for at least 24 hours before walking on the floor. * Use a vacuum cleaner to remove any dust or debris from the subfloor before installing the planks. * Start laying the planks in the direction of the longest dimension of the room to create a spacious effect. * If you encounter any problems during the installation, consult the manufacturer's instructions or seek professional advice.
How To Install Glue Down Vinyl Plank

How To Install Glue Down Vinyl Plank

Post Nbl Express Eco Flooring

How To Install Glue Down Vinyl Plank

Adhesive Vinyl Flooring 4 Ways To Install Planeo

Laying Vinyl Planks The Right Way Expert Guide By Fantastic Handyman

How To Install Glue Down Vinyl Plank Flooring Bathroom Concrete Floor

How To Install L And Stick Vinyl Plank Flooring The Nifty Nester

Ivc Lvt Igrip Glue Down Installation With Trowel Full

How To Install Vinyl Plank Flooring In A Bathroom Fixthisbuildthat
See Also