A Comprehensive Guide to Installing Vinyl Tile Flooring in a Bathroom
Transforming your bathroom with captivating vinyl tile flooring is a smart and cost-effective way to elevate its style and functionality. Whether you're a seasoned DIY enthusiast or a novice embarking on your first home project, this comprehensive guide will empower you with the essential steps to achieve a flawless installation.
Step 1: Preparation and Planning
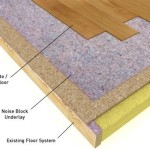
Before embarking on the installation, meticulously plan and prepare the bathroom space. Remove all existing fixtures, such as toilets, sinks, and mirrors, to allow ample room for maneuvering. Thoroughly clean the subfloor to eliminate any dirt, dust, or debris that could compromise the adhesive bond. Ensure that the subfloor is level and smooth, utilizing self-leveling compound as needed to correct any irregularities.
Step 2: Layout and Dry Fit
Arrange several loose vinyl tiles on the subfloor to visualize the overall design and determine the best layout. Consider the room's shape, size, and lighting to achieve a harmonious placement. Once satisfied with the arrangement, remove the tiles and mark the perimeter of the room on the subfloor.
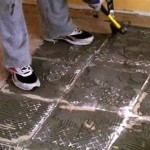
Step 3: Applying Adhesive
Apply a thin, even layer of high-quality vinyl flooring adhesive to the subfloor using a notched trowel. Follow the manufacturer's instructions for the specific adhesive used, as drying times and application techniques vary. Ensure that the adhesive is applied consistently throughout the entire area.
Step 4: Laying the Tiles
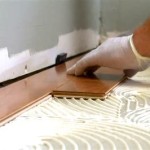
Begin laying the vinyl tiles from a corner, carefully aligning them with the marked perimeter. Use a tapping block and rubber mallet to gently tap the tiles into the adhesive, ensuring they're firmly seated. Continue laying the tiles row by row, maintaining a consistent gap between them and checking for levelness as you progress.
Step 5: Trimming and Fitting
As you approach obstacles or corners, use a utility knife to carefully trim the tiles to fit. Measure the space precisely and score the tiles before cutting to prevent cracking or chipping. Utilize transition strips or molding to conceal any exposed edges or create a seamless transition between different flooring materials.
Step 6: Grouting and Cleanup
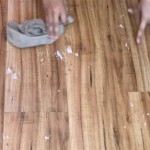
Once all the tiles are laid, it's time to apply grout to the joints. Select a color that complements the tiles and use a grout float to evenly distribute it into the gaps. Remove excess grout immediately with a damp sponge to avoid staining. Allow the grout to dry completely before proceeding to the next step.
Step 7: Sealing and Finishing
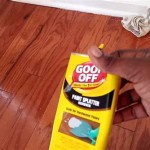
To protect the vinyl tile flooring from moisture, apply a high-quality sealant specifically designed for vinyl surfaces. Follow the manufacturer's instructions for proper application and drying time. This final step will enhance the durability and longevity of your flooring, ensuring it remains pristine for years to come.
Tips for Success
* Use a chalk line to create straight lines and ensure accurate alignment. * Allow the adhesive to dry for the recommended time before walking on the tiles. * Handle the tiles with care to avoid scratches or damage. * Wear appropriate safety gear, including gloves and a dust mask. * If you encounter any difficulties or complexities, consult a professional installer for assistance.
How To Install Vinyl Plank Flooring In A Bathroom Fixthisbuildthat

How To Install Vinyl Plank Flooring In A Bathroom

How To Install Vinyl Plank Flooring In A Bathroom Fixthisbuildthat

How To Install Vinyl Plank Flooring In A Bathroom Fixthisbuildthat

How To Install Vinyl Plank Flooring In A Bathroom

How To Install Vinyl Plank Flooring In A Bathroom Fixthisbuildthat

How To Install Vinyl Plank Floors In A Bathroom Over Tile

How To Install Vinyl Plank Flooring In A Bathroom Fixthisbuildthat

Luxury Vinyl Tile Floors For A Bathroom The Ultimate Guide

Install L And Stick Vinyl Floor Planks In The Bathroom More To Mrs E
See Also