Laying Down Vinyl Flooring on Concrete: A Comprehensive Guide
Vinyl flooring is a popular choice for homeowners due to its durability, affordability, and ease of maintenance. If you're considering installing vinyl flooring on concrete, it's important to follow the proper steps to ensure a successful and long-lasting installation.
1. Prepare the Concrete Surface:
The concrete surface must be clean, dry, and level. Remove any dirt, debris, or old flooring. Check for any uneven areas and fill them with a leveling compound. Ensure the concrete is moisture-free by performing a moisture test.
2. Install a Moisture Barrier:
Moisture can damage vinyl flooring, so installing a moisture barrier is crucial. Use a 6-mil polyethylene sheet and overlap the seams by 6 inches. Secure it with moisture-resistant tape.
3. Underlayment:
An underlayment provides extra cushioning and insulation. It also helps to level minor imperfections in the concrete surface. Choose an underlayment designed specifically for vinyl flooring and follow the manufacturer's instructions for installation.
4. Choosing the Vinyl Flooring:
Select vinyl flooring that meets your durability and style requirements. Consider factors such as wear layer thickness, texture, and pattern. Measure the area where you'll be installing the flooring to determine the quantity needed.
5. Plan the Layout:
Determine the starting point and direction of the vinyl flooring installation. This will help you avoid errors and ensure a seamless appearance. Use a chalk line or laser level to mark the guidelines.
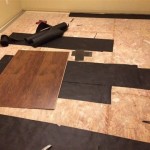
6. Installing the Vinyl Flooring:
Start by applying a thin layer of flooring adhesive to the concrete surface. Use a notched trowel to ensure an even distribution. Place the vinyl flooring planks or tiles according to the planned layout. Press down firmly to ensure adhesion.
7. Cutting and Fitting:
Use a utility knife or flooring cutter to make precise cuts around obstacles such as walls, pipes, or doorways. Measure carefully and cut accurately to ensure a snug fit. Use a tapping block and hammer to gently tap the vinyl flooring into place.
8. Rolling and Sealing:
Once the entire area is covered, roll the flooring with a heavy roller to ensure proper bonding. Seal the joints using a clear vinyl flooring sealant. This will protect the flooring from moisture and enhance its durability.
9. Finishing Touches:
Trim any excess vinyl flooring around the perimeter of the room. Install baseboards or molding to conceal the edges and give a professional finish. Allow the flooring to cure for the recommended time before using the area.
By following these steps, you can achieve a beautiful and long-lasting vinyl flooring installation on a concrete surface. Remember to read the manufacturer's instructions carefully and follow proper safety precautions throughout the process.

How To Prepare A Concrete Floor For Vinyl Flooring Parrys

How To Install Vinyl Plank Over Concrete Orc Week 4 5 The Happy Housie

Vinyl Plank Flooring On Uneven Concrete

Easy Ways To Install Vinyl Plank Flooring On Concrete

Tips For Installing Vinyl Plank Over Concrete Floors Lemon Thistle

Easy Ways To Install Vinyl Plank Flooring On Concrete

How To Install Vinyl Sheet Flooring Over Existing And Concrete

How To Install Vinyl Plank Over Concrete Orc Week 4 5 The Happy Housie

Easy Ways To Install Vinyl Plank Flooring On Concrete

Tips For Installing Vinyl Plank Over Concrete Floors Lemon Thistle
See Also