How To Lay Laminate Flooring For A Flawless Finish
Laminate flooring is a popular choice for homeowners due to its durability, affordability, and ease of installation. If you're considering installing laminate flooring in your home, it's important to follow the proper steps to ensure a flawless finish. Here's a comprehensive guide to help you achieve professional-looking results:
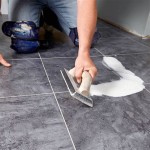
1. Preparation is Key
Before you begin laying the laminate flooring, it's crucial to prepare the subfloor. The subfloor should be level, smooth, and free of any debris or imperfections. This will help prevent any unevenness or squeaking in the finished floor.
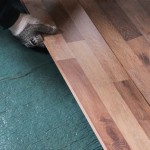
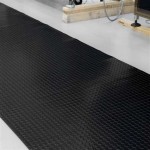
2. Choose the Right Underlayment
Underlayment is a thin layer of material that is placed between the subfloor and the laminate flooring. It helps to provide sound insulation, moisture protection, and a more comfortable feel underfoot. Choose an underlayment that is specifically designed for laminate flooring.
3. Start in the Center of the Room
To ensure a symmetrical layout, start laying the laminate flooring in the center of the room. Use a chalk line or measuring tape to mark a straight line down the center of the room and work your way out from there.
4. Stagger the Joints
As you lay the laminate flooring, stagger the joints of the planks. This means that the end of one plank should not line up directly with the end of the next plank. Staggering the joints helps to distribute the weight of the floor more evenly and prevents any weak points from developing.
5. Use a Tapping Block
When joining the planks together, use a tapping block and a hammer to gently tap the planks into place. Do not hit the planks directly with the hammer, as this can damage them. The tapping block will help to distribute the force evenly and prevent the planks from splitting.
6. Leave an Expansion Gap
Laminate flooring expands and contracts with changes in temperature and humidity. To prevent buckling, leave an expansion gap of about 1/4 inch around the perimeter of the room. You can use spacers to maintain the gap as you install the flooring.
7. Trim the Last Row
The last row of laminate flooring may need to be trimmed to fit. Measure the distance between the last plank and the wall and use a saw to cut the plank to the correct length.
8. Install Moldings
Once the laminate flooring is installed, you can install moldings to cover the expansion gap and give the floor a finished look. Use a miter saw to cut the moldings to the correct length and angle, and then nail or glue them into place.
9. Clean and Maintain
After the laminate flooring is installed, clean it thoroughly with a damp mop. Avoid using harsh cleaners or abrasive materials, as these can damage the finish. To maintain the floor, sweep or vacuum regularly and mop it occasionally with a mild cleaning solution.
By following these steps, you can lay laminate flooring that will look great for years to come. With a little patience and attention to detail, you can achieve a professional-looking finish that will transform the look of your home.
How Do You Properly Install Maintain Laminate Flooring D R Floors And Home Solutions

Laying Laminate On Corners Edges Transitions Parrys

How To Lay Laminate Flooring In 2024 Checkatrade

8 Tips For Flawless Flooring Installation Bostik Blog Usa Us

Tips For A Flawless Laminate Flooring Installation M D Home Repairs And Remodeling Llc

8 Tips For Flawless Flooring Installation Bostik Blog Usa Us

Tips For Installing Laminate Flooring

How To Install Laminate Flooring On Staircase Step By Guide

A Comprehensive Guide To Laying Laminate Flooring On Parquet For Flawless Finish

Installing Laminate Flooring Over Concrete The Ultimate Guide Aa Floors
See Also