How to Lay Plywood on Floorboards: A Comprehensive Guide to a Smooth Installation
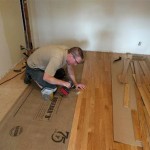
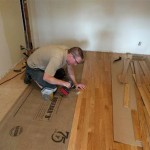
Plywood is a versatile and durable material commonly used as a subfloor over existing floorboards. Laying plywood on floorboards is a relatively straightforward task that can improve the stability, smoothness, and overall performance of your flooring. By following these detailed instructions, you can achieve a professional-looking and long-lasting result.
Materials and Tools You'll Need:
- Plywood (minimum 1/2-inch thickness for flooring applications)
- Circular saw or jigsaw
- Tape measure and pencil
- Screws (1-5/8 inches or 2 inches long, depending on the thickness of plywood and floorboards)
- Impact driver or drill
- Straightedge or level
- Skid-resistant construction adhesive (optional)
Step-by-Step Instructions:
1. Prepare the Floorboards:Remove any existing floor coverings, such as carpets or linoleum. Clean the floorboards thoroughly to remove any dirt, debris, or nails. If there are any loose or damaged floorboards, secure or replace them before proceeding.
2. Determine Plywood Orientation:Orient the plywood panels perpendicular to the existing floorboards. This creates a stronger and more stable subfloor. Measure and mark the center of the room.
3. Cut Plywood Panels:Measure the length of the room along the perpendicular axis and cut the plywood panels to the appropriate size using a circular saw or jigsaw.
4. Lay the First Panel:Apply a thin layer of construction adhesive to the underside of the first plywood panel (optional but recommended). Align the panel with the marked center and place it onto the floorboards.
5. Secure the Panel:Drive screws through the plywood and into the floorboards every 6 inches along the edges and 12 inches in the field. Countersink the screws slightly below the surface of the plywood.
6. Continue Laying Panels:Continue laying the remaining plywood panels, staggering the joints between adjacent panels. Use a straightedge or level to ensure that the panels are flat and even.
7. Secure Remaining Panels:Drive screws through the plywood and floorboards as before. Ensure that all joints and edges are securely fastened.
8. Trim Excess Plywood:Trim any excess plywood around the edges of the room using a circular saw or jigsaw.
Tips for Success:
- Use high-quality plywood with a moisture-resistant coating to prevent warping or damage.
- Ensure that the floorboards are level and free of any unevenness or defects.
- Countersink the screws slightly below the surface of the plywood to create a smooth and even surface.
- Allow the adhesive to dry completely before moving heavy objects or installing flooring over the plywood.
- Protect the plywood from moisture by sealing the seams between panels and around the perimeter.
Conclusion:
Laying plywood on floorboards is an achievable task for DIY enthusiasts or experienced contractors. By following these instructions carefully and using the appropriate materials and tools, you can create a strong and durable subfloor that will enhance the performance and longevity of your flooring. Remember to take your time, pay attention to detail, and seek professional assistance if necessary. With a little effort and patience, you can transform your flooring with a smooth, level, and squeak-free plywood subfloor.

How To Lay A Plywood Floor

Laying A Plywood Subfloor Step By Guide And
.jpg?strip=all)
How To Install And Finish Plywood Flooring Ibuildit Ca

How To Lay A Plywood Floor

How To Lay A Plywood Floor

Laying New Wood Flooring Over Original Uneven Floorboards Le Arthur Wells

Plywood Flooring How To Install Floors Alternative Hardwood Part 1

Julian Cas S Diy Blog Archive Laying Hardboard How To What Use Where Buy

Why Preparation Work Is So Important When Installing Parquet Flooring

How To Lay Engineered Timber Floor Guide Fantastic Handyman Au
See Also
