How to Lay Vinyl Plank Flooring on Uneven Concrete Floors
Installing vinyl plank flooring on uneven concrete floors presents unique challenges, but achieving a smooth and professional-looking result is possible with proper preparation and the right techniques.
1. Assess the Unevenness
Begin by thoroughly inspecting the concrete floor's unevenness. Use a level to identify high or low spots and measure their depth. Determine the severity of the imperfections, as this will affect the thickness and type of underlayment required.
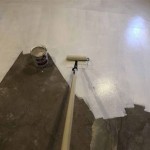
2. Prepare the Concrete Surface
Clean the concrete floor by removing any dirt, debris, or adhesives. Repair any cracks or holes using a concrete patch. Ensure the surface is completely dry and level it as much as possible with self-leveling concrete or a grinding machine.
3. Choose an Underlayment
An underlayment plays a crucial role in leveling the floor and providing a moisture barrier. Opt for a thick underlayment that is at least 6mm in thickness. Waterproof underlayments are also essential if the concrete floor is prone to moisture.
4. Install the Underlayment
Roll out the underlayment, starting from the edge of the room. Cut it to size with a utility knife and seam the sections together using underlayment tape. Overlap the underlayment at least 6 inches to prevent moisture penetration.
5. Install the First Row of Vinyl Planks
Begin installing the vinyl planks by measuring and cutting the first row to fit snugly against the wall. Use spacers along the walls and ends to ensure an even gap and alignment. Engage the planks into each other and attach them to the underlayment using flooring adhesive or a floating click-lock system.
6. Install Subsequent Rows
Continue installing the subsequent rows of vinyl planks by offsetting the ends by at least 6 inches. Staggering the joints reduces stress and prevents buckling or gaps. Apply flooring adhesive or snap the planks together as per manufacturer's instructions.
7. Level the Planks
As you install the planks, use a tapping block and hammer to level them. Strike evenly on the edges and center of each plank until it is flush with the adjacent planks. Avoid over-tapping, as it can damage the planks.
8. Trim and Install Final Pieces
Measure and cut the final pieces to fit against the walls or obstacles. Use a utility knife or miter saw for precise cuts. Fit the final pieces into place and tap them into position using a tapping block.
9. Allow Expansion Gaps
Allow for expansion gaps around the perimeter of the room and around obstacles. Use spacers or quarter-round molding to cover the gaps and prevent the vinyl planks from buckling.
10. Finish the Installation
After the vinyl planks are installed, remove the spacers and apply baseboards or quarter-round molding to conceal the edges and provide a polished finish.

Vinyl Plank Flooring On Uneven Concrete

Vinyl Plank Flooring On Uneven Concrete

10 Beginner Mistakes Installing Vinyl Plank Flooring

How Can I Prepare Uneven Concrete Basement Floor For Vinyl Planks Home Improvement Stack Exchange

How To Prepare A Concrete Floor For Vinyl Flooring Parrys

Should We Be Concerned About Vinyl Plank Installed Over Uneven Floors

Concrete Subfloor Preparation For The Vinyl Floor Installation How To Diy Mryoucandoityourself

Easy Ways To Install Vinyl Plank Flooring On Concrete

10 Beginner Mistakes Installing Vinyl Plank Flooring Fixthisbuildthat

20 Tips For A Great Vinyl Plank Flooring Installation
See Also