How to Level a Chipboard Floor: A Comprehensive Guide
Chipboard flooring, also known as particleboard, is a popular choice for its affordability and ease of installation. However, leveling a chipboard floor can be a challenging task, especially if it has become uneven over time. This guide will provide you with comprehensive instructions on how to level a chipboard floor, ensuring a smooth and level surface for your flooring project.
1. Assess the Floor and Gather Materials
Begin by assessing the floor to determine the extent of unevenness. Use a level to identify low and high spots, and measure the differences in height. This will help you determine the appropriate leveling compound and the amount needed.
Gather the necessary materials, including:
- Self-leveling compound
- Mixing bucket and drill
- Trowel and notched spreader
- Spike roller
- Level
- Measuring tape
- Safety glasses and gloves
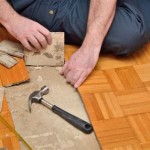
2. Prepare the Floor
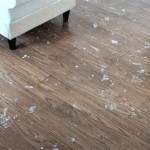
Thoroughly clean the floor to remove any dirt, debris, or old adhesive. Repair any damaged or missing chipboard panels using wood filler or epoxy. Ensure the floor is dry and free of moisture before applying the leveling compound.
3. Mix the Leveling Compound
Follow the manufacturer's instructions carefully when mixing the leveling compound. Use a drill with a mixing paddle to create a smooth, lump-free consistency. The mixture should be fluid enough to pour but not too runny.
4. Pour the Leveling Compound
Starting at the highest point on the floor, pour the leveling compound into sections of approximately 1 square meter. Use a notched spreader to evenly distribute the compound over the surface, working from the center outward.
5. Spread and Level
Use a trowel to smooth out the leveling compound, ensuring a consistent thickness. Run a spike roller over the surface to remove air bubbles and create a smooth, level finish.
6. Check for Levelness
Use a level to check the floor for levelness. If any areas are still uneven, apply additional leveling compound as needed. Repeat steps 4 and 5 until the entire floor is level.
7. Allow to Set
Allow the leveling compound to set and cure according to the manufacturer's instructions. This may take several hours or overnight. Do not walk on the floor or apply additional weight until the compound is fully cured.
8. Finishing Touches
Once the leveling compound is cured, you can install your desired flooring material, such as carpet, laminate, or vinyl. Ensure the new flooring is properly secured to the leveled chipboard floor.
Leveling a chipboard floor requires patience, attention to detail, and the proper materials. By following these steps carefully, you can achieve a smooth and level surface that will enhance the appearance and durability of your flooring project.

How To Level A Floor Flooring Tiling B Q

Laying Chipboard Floating Flooring

How Do I Level A Chipboard Floor Ardex

Help With Uneven Chipboard Floor To Level And Prep For Tiles Tilers Forums

How To Level A Plywood Subfloor With And Self Leveling Compound

Best Way To Level Chipboard Hallway Diynot Forums

How To Level A Wooden Floor

Can I Use Self Leveling Compound On A Chipboard Osb Mryoucandoityourself

Preparing A Chipboard Floor For Painting Property Home Survive France

How Can We Lay A Wood Floor On An Uneven Surface And Make It Look Level Not Tilted Quora
See Also