How to Level Subfloor Before Tile Installation
Proper subfloor preparation is paramount for a successful and long-lasting tile installation. Tile, being a rigid material, is unforgiving and requires a consistently level and stable surface to prevent cracking, lippage (uneven tile edges), and grout failure. A poorly leveled subfloor will inevitably lead to these problems, resulting in costly repairs and potential aesthetic dissatisfaction. This article provides a comprehensive guide on how to level a subfloor prior to tile installation, covering essential tools, techniques, and best practices.
Before embarking on the leveling process, a thorough inspection of the existing subfloor is crucial. This assessment will determine the extent of the leveling required and the appropriate methods to employ. Identifying and addressing underlying issues such as structural weaknesses, moisture problems, or loose fasteners is essential before proceeding with any leveling solutions.
Key Point 1: Assessing and Preparing the Subfloor
The first step in ensuring a properly leveled substrate for tile is a comprehensive assessment. This involves both visual inspection and the use of tools to identify uneven areas and potential underlying problems. This meticulous evaluation serves as the foundation for a successful tile installation.
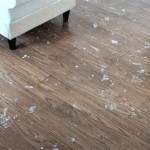
Visual Inspection: Begin by carefully examining the entire subfloor surface. Look for obvious signs of unevenness, such as dips, humps, or warping. Pay close attention to areas around walls, doorways, and plumbing fixtures, as these are often prone to settling or damage. Note any areas where the subfloor appears to be sagging or flexing excessively when walked upon. Identify any signs of water damage, such as staining, discoloration, or mold growth. Addressing moisture issues is paramount before proceeding with any leveling work, as moisture can compromise the integrity of the subfloor and affect the adhesion of tile and leveling compounds.
Using a Level and Straightedge: A long level (at least 6 feet) and a straightedge are essential tools for accurately identifying uneven areas. Place the level on the subfloor in various directions, both parallel and perpendicular to the joists. Observe the bubble in the level to determine if the surface is level. Note any areas where the bubble indicates a significant deviation from level. The straightedge can be used to detect smaller variations in the surface. Place the straightedge on the subfloor and look for gaps between the straightedge and the surface. These gaps indicate low spots that will need to be filled. Mark all identified uneven areas with a pencil or marker for easy reference during the leveling process.
Checking for Stability and Fasteners: Ensure the subfloor is securely fastened to the floor joists. Loose or missing fasteners can contribute to flexing and unevenness. Inspect all screws or nails and replace any that are loose, damaged, or missing. If the subfloor is significantly warped or damaged, it may be necessary to replace sections of the subfloor entirely. This is particularly important if the damage is extensive or if it compromises the structural integrity of the floor. Prior to any leveling application, thoroughly clean the subfloor surface. Remove any debris, dust, dirt, grease, or paint. A clean surface promotes proper adhesion of leveling compounds and ensures a long-lasting, durable tile installation. Vacuuming is an effective way to remove loose debris. For stubborn residues, use a scraper or solvent cleaner, following the manufacturer's instructions carefully. Once cleaned, apply a suitable primer to the subfloor. Primer enhances the adhesion of the leveling compound to the subfloor and helps to prevent moisture absorption.
Key Point 2: Leveling Compounds and Techniques
Once the subfloor is properly assessed and prepared, the application of leveling compound can commence. Selecting the appropriate leveling compound and employing the correct application techniques are critical for achieving a smooth, level surface.
Selecting a Suitable Leveling Compound: Various types of leveling compounds are available, each formulated for specific applications and subfloor materials. Self-leveling underlayments (SLUs) are commonly used for leveling large areas. These compounds are typically cement-based and are designed to flow freely and automatically level themselves. Rapid-setting leveling compounds are ideal for smaller areas or for situations where quick turnaround is required. These compounds cure quickly, allowing for tile installation to proceed sooner. Patching compounds are used to fill small holes, cracks, or imperfections in the subfloor. These compounds are typically thicker than SLUs and are designed to be applied with a trowel or putty knife.
When selecting a leveling compound, consider the following factors: The type of subfloor material (e.g., plywood, OSB, concrete); the extent of the unevenness (e.g., minor imperfections, large dips); the desired drying time; and the compatibility with the chosen tile and adhesive. Always consult the manufacturer's instructions for specific recommendations and application guidelines.
Mixing and Applying Leveling Compound: Mixing leveling compound according to the manufacturer's instructions is crucial. Add the correct amount of water to the dry powder and mix thoroughly using a mixing drill and paddle. Ensure the mixture is lump-free and has a smooth, consistent consistency. The consistency should be pourable but not too watery. Before pouring self-leveling compound, seal any gaps or cracks in the subfloor to prevent the compound from leaking through. This can be done with a sealant or patching compound. Depending on the size of the area, it may be helpful to divide the subfloor into sections using temporary dams or barriers. This helps to control the flow of the leveling compound and ensures even coverage. Pour the leveling compound onto the subfloor, starting in the deepest areas. Use a gauge rake or smoother to distribute the compound evenly and to remove any air bubbles. Follow the manufacturer's instructions for the recommended thickness of the leveling compound. For smaller areas or for patching imperfections, apply the leveling compound with a trowel or putty knife. Feather the edges of the compound to blend seamlessly with the surrounding subfloor. Allow the leveling compound to dry completely according to the manufacturer's instructions. Drying times can vary depending on the type of compound, the thickness of the application, and the ambient temperature and humidity.
Key Point 3: Addressing Specific Subfloor Issues
Certain subfloor issues require specific attention and techniques to ensure a successfully leveled surface. Identifying and addressing these issues proactively is essential for preventing problems down the line.
Dealing with Cracks: Cracks in the subfloor can be a sign of structural problems or settling. Small, hairline cracks can be filled with a patching compound or crack filler. Widen the crack slightly with a utility knife or chisel to create a better bond for the filler. Apply the filler according to the manufacturer's instructions and allow it to dry completely. Larger cracks or structural cracks may require more extensive repairs. Consult with a structural engineer or qualified contractor to assess the extent of the damage and to determine the appropriate repair strategy. This may involve reinforcing the subfloor or replacing damaged sections. Expansion joints are designed to accommodate movement in the subfloor and should not be filled with leveling compound. Instead, maintain the expansion joint and cover it with a flexible sealant or a tile profile specifically designed for expansion joints.
Addressing Moisture Problems: Moisture can damage the subfloor, promote mold growth, and compromise the adhesion of tile and leveling compounds. Identify and eliminate the source of the moisture. This may involve repairing leaks, improving ventilation, or installing a moisture barrier. If the subfloor is damp, allow it to dry completely before applying any leveling compounds. Use a moisture meter to check the moisture content of the subfloor. Follow the manufacturer's instructions for acceptable moisture levels. In areas prone to moisture, consider installing a waterproof membrane over the subfloor before tiling. This will provide an additional layer of protection against moisture damage. Ensure that the subfloor is properly ventilated to prevent moisture buildup. This is particularly important in bathrooms and kitchens. Proper ventilation can help to maintain a stable moisture level and prevent mold growth.
Handling Uneven Transitions: Uneven transitions between different flooring materials or between rooms can create a tripping hazard and detract from the aesthetic appeal of the tile installation. Use a transition strip to seamlessly bridge the gap between the tile and the adjacent flooring material. Transition strips are available in various materials and styles to match the tile and surrounding decor. For larger transitions, you may need to build up the subfloor to create a smooth, gradual transition. This can be done by layering plywood or other suitable materials. Ensure that the transition is structurally sound and securely fastened to the subfloor. In some cases, grinding down the high point of the subfloor may be necessary to create a level transition. This requires specialized tools and techniques and should be performed by a qualified professional.
By meticulously assessing the subfloor, selecting appropriate leveling compounds, and addressing specific issues proactively, a properly leveled subfloor can be achieved, ensuring a tile installation that is both aesthetically pleasing and structurally sound. The adherence to manufacturer's guidelines and best practices significantly contributes to the longevity and overall success of the tile project.

How To Level A Subfloor Before Laying Tile

How To Prepare A Subfloor For Tile Installation The Home

How To Level A Floor For Tile Expert Tips And Advice

How To Prepare A Subfloor For Tile Installation The Home

How To Level Floors For Tile Get It Ready

How To Prepare A Subfloor For Tile Installation The Home

How To Level A Subfloor Before Laying Tile

How To Prepare Subfloor For Tile The Home
%20(2).png?strip=all "How To Level A Subfloor Lay Flooring")
How To Level A Subfloor Lay Flooring

How To Level A Subfloor Before Laying Tile
See Also