How to Prep Subfloor For Tile Bathroom Flooring
Preparing the subfloor correctly is a critical step in any successful tile installation, particularly in a bathroom. Achieving a professional and long-lasting tile floor relies heavily on the soundness and stability of the underlying surface. Neglecting proper subfloor preparation can lead to cracked tiles, loose grout, and ultimately, a compromised bathroom renovation. This article details the necessary steps to ensure the subfloor is ready to receive tile, providing a durable and aesthetically pleasing result.
Before any actual preparation can begin, a thorough inspection of the existing subfloor is essential. This assessment will determine the necessary repairs, modifications, and enhancements required to create a suitable foundation for tile. Identify any signs of damage, such as water stains, rot, mold, or insect infestation. Addressing these issues early on is vital to prevent future problems. A warped or uneven subfloor will also need to be identified and corrected, as it will cause problems with tile adhesion and leveling.
The type of subfloor material will also dictate the appropriate preparation methods. Common subfloor materials include plywood, oriented strand board (OSB), and concrete. Each material has its own specific requirements regarding moisture control, reinforcement, and surface preparation. Understanding the characteristics of the existing subfloor will guide the selection of appropriate products and techniques.
Assessing the Subfloor's Structural Integrity
The first and most crucial step is to evaluate the structural integrity of the existing subfloor. The subfloor must be able to support the weight of the tile, mortar, and any fixtures installed on top. Any signs of weakness, such as excessive deflection or soft spots, must be addressed before proceeding. Walking across the subfloor and paying close attention to any areas that sag or flex is a good way to identify potential problems.
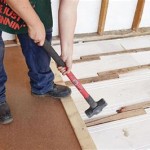
If any areas feel spongy or appear to be deteriorating, probe them with a screwdriver or other sharp tool. If the tool easily penetrates the wood, it indicates rot or decay. Affected areas must be removed and replaced with new, structurally sound material. Extend the replacement beyond the visibly damaged area to ensure all compromised material is eliminated. Use screws to fasten the new subfloor patches securely to the joists below, ensuring they are flush with the surrounding surface. Using construction adhesive in addition to screws will provide an even stronger bond.
For concrete subfloors, inspect for cracks, crumbling, or uneven surfaces. Small cracks can often be repaired with a concrete crack filler. Larger cracks, however, may indicate a more serious structural issue and should be evaluated by a professional. A self-leveling compound can be used to correct minor unevenness in concrete subfloors. Follow the manufacturer's instructions carefully when applying self-leveling compound to ensure a smooth and even surface.
A level can be used to assess the overall flatness of the subfloor. Place a long level across the subfloor in multiple directions. Note any areas where the level indicates significant dips or rises. These areas may require shimming or leveling compound to create a uniformly flat surface.
Cleaning and Preparing the Subfloor Surface
Once the structural integrity of the subfloor has been confirmed and any necessary repairs completed, the next step is to thoroughly clean the surface. This will remove any dirt, dust, debris, grease, or adhesives that could interfere with the proper adhesion of the tile mortar. A clean surface is essential for creating a strong and durable bond between the subfloor and the tile.
Start by sweeping or vacuuming the entire subfloor surface to remove loose debris. For wood subfloors, scrape away any old adhesive residue or paint chips using a floor scraper or putty knife. Pay particular attention to areas where carpet or linoleum may have been previously installed. Vacuum again after scraping to remove any remaining debris. For concrete subfloors, use a wire brush to remove any loose concrete or debris. A concrete grinder can be used to smooth out rough spots or remove stubborn coatings.
After removing the loose debris, clean the subfloor with a suitable cleaning solution. For wood subfloors, use a mild detergent and water solution. Avoid using excessive water, as this can damage the wood. For concrete subfloors, use a concrete cleaner or degreaser to remove any oil or grease stains. Follow the manufacturer's instructions for dilution and application. Rinse the subfloor thoroughly with clean water to remove any remaining cleaning solution. Allow the subfloor to dry completely before proceeding to the next step. The drying time will depend on the material of the subfloor and the humidity levels in the room. Ensure adequate ventilation to speed up the drying process.
Once the subfloor is dry, it's important to ensure that there are no remaining imperfections that could compromise the tile installation. Check for any nail heads that are protruding above the surface. Hammer them down flush with the subfloor or remove them entirely and replace them with screws. Inspect the subfloor for any gaps or cracks that may have been missed during the initial assessment. Fill these gaps with a suitable wood filler or patching compound. Allow the filler to dry completely before sanding it smooth.
Adding a Cement Backer Board (CBU) or Waterproofing Membrane
In bathrooms, subfloor preparation almost always involves adding a layer of cement backer board (CBU) or a waterproofing membrane, especially over wood subfloors. These materials provide a stable, water-resistant surface that is ideal for tile installation. CBU is a cement-based board that is specifically designed for use under tile. It is highly resistant to moisture and provides a strong, rigid surface for the tile to adhere to. Waterproofing membranes provide a barrier against moisture penetration, protecting the subfloor from water damage. These membranes can be sheet-based or liquid-applied.
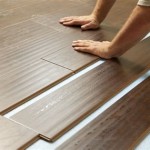
When installing CBU, cut the boards to fit the dimensions of the bathroom floor. Leave a small gap (approximately 1/8 inch) between the boards and the walls. This gap allows for expansion and contraction and prevents cracking. Apply a thin-set mortar to the subfloor using a notched trowel. Place the CBU boards onto the mortar, making sure they are firmly seated. Secure the boards to the subfloor with cement board screws, spacing them according to the manufacturer's instructions. Tape the seams between the CBU boards with a cement board tape and thin-set mortar to create a smooth, continuous surface.
For waterproofing membranes, choose a product that is specifically designed for use under tile. Follow the manufacturer's instructions carefully when applying the membrane. Most liquid-applied membranes require multiple coats. Allow each coat to dry completely before applying the next. Overlap the membrane onto the walls by several inches to create a watertight seal. Sheet-based membranes are typically adhered to the subfloor using a thin-set mortar or a special adhesive. Overlap the seams between the sheets according to the manufacturer's instructions. Roll the seams with a seam roller to ensure a tight seal.
When selecting a waterproofing membrane, consider the specific requirements of the tile and grout being used. Some tiles and grouts require a specific type of membrane to ensure proper adhesion and prevent staining. Consult the manufacturer's recommendations to determine the appropriate membrane for your project. It’s also important to consider the type of shower or tub you're installing. If you're installing a steam shower, you'll need a more robust waterproofing system to handle the higher levels of moisture. If you're installing a tub with a shower, you'll need to ensure that the waterproofing membrane extends up the walls to protect them from water damage.
In conclusion, meticulously preparing the subfloor for tile installation in a bathroom is crucial for achieving a durable and aesthetically pleasing result. By thoroughly assessing the subfloor's structural integrity, cleaning and preparing the surface, and adding a cement backer board or waterproofing membrane, one can create a solid foundation for a successful tile project. Neglecting these steps can lead to costly repairs and premature failure of the tile installation. Careful attention to detail during the subfloor preparation process is an investment in the long-term performance and beauty of the tiled bathroom floor.

How To Install Cement Board On A Floor Diy Family Handyman

Bathroom Subfloor Prep For Tile Pelican Parts Forums

Tile Underlayment The Complete Guide For Beginners Diytileguy

Tile Underlayment The Complete Guide For Beginners Diytileguy

How To Level A Subfloor Before Laying Tile

How To Lay Tile Install A Ceramic Floor In The Bathroom Diy

Waterproofing How Do I Correctly Install Ceramic Floor Tile Home Improvement Stack Exchange

How To Install A Tile Floor In Your Bathroom Dumpsters Com

How To Tile A Floor Step By Installation Guide

Waterproofing How Do I Correctly Install Ceramic Floor Tile Home Improvement Stack Exchange
See Also