How to Install Plywood on a Concrete Floor in a Basement
Installing plywood on a concrete floor in a basement can be a great way to improve the look and feel of your space, while also providing a more comfortable surface to walk on. The process is relatively simple and can be completed in a few hours.Here are the materials you will need:
- Plywood (minimum 1/2-inch thickness)
- Vapor barrier (6-mil polyethylene sheeting)
- Wood screws (2-inch length)
- Drill
- Circular saw or jigsaw
- Tape measure
- Chalk line
Here are the steps to follow:
1. Prepare the Floor
The first step is to prepare the concrete floor by cleaning and leveling it. Remove any dirt or debris from the floor, and then use a level to check for any uneven areas. If there are any low spots, you can fill them in with a self-leveling concrete mix.2. Install the Vapor Barrier
Once the floor is prepared, you need to install a vapor barrier to prevent moisture from seeping up through the concrete. Cut the vapor barrier to the size of the floor, and then lay it down on the floor, overlapping the edges by 6 inches. Tape the edges of the vapor barrier together to seal them.3. Install the Plywood
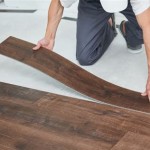
The next step is to install the plywood. Start by measuring the floor and cutting the plywood to size. Then, lay the plywood down on the vapor barrier, starting in one corner of the room.4. Screw Down the Plywood
Once the plywood is in place, you need to screw it down to the concrete floor. Use 2-inch wood screws and a drill to drive the screws through the plywood and into the concrete. Space the screws evenly apart, about 6 inches apart.5. Trim the Plywood
Once the plywood is screwed down, you need to trim the edges so that they fit snugly against the walls. Use a circular saw or jigsaw to cut the plywood to size.6. Sand the Plywood
Finally, sand the plywood to smooth out any rough edges. You can use a hand sander or a power sander for this step.7. Finish the Plywood
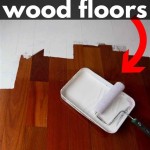
Once the plywood is sanded, you can finish it with paint, stain, or sealant. This will help to protect the plywood from moisture and wear.Additional Tips:
* If you are installing plywood in a large area, it is a good idea to stagger the joints between the plywood sheets. This will help to prevent the floor from buckling. * Use a chalk line to snap a line around the perimeter of the room before you start installing the plywood. This will help you to ensure that the plywood is installed evenly. * If you are working in a cold basement, allow the plywood to warm up to room temperature before you install it. This will help to prevent the plywood from warping.
Installing Wood Flooring Over Concrete Diy

How To Install A Barn Board Floor Over Concrete Tutorial Diy Passion

How To Install A Wood Subfloor Over Concrete Rona

How To Install A Wood Subfloor Over Concrete Rona

Installing Wood Subfloors Over Concrete Hardwood Floors

How To Install A Wood Subfloor Over Concrete Rona

Installing Rigid Foam Above A Concrete Slab Greenbuildingadvisor

Breakfast Room Progress Plywood Subfloor Installed Over Concrete Slab For Nail Down Solid Hardwood Flooring Addicted 2 Decorating

How To Install Concrete Over Plywood Sub Floor

Installing Rigid Foam Above A Concrete Slab Greenbuildingadvisor
See Also