How to Put Vinyl Plank Flooring on Steps
Vinyl plank flooring is a popular choice for both residential and commercial properties. It is durable, easy to clean, and available in a wide variety of styles. Vinyl plank flooring can also be installed on stairs, which can add a touch of elegance and sophistication to your home.
Installing vinyl plank flooring on stairs is a relatively simple process, but it does require some precision. Here are the steps on how to do it:
Materials You'll Need
- Vinyl plank flooring
- Underlayment
- Stair nosing
- Adhesive
- Caulk
- Mitre saw
- Tape measure
- Level
- Hammer
- Nail gun
- Safety glasses
Step 1: Prepare the Stairs
The first step is to prepare the stairs for installation. This involves removing any existing flooring, cleaning the surface, and making sure that the stairs are level. If the stairs are not level, you will need to level them before you can install the vinyl plank flooring.
Step 2: Install the Underlayment
Once the stairs are prepared, you need to install the underlayment. The underlayment will help to protect the vinyl plank flooring from moisture and wear and tear. There are a variety of different underlayments available, so be sure to choose one that is appropriate for your needs.
Step 3: Install the Vinyl Plank Flooring
Once the underlayment is installed, you can begin installing the vinyl plank flooring. Start by measuring and cutting the planks to fit the stairs. Be sure to leave a small gap between the planks and the wall to allow for expansion and contraction.
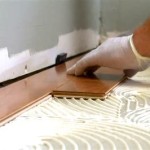
Once the planks are cut, you can begin installing them. Apply a thin layer of adhesive to the back of each plank and then press it into place. Be sure to use a level to make sure that the planks are level.
Step 4: Install the Stair Nosing
Once the vinyl plank flooring is installed, you need to install the stair nosing. The stair nosing will help to protect the edge of the stairs and give them a finished look.
To install the stair nosing, measure and cut it to fit the stairs. Then, apply a thin layer of adhesive to the back of the stair nosing and press it into place. Be sure to use a level to make sure that the stair nosing is level.
Step 5: Caulk the Gaps
Once the stair nosing is installed, you can caulk the gaps between the planks and the wall. This will help to seal the joints and prevent moisture from getting in.
To caulk the gaps, apply a thin bead of caulk to the joint and then smooth it out with your finger. Be sure to wipe away any excess caulk.
Step 6: Enjoy Your New Vinyl Plank Flooring
Once the caulk is dry, you can enjoy your new vinyl plank flooring. Vinyl plank flooring is a durable and easy-to-clean flooring option that can add a touch of elegance and sophistication to your home.

How To Install Laminate On Stairs Step By For Beginners

How To Install Luxury Vinyl Plank Laminate Flooring On Stairs

How To Install Vinyl Plank Flooring On Stairs In 6 Steps

How To Make A Vinyl Plank Stair Nosing

Luxury Vinyl Tile Seamless Upstairs And Downstairs Solution

How To Install Lvp Stairs Diy

How To Install Vinyl Flooring On Stairs

How To Install Vinyl Plank Flooring On Stairs

How To Install Luxury Vinyl Flooring On Stairs

Pros And Cons Of Installing Vinyl Flooring On Stairs Lx Hausys
See Also


