How To Remove A Laminate Floor Board
Laminate flooring offers an attractive and affordable flooring solution. However, individual boards can become damaged or require removal for access to subfloor utilities. This article provides a step-by-step guide for removing a laminate floor board safely and effectively, minimizing disruption to the surrounding flooring.
1. Gathering Necessary Tools and Materials
Before beginning the removal process, gather the necessary tools and materials. These typically include a utility knife, pry bar, pull bar, tapping block, hammer, safety glasses, and potentially a circular saw with a fine-tooth blade. Having all tools readily available streamlines the process and prevents unnecessary interruptions.
2. Identifying the Damaged Board and Clearing the Area
Locate the specific laminate board requiring removal. Clear the area surrounding the board of any furniture, rugs, or obstructions. This provides ample workspace and prevents damage to surrounding items during the removal process.
3. Cutting the Damaged Board
Using a utility knife or circular saw with a fine-tooth blade, score the surface of the damaged board along its length and width. This scoring process weakens the board, making it easier to break apart and remove without affecting the interlocking mechanism of adjacent boards. When using a circular saw, set the blade depth shallowly to avoid damaging the subfloor.
4. Breaking and Removing the Board Pieces
Using a hammer and chisel, carefully break apart the scored sections of the laminate board. Start from the center of the board and work outwards towards the edges. Once broken into smaller pieces, these pieces can be removed individually using a pry bar. Exercise caution to avoid damaging the tongue-and-groove edges of surrounding boards.
5. Utilizing a Pull Bar for Stubborn Pieces
For particularly stubborn pieces, a pull bar can provide additional leverage. Place the pull bar against the edge of the damaged board and gently tap it with a hammer to loosen the piece from the subfloor adhesive or interlocking mechanism. The pull bar helps minimize damage to adjacent boards.
6. Cleaning the Area and Preparing for Replacement
Once the damaged board is completely removed, thoroughly clean the exposed subfloor area. Remove any remaining adhesive, debris, or underlayment fragments. This ensures a clean and level surface for installing the replacement board.
7. Preparing the Replacement Board
If the old board was salvageable, it can be reinstalled. Otherwise, prepare the replacement board by cutting it to the precise dimensions of the removed board. Ensure the tongue and groove edges are intact for proper fitting with the surrounding boards. If necessary, apply a thin layer of laminate flooring adhesive to the subfloor area where the replacement board will be placed.
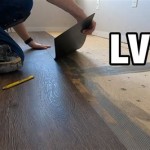
8. Installing the Replacement Board
Carefully insert the replacement board into the gap, angling it slightly to engage the tongue-and-groove locking mechanism. Gently tap the board into place using a tapping block and hammer. Ensure the surface of the new board is flush with the surrounding flooring. Avoid applying excessive force which could damage the new board or surrounding boards.
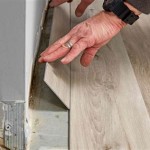
9. Checking the Stability and Fit
Once the replacement board is in place, carefully inspect the surrounding area for stability and proper fit. Walk on the newly installed board to ensure it is securely in place and doesn't move or creak. If any gaps or unevenness are observed, gently tap the board into place with the tapping block and hammer until it is flush and stable.
10. Addressing Subfloor Issues (If Necessary)
If the removed board revealed any subfloor issues, such as unevenness or moisture damage, address these issues before installing the replacement board. This might involve patching the subfloor, adding a moisture barrier, or leveling the surface to ensure the new board sits properly and avoids future damage.
11. Utilizing a Floor Repair Kit for Minor Damages
For minor damage to a laminate floor board, such as chips or scratches, a floor repair kit can be used instead of complete board replacement. These kits typically contain putty or filler materials that can be colour-matched to the flooring and used to repair the damaged area. This approach offers a quicker and less invasive solution for minor cosmetic issues.
12. Safety Considerations
Throughout the entire process, prioritize safety. Always wear safety glasses to protect your eyes from debris. When using power tools, follow the manufacturer's instructions carefully. Be mindful of sharp edges on tools and broken laminate pieces. Use caution when handling pry bars and pull bars to avoid injury.

Laminate Floor Repair Diy Family Handyman

How To Remove Laminate Flooring

How To Remove Laminate Flooring The Home

How To Replace Laminate Flooring Episode 7 Howtospecialist Build Step By Diy Plans

How To Remove Laminate Flooring

How To Remove Laminate Flooring The Home

How To Remove Laminate Flooring Lcf Ltd

How To Replace Damaged Flooring Plank Diy

How To Replace Lock Vinyl Flooring

How To Remove Laminate Flooring Budget Dumpster
See Also