How to Remove Ceramic Tile Adhesive from Concrete Floor: A Comprehensive Guide
Removing ceramic tile adhesive from a concrete floor can be a laborious task, but it is crucial for preparing the surface for new flooring or other purposes. Here's a comprehensive guide to help you navigate this process effectively.
1. Safety First
Wear protective gear, including safety glasses, gloves, and a mask, as the process can generate dust and potentially harmful particles. Ensure proper ventilation by opening windows or using fans.
2. Identify Adhesive Type
Determine the type of adhesive used. Thin-set mortar and mastic are common types. Knowing the adhesive will guide the selection of removal methods.
3. Mechanical Removal Using Grinder
For thick or stubborn adhesives, consider using an angle grinder with a diamond blade. Grind the adhesive in a controlled manner, being careful not to damage the concrete floor. Use a vacuum or dust collection system to control dust.
4. Chemical Removal with Solvent
If the adhesive is thin or mastic-based, chemical solvents like methylene chloride or dimethylformamide can be effective. Apply the solvent according to the manufacturer's instructions, allowing it to penetrate the adhesive. Avoid using solvents on thin-set mortar.
5. Removal with Heat
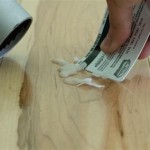
Heat softens adhesives, making them easier to remove. Use a heat gun or torch to heat the adhesive, being mindful of the concrete's temperature. As the adhesive softens, scrape it off using a putty knife or scraper.
6. Water-Based Removal
This method is less effective but can be used for thin adhesives. Apply water to the adhesive and allow it to soak for several hours. The water will penetrate the adhesive and weaken its bond, making it easier to scrape off.
7. Hand Scraping
After softening the adhesive using one of the above methods, scrape it off using a chisel, putty knife, or scraper. Start at the edges of the tile and work inward, applying gentle but firm pressure.
8. Surface Cleaning
Once the adhesive is removed, clean the concrete surface thoroughly using a broom or vacuum to remove any remaining dust or debris. If necessary, scrub the floor with a mild detergent solution to remove any residual adhesive residue.
9. Concrete Repair (Optional)
If the adhesive removal process has damaged the concrete floor, repairs may be necessary. Fill any holes or cracks using a concrete patch or repair kit. Allow the repairs to cure completely before proceeding with new flooring.
Additional Tips
- Test the removal methods on a small area before applying them to the entire floor.
- Avoid using harsh chemicals or abrasive materials that could damage the concrete.
- Dispose of removed adhesive and chemicals properly according to local regulations.
- If the adhesive is extensive or difficult to remove, consider hiring a professional contractor.

How To Remove Ceramic Tile Adhesive From Concrete Floor Alliance Flooring Directory

How To Remove Old Floor Tile Adhesive All Stripped

3 Easy Ways To Remove Tile Mortar Thinset From Cement Floor Tilemortar
Removing Old Tile Adhesive From Floor Tilers Forums

How To Remove Floor Tiles From Concrete Our Guide

How To Remove Thinset All Removal Tools Surfaces

How To Remove Ceramic Tile And Thinset The Nifty Nester

How To Remove Tile From A Concrete Floor

The Best Way To Remove Thinset From A Cement Foundation House Of Hepworths

How To Remove Tile Adhesive Maid2match
See Also
