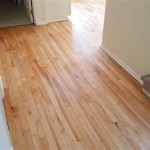
How to Remove Floating Floor Pieces
Floating floors, also known as engineered wood flooring, are popular choices for homeowners due to their ease of installation and durability. However, there may be instances where you need to remove these floor pieces, whether it's for repairs, replacement, or a complete renovation. While removing floating floors can seem daunting, it's a process that can be managed with the right tools and techniques. This article outlines the necessary steps to remove floating floor pieces successfully.
1. Locate the Starting Point
Before attempting to remove any pieces, it's essential to locate the starting point. Floating floors are typically laid in a staggered pattern, where each row is offset from the previous one. Find the last row laid, which will usually be along a wall or in a corner. This row will have no pieces overlapping it, making it the easiest point to begin removal.
If you're unsure where the starting point is, carefully examine the floor. Look for a seam where the floor transitions into another surface, like a doorway or a different type of flooring. This seam may indicate the end of a row and a good starting point for removal.
2. Remove Baseboards and Moldings
Baseboards and moldings can often hold the floor pieces in place, so removing them is necessary before proceeding. Begin by carefully prying the baseboards or moldings away from the wall using a pry bar or a utility knife. Be cautious not to damage the surrounding walls or the flooring itself. Once the baseboards or moldings are removed, you'll have better access to the floor pieces.
3. Remove the Last Row of Floor Pieces
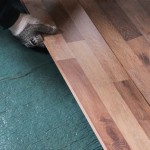
With the baseboards or moldings removed, start removing the last row of floor pieces. Use a pry bar to gently lift the edge of the floor piece away from the wall or the adjacent piece. Once you have a small gap, you can insert the pry bar further and carefully leverage it to lift the entire piece. Work your way along the row, removing each piece until you reach the end.
If the floor pieces are glued or adhered to the subfloor, you may need to use a scraper or a utility knife to break the adhesive bond before lifting them. However, it's advisable to check the installation instructions specific to your flooring type to determine the appropriate method for removing the pieces.
4. Remove Adjacent Rows
Once the last row is removed, you can start working on the adjacent rows. Carefully lift the edge of the floor piece closest to the removed row using a pry bar. Take care not to damage the surrounding pieces. Once you have a small gap, insert the pry bar and leverage it to lift the piece up.
5. Protect the Subfloor
As you remove the floor pieces, check the subfloor underneath. If there are any nails or staples protruding, carefully remove them to avoid damage when installing the new flooring. Use a hammer and nail puller to remove these fasteners safely. Additionally, it's essential to clean the subfloor thoroughly to ensure a smooth and secure installation for the new flooring.

How To Remove Laminate Flooring The Home

How To Replace Lock Vinyl Flooring

How To Remove Laminate Flooring

How To Remove Laminate Flooring A Step By Guide Mersey

How To Replace Damaged Flooring Plank Diy

How To Remove A Single Piece Of Hardwood Flooring The Art Doing Stuff

How To Remove Laminate Flooring Simple Worthy Methods

How Do I Remove Laminate Flooring Factory Direct

How To Replace A Vinyl Plank With Tongue And Groove Locking System

How To Remove A Single Piece Of Hardwood Flooring The Art Doing Stuff
See Also
