How to Remove Linoleum Flooring: A Complete Guide
Transforming the floor of your home can be daunting, but removing linoleum flooring doesn't have to be. Whether you're tackling a simple DIY project or preparing for a professional installation, understanding the steps involved will empower you to get the job done efficiently and effectively.
Step 1: Safety First
Wear protective gear, including gloves, eye protection, and a dust mask to minimize exposure to debris and chemicals. Turn off any electrical outlets near the work area and disconnect appliances if necessary.
Step 2: Identify the Adhesive
Determine the type of adhesive used to secure the linoleum. Common options include cutback adhesive, water-based adhesive, and pressure-sensitive adhesive. Knowing the adhesive type will guide your removal method.
Step 3: Remove Loose Linoleum
Using a pry bar or utility knife, carefully detach any loose or damaged linoleum. If the linoleum is strongly adhered, skip this step.
Step 4: Removing Cutback Adhesive
For cutback adhesive, use a chemical adhesive stripper specifically designed for this purpose. Apply the stripper liberally to the adhesive and allow it to dwell for the recommended time. Use a plastic scraper or putty knife to remove the softened adhesive.
Step 5: Removing Water-Based Adhesive
With water-based adhesive, create a solution of 50% warm water and 50% denatured alcohol. Apply the solution to the adhesive and allow it to soak for several minutes. Scrape off the adhesive using a plastic or metal scraper.
Step 6: Removing Pressure-Sensitive Adhesive
For pressure-sensitive adhesive, use a heat gun or hair dryer to soften the adhesive. Once softened, peel away the linoleum and use a citrus-based adhesive remover to clean up any remaining residue.
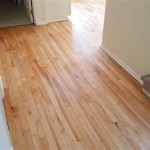
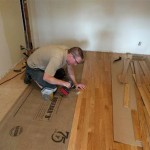
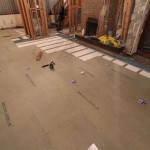
Step 7: Scrape Subfloor Clean
After removing the linoleum and adhesive, use a scraper to remove any remaining adhesive residue from the subfloor. This will ensure a clean and even surface for future flooring installation.
Tips for Success
- Work in small sections to prevent the adhesive from drying out.
- Be patient and persistent, especially with stubborn adhesives.
- Ventilate the work area adequately to minimize chemical fumes.
- Dispose of old linoleum and adhesives responsibly.
- If dealing with a large area or encountering significant difficulties, consider hiring a professional flooring contractor.
Conclusion
Removing linoleum flooring can be a manageable task with the right tools, techniques, and precautions. By following these steps and taking your time, you can successfully prepare your subfloor for a fresh and updated floor covering.

What You Should Know About Removing Old Linoleum Or Vinyl Flooring Hq Longwood Fl

How To Easily Remove Linoleum Houseful Of Handmade

How To Remove Vinyl Flooring The Home

How To Remove Linoleum 13 Steps With S Wikihow

Easy Way To Remove Lino Flooring At Least The Foam Backed Type

Best Way To Remove Linoleum Flooring Concrete

How To Remove Old Linoleum

How To Remove Linoleum Discount Dumpster Al

Tearing Out Old Kitchen Flooring Planitdiy

Mobile Homes Removing Vinyl Flooring Floor Prep For
See Also