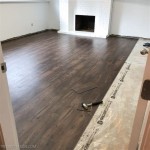
How To Remove Masking Tape Residue From Wood Floor
Masking tape is a ubiquitous tool in painting and DIY projects, offering a convenient way to protect surfaces and create clean lines. However, its adhesive nature can sometimes lead to an unwanted consequence: sticky residue left behind on wood floors. This residue is not only unsightly but can also attract dirt and grime, exacerbating the problem over time. Successfully removing masking tape residue requires careful consideration and the use of appropriate techniques to avoid damaging the wood floor's finish or the wood itself. This article will provide a comprehensive guide on how to effectively remove masking tape residue from wood floors, covering various methods and precautions to take.
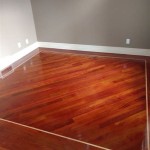
The type of adhesive used in the masking tape, along with the duration the tape was adhered to the floor, significantly impacts the tenacity of the residue. Fresh residue is generally easier to remove than residue that has been exposed to heat, sunlight, or has aged over a prolonged period. Furthermore, the finish applied to the wood floor plays a crucial role in determining the appropriate cleaning methods. A robust polyurethane finish will be more resistant to solvents and scrubbing than a delicate wax or oil finish. Therefore, understanding the type of finish on the wood floor is a prerequisite for choosing the right removal technique.
Before commencing any cleaning procedure, it is imperative to test the chosen method in an inconspicuous area of the floor. This preliminary step helps ascertain whether the cleaner or technique causes any discoloration, damage, or alteration to the floor's finish. A hidden spot, such as under a rug or piece of furniture, serves as an ideal testing ground. Observe the area for at least 24 hours after applying the test solution to ensure there are no adverse effects before proceeding with the entire affected area.
Understanding the Types of Masking Tape Residue
The characteristics of masking tape residue can differ based on factors such as the tape's composition, the length of time it remained on the surface, and environmental factors like temperature and humidity. Identifying the type of residue helps in selecting the most effective removal method.
Fresh Residue: This type of residue is typically soft and pliable, resulting from recently applied masking tape. It is generally easier to remove compared to aged residue because the adhesive hasn't had ample time to bond firmly with the wood floor. Gentle methods are often sufficient for removing fresh residue, minimizing the risk of damage to the floor's finish.
Aged Residue: When masking tape is left on a surface for an extended period, the adhesive can harden and become more difficult to remove. Exposure to heat, sunlight, and air can cause the adhesive to polymerize, forming a stubborn bond with the wood floor. Removing aged residue may require the use of stronger solvents or more abrasive techniques, demanding greater diligence to avoid damaging the wood floor.
Sticky Residue: Some masking tapes leave behind a particularly sticky type of residue due to the composition of their adhesive. This sticky substance attracts dust, dirt, and debris, further complicating the removal process. Special cleaning solutions or adhesive removers designed to break down sticky residues are often necessary to effectively tackle this type of problem.
Methods for Removing Masking Tape Residue
Several methods can be employed to remove masking tape residue from wood floors, each with its own advantages and disadvantages. The choice of method depends on the type and age of the residue, the type of finish on the floor, and personal preference. It is always advisable to start with the gentlest method and progressively move towards more aggressive techniques if necessary, always testing in an inconspicuous area first.
Warm Water and Soap: This is often the first and simplest approach to try, particularly for fresh residue. Mix a mild dish soap with warm water, creating a sudsy solution. Dip a soft cloth into the solution and gently wipe the affected area. Avoid excessive soaking, as water can damage wood floors. After wiping, dry the area thoroughly with a clean, dry cloth. This method is effective for loosening and removing light residue without harming the floor's finish.
Rubbing Alcohol (Isopropyl Alcohol): Rubbing alcohol is a solvent that can dissolve many types of adhesives. Apply a small amount of rubbing alcohol to a clean cloth and gently dab the residue. Avoid pouring alcohol directly onto the floor. Let the alcohol sit for a few seconds to dissolve the adhesive before wiping it away. Be cautious when using rubbing alcohol on floors with shellac or varnish finishes, as it can potentially damage these types of coatings. Always test in an inconspicuous area first.
Vinegar: White vinegar is a mild acid that can help loosen adhesive residue. Dilute white vinegar with water in a 1:1 ratio. Apply the solution to the affected area using a soft cloth, allowing it to sit for a few minutes to soften the residue. Wipe the area clean and dry thoroughly. Vinegar is a relatively safe and effective option for removing mild to moderate residue from most wood floor finishes but should still be tested beforehand.
Oil-Based Solutions: Oils, such as cooking oil, baby oil, or mineral oil, can penetrate the adhesive and loosen its bond with the floor. Apply a small amount of oil to the residue and let it sit for several minutes. Gently rub the area with a soft cloth or sponge to lift the residue. Wipe away the excess oil with a clean cloth and follow up with a wood floor cleaner to remove any remaining oil residue. This method is particularly useful for sticky residue and is generally safe for most wood floor finishes.
Hair Dryer: Applying heat to the residue can soften the adhesive, making it easier to remove. Use a hair dryer on a low heat setting and direct the warm air towards the residue. As the adhesive softens, gently scrape it away with a plastic scraper or a credit card. Be careful not to overheat the area, as excessive heat can damage the floor's finish. This method is best suited for small areas of residue.
Ice: In some cases, freezing the residue can make it brittle and easier to remove. Place an ice pack or a bag of ice cubes wrapped in a cloth on top of the residue for a few minutes. The cold can harden the adhesive, allowing you to gently scrape it away. Be careful not to leave the ice on the floor for too long, as excessive moisture can damage the wood.
Commercial Adhesive Removers: Several commercial adhesive removers are specifically designed to remove sticky substances from surfaces. When using these products, carefully follow the manufacturer's instructions and test the product in an inconspicuous area first. Ensure the product is compatible with wood floor finishes. These removers often contain stronger solvents and should be used with caution, providing adequate ventilation and wearing gloves.
Mechanical Removal (Scraping): For stubborn residue, gentle scraping may be necessary. Use a plastic scraper, a credit card, or a similar tool to carefully scrape away the residue. Avoid using metal scrapers, as they can easily scratch the floor's finish. Work slowly and gently, applying minimal pressure to avoid damaging the wood. This method is best used in conjunction with other cleaning solutions.
Precautions to Take When Removing Residue
Proper preparation and caution are crucial to prevent damage to the wood floor during the residue removal process. Implementing these precautions ensures a successful outcome and protects the floor's integrity.
Protect the Surrounding Area: Before starting, cover the surrounding area with drop cloths or plastic sheeting to protect it from cleaning solutions and debris. This prevents accidental spills and ensures that only the affected area is treated.
Ventilation: When using solvents or commercial adhesive removers, ensure adequate ventilation in the room. Open windows and doors or use a fan to circulate air. This helps to prevent the inhalation of harmful fumes and ensures a safe working environment.
Wear Protective Gear: Wear gloves to protect your hands from cleaning solutions and to prevent the transfer of oils from your skin to the floor. Safety glasses can also be worn to protect your eyes from splashes or fumes.
Avoid Abrasive Cleaners and Tools: Abrasive cleaners, steel wool, and harsh scrubbing pads can scratch and damage the floor's finish. Always use soft cloths, sponges, and plastic scrapers. Avoid excessive scrubbing, as this can also damage the finish.
Minimize Moisture: Wood is susceptible to water damage, so it's important to minimize moisture during the cleaning process. Avoid excessive soaking and always dry the area thoroughly after cleaning. Use a clean, dry cloth to absorb any remaining moisture.
Test in an Inconspicuous Area: As mentioned earlier, always test the chosen cleaning method in an inconspicuous area before applying it to the entire affected area. This ensures that the solution does not cause any discoloration, damage, or alteration to the floor's finish.
Proper Disposal: Dispose of used cloths, solvents, and adhesive removers properly, following local regulations. Some solvents may be flammable and require special handling. Refer to the product's safety data sheet (SDS) for specific disposal instructions.

4 Ways To Remove Adhesive From A Hardwood Floor Wikihow

Best Cleaner Ever To Remove Sticky Tape From Floors Etc Safe Easy

Easy Way To Remove Tape Residue Goo Gone

Best Cleaner Ever To Remove Sticky Tape From Floors Etc Safe Easy

4 Ways To Remove Adhesive From A Hardwood Floor Wikihow

How To Remove Tape Residue From My Wood Floor Knowledge Centre

How To Quickly And Easily Remove Tape Residue Stylus Tapes International

How To Remove Double Sided Carpet Tape On Linoleum Kitchen Floor Hometalk

4 Ways To Remove Adhesive From A Hardwood Floor Wikihow

Remove Sticky Tape Residue Glue Clean Sticker Adhesive Super Easy Strong Diy Cleaner
See Also