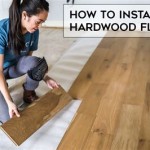
How To Remove Vinyl Flooring In Bathroom Without Windows
Removing old vinyl flooring, particularly in a bathroom without windows, presents unique challenges. The lack of natural ventilation combined with the potential for adhesives and moisture requires careful planning and execution to ensure a safe and efficient removal process. This article provides a detailed guide on how to effectively remove vinyl flooring from a bathroom lacking natural ventilation, focusing on techniques, tools, and safety precautions necessary for a successful outcome.
Before commencing any removal work, thorough preparation is crucial. This includes gathering the necessary tools and materials, ensuring adequate ventilation, and taking precautions to protect the surrounding areas from damage.
The first step involves acquiring the appropriate tools. Essential items include a utility knife with replacement blades, a scraper (both a long-handled floor scraper and a smaller, handheld scraper), a heat gun or hair dryer, a pry bar, safety glasses, gloves, a dust mask or respirator, and heavy-duty trash bags for disposal. Additionally, a shop vacuum is beneficial for cleanup after each step.
Given the absence of windows, compensating for the lack of natural ventilation is paramount. This can be achieved through the use of a portable fan to circulate air and exhaust fumes. Position the fan to draw air out of the bathroom, preferably towards a doorway leading to a well-ventilated area. Consider using an air purifier with a HEPA filter to further reduce airborne particles and odors.
Protecting the surrounding areas is also vital. Cover any fixtures such as toilets, sinks, and bathtubs with drop cloths or plastic sheeting to prevent scratches or damage from falling debris. Tape the edges of the sheeting securely to the walls or fixtures to ensure they remain in place throughout the removal process.
Preparing the Vinyl Flooring for Removal
The ease of removing vinyl flooring largely depends on the type of adhesive used and the age of the flooring. Some vinyl floors may peel up relatively easily, while others are bonded more aggressively to the subfloor. Softening the adhesive is often necessary to facilitate removal.
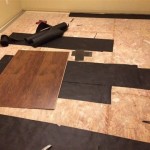
The initial step involves scoring the vinyl flooring with a utility knife. Cut the flooring into smaller, manageable sections, typically squares or rectangles of approximately 12 to 24 inches in size. This makes it easier to lift and peel the vinyl from the subfloor. Multiple passes with the utility knife may be necessary to cut through the entire thickness of the vinyl.
Heat is a valuable tool for softening stubborn adhesives. A heat gun or hair dryer can be used to warm the vinyl flooring, making the adhesive more pliable. Apply heat to a small section of the flooring for a few seconds, then attempt to lift an edge with a scraper. If the vinyl lifts easily, continue applying heat and peeling back the flooring. If resistance is encountered, apply more heat until the adhesive softens sufficiently. Exercise caution when using a heat gun to avoid overheating or damaging the subfloor.
For areas where the vinyl flooring is particularly difficult to remove, consider using a solvent-based adhesive remover. Select a product specifically designed for vinyl flooring and follow the manufacturer's instructions carefully. Apply the adhesive remover to the stubborn areas, allowing it to soak in for the recommended time. This will help to break down the adhesive bond and make the flooring easier to remove.
Removing the Vinyl Flooring
With the vinyl flooring prepared, the next step is to physically remove it from the subfloor. This process requires patience and the use of appropriate tools to lift and scrape the flooring away without damaging the underlying surface.
Begin by using a scraper to lift an edge of the scored vinyl section. A handheld scraper is suitable for smaller areas and edges, while a long-handled floor scraper provides better leverage for larger sections. Apply steady pressure to the scraper, working it underneath the vinyl to loosen the adhesive bond. If the vinyl tears or resists removal, apply more heat or adhesive remover as needed.
As the vinyl is lifted, use a pry bar to gently lever it away from the subfloor. Insert the pry bar underneath the raised edge of the vinyl and apply gentle pressure to separate the flooring from the adhesive. Be careful not to apply excessive force, as this could damage the subfloor. Work slowly and methodically, moving along the scored lines to remove each section of vinyl.
Once a section of vinyl is removed, immediately place it into a heavy-duty trash bag. This helps to contain the mess and prevent adhesive residue from spreading throughout the bathroom. Dispose of the bags properly according to local regulations.
Continue this process, working section by section, until all of the vinyl flooring has been removed from the bathroom. Periodically check the ventilation to ensure that fumes are being adequately exhausted. Take breaks as needed to avoid fatigue and maintain focus on safety.
Cleaning and Preparing the Subfloor
After removing the vinyl flooring, the subfloor will likely have residual adhesive and debris. Thorough cleaning and preparation are essential before installing new flooring.
Start by scraping away any remaining adhesive residue with a floor scraper. Apply firm, even pressure to remove the adhesive without gouging or damaging the subfloor. A solvent-based adhesive remover can also be used to soften stubborn adhesive before scraping.
Once the bulk of the adhesive is removed, use a shop vacuum to clean the subfloor thoroughly. Vacuum up any loose debris, dust, and adhesive particles. Pay particular attention to corners and edges where debris may accumulate.
After vacuuming, clean the subfloor with a damp mop and a mild detergent solution. This will help to remove any remaining dirt and grime. Allow the subfloor to dry completely before proceeding to the next step. Ensure the room remains well ventilated during the drying process.
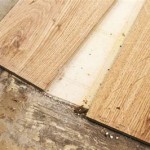
Inspect the subfloor for any damage, such as cracks, holes, or unevenness. Repair any damage with appropriate patching compounds or leveling compounds. Follow the manufacturer's instructions carefully when applying these products. Allow the repairs to cure completely before proceeding.
Finally, sand the subfloor lightly to create a smooth, even surface for the new flooring. This will help to ensure that the new flooring adheres properly and provides a professional-looking finish. Vacuum the subfloor again after sanding to remove any sanding dust.
Removing vinyl flooring from a bathroom without windows requires careful planning, the right tools, and a commitment to safety. By following these steps, the task can be completed effectively, the subfloor will be prepared for new flooring.

How To Install Vinyl Flooring In Bathroom Without Removing The Toilet

How To Remove Vinyl Flooring The Home

How To Install Vinyl Flooring In Bathroom Without Removing The Toilet

How To Install Vinyl Flooring In Bathroom Without Removing The Toilet

How To Install Vinyl Plank Flooring In A Bathroom Fixthisbuildthat

How To Install Vinyl Flooring In Bathroom Without Removing The Toilet

How To Install Vinyl Flooring In Bathroom Without Removing The Toilet

What To Do If Your Bathroom Has No Windows

How To Cover Ugly Al Bathroom Floors With A Vinyl Mat The Homes I Have Made

How To Remove Vinyl Flooring The Home
See Also