How to Remove Vinyl Flooring in a Bathroom Without Windows (Singapore)
Removing vinyl flooring from a bathroom, particularly one without windows in Singapore, presents unique challenges due to limited ventilation and potentially higher humidity levels. This article provides a comprehensive guide on safely and effectively removing vinyl flooring in such an environment, focusing on minimizing risks and achieving a clean subfloor for future flooring installation.
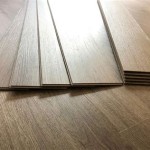
Vinyl flooring, commonly found in Singapore bathrooms, offers water resistance and durability. However, over time, it may become damaged, outdated, or require replacement due to mould or mildew growth underneath, especially in bathrooms lacking adequate ventilation. A well-planned approach is crucial to avoid damaging the subfloor and ensuring a healthy environment.
Preparing the Bathroom and Gathering Necessary Tools
Prior to commencing the removal process, thorough preparation is essential. The first step involves securing the bathroom. This includes shutting off the water supply to the toilet and sink to prevent accidental flooding during cleaning. Remove all movable items from the bathroom, such as toiletries, shower curtains, and wastebaskets. This provides a clear workspace and minimizes the risk of damage to personal belongings.
Adequate ventilation is paramount, especially in a bathroom without windows. Use a portable fan to circulate air and help dissipate any fumes released during the removal process. If possible, leave the bathroom door open to improve airflow into the rest of the house. Consider using an air purifier with a HEPA filter to capture dust and debris particles. Humidity is a significant concern in Singapore bathrooms, which can exacerbate the effects of adhesives and potentially promote mould growth during the removal process. A dehumidifier can help regulate moisture levels. Monitor the humidity level throughout the process and adjust the dehumidifier accordingly.
Gathering the appropriate tools is crucial for efficiency and safety. The following tools are recommended:
*Utility Knife:
For scoring and cutting the vinyl flooring into manageable sections. Ensure the blade is sharp for clean cuts. *Putty Knife or Scraper:
For lifting the vinyl from the subfloor. A variety of sizes may be necessary to accommodate different situations. *Heat Gun or Hair Dryer:
To soften the adhesive, making it easier to peel up the vinyl. Use caution to avoid overheating and damaging the subfloor. *Pry Bar:
For stubborn sections of vinyl that are difficult to lift with a putty knife. Use carefully to avoid damaging the subfloor. *Hammer:
To gently tap the putty knife or pry bar for leverage. *Floor Scraper:
A long-handled scraper with a wide blade for removing adhesive residue from the subfloor. *Safety Glasses:
To protect eyes from flying debris and dust. *Gloves:
To protect hands from adhesive and sharp edges. *Dust Mask or Respirator:
To protect respiratory system from dust and fumes. *Heavy-Duty Trash Bags:
For disposing of the removed vinyl and debris. *Cleaning Supplies:
Including a vacuum cleaner, broom, mop, and suitable cleaning solutions for removing adhesive residue.Removing the Vinyl Flooring
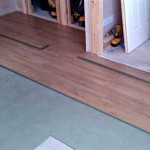
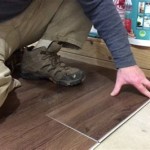
The removal process begins by scoring the vinyl flooring into strips or sections using a utility knife. This makes it easier to peel up the vinyl and reduces the risk of tearing it into small, unmanageable pieces. Cut along seams and edges first, then create parallel cuts approximately 12-18 inches apart. Exercise caution when using the utility knife to avoid cutting into the subfloor.
Utilize a heat gun or hair dryer to soften the adhesive underneath the vinyl. Direct the heat evenly over a section of the scored vinyl, holding the heat source a few inches away from the surface. Avoid overheating the vinyl, as this can cause it to melt or emit harmful fumes. The goal is to soften the adhesive enough to facilitate peeling.
Once the adhesive is softened, use a putty knife or scraper to lift an edge of the vinyl. Gently work the putty knife under the vinyl, applying pressure to separate it from the subfloor. If the vinyl is difficult to lift, apply more heat to the area. Gradually peel the vinyl away from the subfloor, working in sections. If the vinyl tears, rescore the area and apply more heat.
For stubborn sections of vinyl that are difficult to lift with a putty knife or scraper, a pry bar may be necessary. Position the pry bar under the edge of the vinyl and gently apply leverage to lift it. Exercise caution to avoid damaging the subfloor. Use a hammer to gently tap the pry bar for added leverage if needed. Work slowly and carefully to minimize the risk of cracking or splintering the subfloor.
As the vinyl is removed, immediately place it into heavy-duty trash bags. This helps contain the mess and prevents the spread of dust and debris. Take the trash bags outside to minimize the accumulation of odours and potential hazards inside the bathroom. Ensure proper disposal of the vinyl according to local regulations.
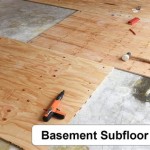
Cleaning and Preparing the Subfloor
After the vinyl flooring has been removed, the subfloor will likely have adhesive residue remaining. Removing this residue is crucial for ensuring a smooth and even surface for the new flooring installation. Start by using a floor scraper to remove as much of the adhesive as possible. Apply firm, even pressure to the scraper and work in overlapping strokes.
For stubborn adhesive residue, consider using a chemical adhesive remover. Choose a product that is specifically designed for removing vinyl flooring adhesive and is compatible with the subfloor material. Follow the manufacturer's instructions carefully when using chemical removers, paying particular attention to safety precautions and ventilation requirements. Apply the adhesive remover to the affected area and allow it to dwell for the recommended time. Then, use a floor scraper to remove the softened adhesive.
Once the adhesive residue has been removed, thoroughly clean the subfloor with a vacuum cleaner to remove any remaining debris and dust. Pay particular attention to corners and edges. After vacuuming, mop the subfloor with a suitable cleaning solution to remove any remaining residue and grime. Allow the subfloor to dry completely before proceeding with the new flooring installation.
Inspect the subfloor for any damage, such as cracks, holes, or unevenness. Repair any damage before installing the new flooring. Fill cracks and holes with a suitable patching compound and sand smooth. Level any uneven areas with a self-leveling compound. Ensure the subfloor is clean, dry, and level before proceeding with the new flooring installation. If there is any mould present, treat the affected areas with a mould remover and allow them to dry completely before proceeding.
Consider applying a primer to the subfloor before installing the new flooring. Primer helps improve adhesion and prevents moisture from seeping into the subfloor. Choose a primer that is compatible with the subfloor material and the new flooring. Follow the manufacturer's instructions carefully when applying the primer. Allow the primer to dry completely before proceeding with the new flooring installation. A properly prepared subfloor will ensure a long-lasting and aesthetically pleasing flooring installation.

Say Goodbye To Old Vinyl Tiles Dismantling And Floor Reinstatement Services In Singapore

Say Goodbye To Toilet Floor Leaks No Ing Waterproofing Solutions In Singapore

Dismantling Home Laminate Flooring In Singapore When To Remove And How Replace It

39 Renovation Regrets Revealed By First Time Homeowners

Sticky Situation What You Must Know Before Removing Glue From Vinyl Or Carpet Tiles In Singapore

How To Clean Vinyl Flooring From The Experts

Er Friendly Bathroom Floor Transformation Makeover Tiktok

33 Ways To Upgrade Your Al Bathroom Without Losing Deposit

Flooring Installation Tips How To Cut The Last Row For Vinyl Plank Floor Install

Vinyl Flooring Installation Repair Service Ls Handyman Singapore
See Also