How to Repair Floating Floor Boards
Floating floors offer a versatile and relatively easy-to-install flooring option. However, damage can occur through everyday wear and tear, accidents, or improper installation. Repairing these issues often requires a different approach than traditional hardwood floor repair. This article outlines effective methods for addressing common floating floor problems.
Assessing the Damage: Before initiating any repairs, careful assessment of the damage is crucial. This involves identifying the type of damage, its location, and the extent of the affected area. Common issues include scratches, dents, gaps between planks, water damage, and buckling.
Gathering Necessary Tools and Materials: The tools and materials required will vary depending on the repair. Common items include a utility knife, pry bar, tapping block, rubber mallet, pull bar, replacement planks, floor repair kit (containing filler and color-matched putty), adhesive (if applicable), and safety glasses.
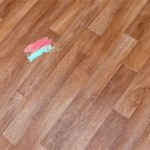
Repairing Scratches and Minor Dents: Superficial scratches can often be addressed using a floor repair kit. The kit typically contains a filler that can be applied to the scratch and then buffed to blend with the surrounding floor. Similarly, minor dents can sometimes be lifted by applying a damp cloth and a warm iron, allowing the moisture and heat to swell the compressed wood fibers.
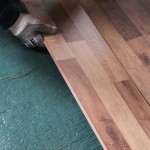
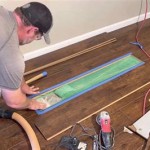
Replacing Damaged Planks (Mid-Floor): Replacing a plank in the middle of the floor requires careful maneuvering. First, a section of flooring leading to the damaged plank needs to be disassembled. This can be achieved by using a pry bar to gently lift the planks, starting from the edge of the room or a doorway. Once the damaged plank is accessible, it can be removed and replaced with a new one. The disassembled planks are then reassembled, ensuring proper locking mechanisms are engaged.
Replacing Damaged Planks (Edge of Room): Replacing planks at the edge of the room is generally simpler. The baseboard or quarter-round molding can be removed to provide access to the damaged plank. A pull bar can then be used to carefully remove the plank without disturbing the surrounding flooring. The new plank can be installed and the molding replaced.
Addressing Gaps Between Planks: Gaps between planks can occur due to temperature fluctuations, humidity changes, or improper installation. Minor gaps can sometimes be closed by gently tapping the planks together using a tapping block and rubber mallet. For larger gaps, adding adhesive to the tongue-and-groove connection before tapping the planks together can be effective.
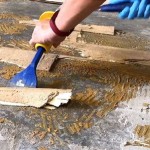
Repairing Water Damage: Water damage requires prompt attention to prevent further issues such as mold growth. The source of the water leak must be addressed first. The affected planks should be removed and allowed to dry thoroughly. The subfloor should also be inspected and dried. If the subfloor is damaged, it needs to be repaired or replaced before installing new planks.
Addressing Buckling: Buckling can occur due to excessive moisture or expansion of the flooring material. Identifying the cause of buckling is crucial for effective repair. If due to moisture, the source needs to be addressed and the affected area allowed to dry. Sometimes, removing a row of planks near the wall can relieve pressure and allow the buckled planks to settle back into place. In severe cases, the entire floor might need to be reinstalled, allowing for proper expansion gaps.
Preventing Future Damage: Several preventative measures can help maintain the integrity of floating floors. Using furniture pads can prevent scratches and dents. Cleaning up spills promptly can mitigate water damage. Maintaining a consistent temperature and humidity level can help prevent gaps and buckling. Ensuring proper installation with adequate expansion gaps around the perimeter of the room is also crucial.
Seeking Professional Assistance: While many minor floating floor repairs can be handled as DIY projects, complex issues or extensive damage may require professional assistance. Consulting a qualified flooring installer can ensure appropriate repair techniques and prevent further complications.
Understanding Warranty Information: It is important to review the manufacturer’s warranty information for specific guidelines regarding repairs and covered damages. Attempting repairs independently might void the warranty in certain cases. Contacting the manufacturer or retailer can clarify warranty coverage and recommended repair procedures.
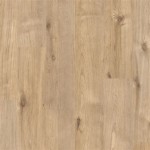
Choosing the Right Replacement Planks: When replacing damaged planks, ensuring the new planks match the existing flooring is essential. This involves considering factors such as color, texture, and style. Retain a few extra planks from the original installation for future repairs or purchase new planks from the same manufacturer and batch number if possible. This can minimize discrepancies in appearance.

Sagging Floorboard Repair No Damage To Floorboards

How To Repair Laminate Flooring The Home

How To Fix A De Laminated Board Without Removing The

How To Replace Damaged Flooring Plank Diy

How To Repair Laminate Flooring The Home

How To Fix Floating Floor Gaps The Easy Way

How To Repair Damaged Laminate Floor Checkatrade

How To Replace A Damaged Laminate Board That S In The Middle Of Floor

Avoid Costly Mistakes Repairing Vinyl Plank Flooring Made Easy

How To Safely Repair Floor Boards Help Advice Leader Floors
See Also