How To Replace a Laminate Floor Plank
Damaged laminate flooring planks detract from a room's aesthetic and can pose a tripping hazard. Fortunately, replacing individual planks is often a manageable DIY project, avoiding the cost and disruption of a full floor replacement. This process requires careful execution to prevent further damage to surrounding planks. This guide provides a step-by-step approach to replacing a single damaged laminate plank.
1. Gather Necessary Tools and Materials
Before beginning the replacement process, gather all necessary tools and materials. This preparation ensures a smooth and efficient workflow. Essential tools include a circular saw, jigsaw, pull bar, tapping block, safety glasses, hammer, measuring tape, pencil, and utility knife. Materials required include a replacement plank, matching laminate adhesive (if necessary), and wood putty that matches the floor color.
2. Prepare the Damaged Plank for Removal
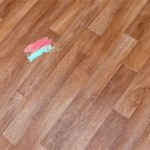
The damaged plank must be carefully cut to prevent damage to surrounding planks. Score the center of the damaged plank using a utility knife, creating cutting lines. This scoring process reduces the likelihood of chipping the surrounding laminate. Next, use a circular saw set to a shallow depth to cut along the scored lines, creating several smaller sections within the damaged plank. These smaller sections are easier to remove without affecting adjacent planks.
3. Remove the Damaged Plank Sections
Using a chisel and hammer, carefully lift the cut sections of the damaged plank. Start from the center and work outwards, applying gentle pressure to avoid damaging the tongue and groove system of the surrounding planks. A pry bar can also be helpful in this process. Once all sections are removed, clean the area thoroughly, removing any remaining debris or adhesive residue. This will ensure a proper fit for the replacement plank.
4. Prepare the Replacement Plank
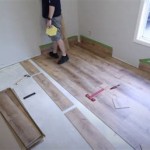
The replacement plank needs to be prepared to fit seamlessly into the existing floor. Measure the space left by the removed plank precisely. Using the damaged plank as a template, use the measurement of the existing planks to mark the new replacement plank. After cutting the new plank, the short ends need to be trimmed. Using a jigsaw, carefully remove the bottom lip (tongue) and the short-end groove on one side of the replacement plank. This will allow the plank to slide into place.
5. Install the Replacement Plank
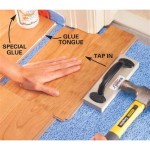
Apply a thin bead of laminate adhesive to the edges of the surrounding planks where the new plank will be inserted, if your flooring requires adhesive. Angle the replacement plank, aligning the long tongue edge with the groove of the adjacent plank. Gently lower the plank into place, ensuring it is flush with the surrounding flooring. Use a tapping block and hammer to tap the plank firmly into place, ensuring a tight and secure fit. Avoid directly hitting the new plank with the hammer, as this can damage the surface.
6. Finish and Clean Up
Once the replacement plank is securely in place, clean any excess adhesive. Fill any small gaps between the planks with wood putty, ensuring a seamless finish. Allow the putty to dry completely according to the manufacturer's instructions. After drying, lightly sand the putty to make it flush with the surrounding flooring. Finally, clean the area thoroughly to remove any dust or debris.
7. Inspect the Repaired Area
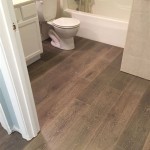
After the repair, inspect the replaced plank and surrounding area. Ensure the new plank lies flush with the existing floor and that there are no gaps or unevenness. Check for any signs of damage to adjacent planks. Walk over the repaired area to ensure stability and a smooth surface. Any noticeable imperfections should be addressed immediately to prevent further issues.

Laminate Floor Repair Diy Family Handyman

How To Replace Damaged Flooring Plank Diy

How To Replace Lock Vinyl Flooring

How To Install Laminate Flooring For Beginners

How To Repair Laminate Flooring The Home

Replace A Damaged Board In Laminate Floor Rw Supply Design

How To Replace Laminate Flooring Episode 7 Howtospecialist Build Step By Diy Plans

How To Replace Warped Water Damaged Laminate Floor Boards

How To Repair Laminate Flooring Foreman Snags

Our Step By Guide For Laying Laminate Flooring
See Also