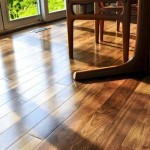
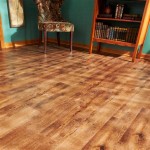
How to Replace a Single Engineered Hardwood Floor Board
Damaged hardwood floors detract from a home's aesthetic appeal and can pose safety hazards. Fortunately, replacing a single engineered hardwood plank is often a manageable DIY project, saving the cost of professional flooring services. This guide provides a step-by-step approach to replacing a damaged engineered hardwood floor board.
Gather Necessary Tools and Materials
Before starting the replacement process, gather the necessary tools and materials. Proper preparation streamlines the project and ensures a smooth workflow. The following items are typically required:
- Circular saw
- Oscillating multi-tool
- Safety glasses and dust mask
- Hammer
- Pry bar
- Chisel
- Vacuum cleaner
- Wood glue
- Replacement engineered hardwood plank
- Measuring tape
- Pencil
Prepare the Damaged Board for Removal
The damaged board needs to be carefully cut to prevent damage to surrounding planks. This process requires precision and the correct use of tools.
- Using a circular saw set to a shallow depth, score the damaged board lengthwise, creating two parallel cuts along the board's center.
- Repeat this process across the board's width, creating smaller sections within the damaged area.
- Put on safety glasses and a dust mask to protect against flying debris.
Remove the Damaged Board
Removing the damaged sections involves careful prying and chiseling to minimize disruption to the surrounding flooring.
- Using a chisel and hammer, carefully remove the scored sections of the damaged board.
- Gently pry up any remaining pieces, ensuring the tongue and groove edges of surrounding boards remain intact.
- Thoroughly clean the area of any debris and remaining adhesive using a vacuum cleaner.
Prepare the Replacement Board
The replacement board needs to be correctly sized and prepared for a seamless fit.
- Measure the dimensions of the removed board accurately.
- Cut the replacement plank to the exact measurements, ensuring a precise fit.
- If the replacement board has a pre-attached underlayment, trim it to fit within the exposed area.
- Test fit the replacement board to ensure a snug fit.
Install the Replacement Board
Proper installation of the replacement board ensures stability and a flush finish.
- Apply wood glue to the exposed tongue and groove edges of the surrounding boards.
- Carefully insert the replacement board, angling it slightly to engage the tongue and groove system.
- Gently tap the replacement board into place using a hammer and a protective block to avoid damaging the surface.
- Ensure the replacement board is flush with the surrounding flooring.
Finishing Touches
Completing the installation involves cleaning and allowing the adhesive to set for optimal results.
- Clean any excess glue immediately with a damp cloth.
- Allow the glue to dry completely according to the manufacturer's instructions before placing any weight or furniture on the replaced board.
- Inspect the replaced board to confirm it sits flush with the surrounding flooring and blends in seamlessly.
Addressing Floating Floor Installations
Replacing a board in a floating engineered hardwood floor requires a slightly different approach.
- Instead of cutting the damaged board into sections, it may be possible to carefully pry up the entire board starting from the nearest wall.
- The replacement board will need its tongue edge trimmed to allow it to slide into place. Use a utility knife or saw to accomplish this.
- Ensure the underlayment is properly positioned beneath the replacement board.
Dealing with Glue-Down Installations
Glue-down engineered hardwood floors present a greater challenge for single board replacement.
- Carefully remove the damaged board, being mindful of potential damage to the subfloor.
- Scrape away any remaining adhesive from the subfloor.
- Apply fresh adhesive before installing the replacement board.
- Weight down the replaced board while the adhesive dries.
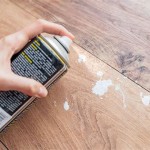
Repairing Minor Damages
For minor surface damage like scratches or dents, consider using a wood repair kit that matches the color of your flooring.
- Clean the damaged area thoroughly.
- Apply the wood filler or repair compound according to the manufacturer's instructions.
- Sand and refinish the repaired area to blend it seamlessly with the surrounding floor.

How To Remove A Single Piece Of Hardwood Flooring The Art Doing Stuff

How To Remove A Single Piece Of Hardwood Flooring The Art Doing Stuff

How To Remove A Single Piece Of Hardwood Flooring The Art Doing Stuff

How To Replace A Damaged Hardwood Floor Board Diy Family Handyman

How To Replace Engineered Hardwood Floor Planks Diy Repair

How To Change A Board On Glue Down Hardwood Floor Phoenix Scottsdale Gilbert Peoria Arizona

Removing Replacing A Damaged Hardwood Flooring Board

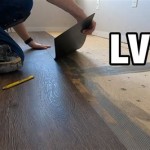
How To Replace Lock Vinyl Flooring

How To Remove A Single Piece Of Hardwood Flooring The Art Doing Stuff

How To Replace Hardwood Floor With S Wikihow
See Also