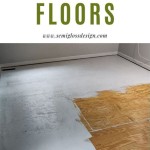
How to Replace a Single Hardwood Floor Board
Damaged hardwood floors detract from a home's aesthetic appeal and can pose safety hazards. Fortunately, replacing a single damaged board, rather than the entire floor, is often a viable and cost-effective solution. This process requires patience and precision, but with the right tools and techniques, even novice DIYers can achieve professional-looking results.
Assessing the Damage and Gathering Supplies
Before beginning the replacement process, assess the damage to determine if a single board replacement is sufficient. If the damage is extensive or affects multiple boards, consulting a professional flooring installer may be necessary. Once a single board replacement is deemed appropriate, gather the necessary tools and materials.
Essential supplies include:
- Circular saw
- Oscillating multi-tool
- Hammer
- Pry bar
- Chisel
- Safety glasses
- Dust mask
- Wood glue
- Replacement hardwood board
- Nail set
- Finishing nails
- Wood putty
- Sandpaper
- Wood stain (if necessary)
- Polyurethane finish
Cutting the Damaged Board
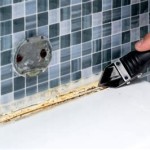
The first step in replacing the damaged board involves carefully cutting it out. Set the circular saw blade depth slightly deeper than the thickness of the flooring. Make several parallel cuts along the length of the damaged board, being careful not to cut into the subfloor. Then, using the oscillating multi-tool, cut across the ends of the board to complete the cuts.
Removing the Damaged Board
After making the necessary cuts, carefully remove the damaged pieces. Start by inserting the pry bar between the cut sections and the adjacent boards. Gently pry up the pieces, working from one end to the other. A chisel can help remove stubborn sections or any remaining nails. Take care not to damage the surrounding boards during this process.
Preparing the Replacement Board
Once the damaged board is removed, prepare the replacement board for installation. The replacement board should match the existing flooring in terms of wood species, thickness, and width. Measure the opening left by the removed board and cut the replacement board to the correct size. Test fit the replacement board to ensure a snug fit. If necessary, make minor adjustments to the board's dimensions.
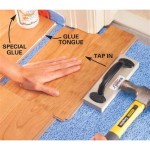
Installing the Replacement Board
Apply a thin layer of wood glue to the underside of the replacement board’s groove edges, then carefully slide the new board into place. Ensure the tongue and groove of the replacement board align seamlessly with the adjacent boards. Use a hammer and nail set to drive finishing nails at an angle through the tongue of the new board into the subfloor. Be sure to countersink the nails slightly below the surface of the wood.
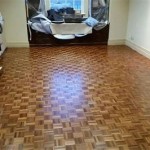
Finishing Touches
After installing the replacement board, fill the nail holes with wood putty. Allow the putty to dry completely according to the manufacturer's instructions. Once dry, sand the filled areas smooth, blending them seamlessly with the surrounding floor. If necessary, apply wood stain to match the existing floor color. Finally, apply a coat or two of polyurethane finish to protect the new board and ensure a uniform sheen across the entire floor.
Common Challenges and Solutions
Several challenges may arise during the replacement process. One common issue is encountering hidden nails or staples. If this occurs, use a nail set or pliers to remove the obstructions carefully. Another challenge involves tight-fitting boards. In such cases, a rubber mallet can be helpful in gently tapping the new board into place without damaging it. Finally, ensuring a seamless color match between the new and existing boards can be tricky. Testing the stain on a scrap piece of wood before applying it to the new board is highly recommended.
Maintenance and Prevention
Regular maintenance can help extend the lifespan of hardwood floors and prevent future damage. Sweep or vacuum the floors regularly to remove dirt and debris. Use protective pads under furniture legs to prevent scratches. Clean up spills promptly to avoid water damage. Avoid wearing high heels or shoes with cleats on hardwood floors. By following these simple maintenance tips, homeowners can protect their investment and enjoy the beauty of their hardwood floors for years to come.
Safety Precautions
Working with power tools requires adherence to safety precautions. Always wear safety glasses and a dust mask to protect eyes and lungs. Ensure adequate ventilation in the work area. Follow the manufacturer's instructions for operating power tools. Disconnect power tools when not in use. By taking these safety precautions, individuals can minimize the risk of injury while working on their hardwood floors.

How To Remove A Single Piece Of Hardwood Flooring The Art Doing Stuff

How To Remove A Single Piece Of Hardwood Flooring The Art Doing Stuff

Removing Replacing A Damaged Hardwood Flooring Board

Boen Repair Tips How To Replace A Single Hardwood Flooring Board

How To Remove A Single Piece Of Hardwood Flooring The Art Doing Stuff

How To Replace Lock Vinyl Flooring

How To Remove A Single Piece Of Hardwood Flooring Floor Repair Wood Floors

Repairing Floating Hardwood Floors

Patching Hardwood Floors Wood Floor Techniques Pete S

Removing Nailed Down Tongue Groove Floorboards
See Also