How to Replace a Broken Floor Joist: A Comprehensive Guide
Floor joists are the horizontal structural members that support the floor and ceiling loads of a building. They are typically made of wood and run parallel to each other, spaced evenly apart. Over time, floor joists can weaken or break due to various factors, including moisture damage, insect infestation, rot, or excessive weight load. Replacing a broken floor joist is a significant undertaking, but with the right knowledge, tools, and materials, it is a manageable project for a competent DIY enthusiast or a professional contractor. This article provides a detailed guide to the process.
Before commencing any work, it is imperative to assess the extent of the damage and determine the cause of the joist failure. This evaluation informs the repair strategy and helps prevent future problems. Carefully inspect the adjacent joists and subfloor for any signs of related issues. If the damage is widespread or if there are concerns about the overall structural integrity of the floor, consulting with a qualified structural engineer is strongly recommended.
Safety is paramount throughout the entire process. Prior to beginning work, ensure the area is adequately ventilated and clear of any obstructions. Wear appropriate personal protective equipment (PPE), including safety glasses, gloves, and a dust mask or respirator. If working in a crawl space or basement, ensure proper lighting and consider wearing a hard hat. It is also crucial to disconnect any electrical wiring or plumbing that may be located near the damaged joist to prevent electric shock or water damage.
1. Preparation and Assessment
The initial phase involves gathering the necessary tools and materials and thoroughly assessing the damage. This ensures a smooth and efficient repair process.
Tools and Materials: A comprehensive list of required tools and materials includes: new floor joist (matching the dimensions and species of the existing joists), measuring tape, pencil, circular saw, reciprocating saw or handsaw, drill, impact driver, level, hammer, pry bar, shims, construction adhesive, galvanized nails or screws, temporary supports (e.g., adjustable steel columns or wood posts), safety glasses, gloves, dust mask or respirator, and a stud finder.
Assessing the Damage: Closely examine the broken floor joist to determine the extent of the damage. Identify the location and nature of the break or weakness. Look for signs of rot, insect infestation, or water damage. Check the adjacent joists for any signs of similar problems. Measure the length, width, and depth of the existing floor joists to ensure the replacement joist is the correct size. Note the spacing between the joists to maintain proper structural support. Determine if the damage is localized or extends to a larger area. If there is significant rot or insect damage, it may be necessary to replace multiple joists.
Planning the Repair: Based on the assessment, develop a detailed repair plan. Decide how much of the joist needs to be replaced. Determine the best method for supporting the existing floor and ceiling loads during the repair process. Consider the accessibility of the work area and any potential obstacles. Plan the sequence of steps for removing the damaged joist and installing the new one. Calculate the amount of materials needed for the repair and ensure they are readily available. Obtain any necessary permits or approvals from local building authorities.
2. Removing the Damaged Joist and Providing Temporary Support
This phase involves carefully removing the broken joist while ensuring the structural stability of the surrounding area.
Installing Temporary Supports: Before removing the damaged joist, it is crucial to provide temporary support to the floor and ceiling above. This prevents sagging or collapse during the repair process. Place temporary supports on either side of the damaged joist, typically spaced no more than 4 feet apart. These supports can be adjustable steel columns, wood posts, or sturdy jacks. Ensure the supports are placed on solid ground or a stable foundation. Use shims to ensure the supports are level and provide even weight distribution. Gradually raise the supports until they are snug against the subfloor, but avoid over-tightening, which could cause damage.
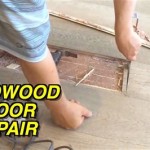
Removing the Existing Joist: Once the temporary supports are in place, the damaged joist can be removed. Use a reciprocating saw or handsaw to cut the joist on either side of the damaged area. Ensure the cuts are clean and straight. If the joist is nailed or screwed to the subfloor or rim joist, use a pry bar to carefully detach it. Avoid damaging the surrounding structures. If the joist is embedded in a concrete wall, it may be necessary to chip away the concrete to free the joist. Remove any remaining nails, screws, or debris from the area.
Inspecting the Cavity: After removing the damaged joist, thoroughly inspect the cavity where it was located. Check for any signs of rot, insect infestation, or water damage in the adjacent joists, subfloor, and rim joist. Address any underlying issues before installing the new joist. If necessary, treat the area with a wood preservative or insecticide to prevent future problems. Ensure the cavity is clean and free of debris.
3. Installing the New Joist and Securing it in Place
This phase focuses on installing the replacement joist and properly securing it to ensure structural integrity.
Preparing the New Joist: Measure the exact length of the space where the damaged joist was removed. Cut the new joist to the correct length using a circular saw. Ensure the cut is straight and accurate. Apply construction adhesive to the ends of the new joist where it will rest on the supporting structures. This provides a stronger bond and helps prevent squeaking.
Installing the New Joist: Carefully lift the new joist into place, aligning it with the existing joists. Ensure the joist is level and flush with the surrounding floor. Push the joist into the cavity, ensuring it is seated firmly against the supporting structures. Use shims to fill any gaps between the joist and the subfloor or rim joist. This provides additional support and prevents movement.
Securing the New Joist: Once the new joist is in place, it must be securely fastened to the surrounding structures. Use galvanized nails or screws to attach the joist to the subfloor and rim joist. Drive the fasteners at an angle to provide maximum holding power. If necessary, use metal joist hangers to provide additional support, especially if the joist is bearing a heavy load. Ensure the fasteners are properly sized and spaced according to building codes and industry standards. Apply additional construction adhesive to the connection points for added strength.
Once the new joist is securely installed, remove the temporary supports. Gradually lower the supports to release the pressure on the new joist. Observe the floor and ceiling for any signs of sagging or movement. If necessary, re-adjust the supports or add additional shims to provide further stabilization. After the supports are removed, inspect the area for any loose nails, screws, or debris. Clean up the work area and dispose of any waste materials properly. Consider installing insulation between the joists to improve energy efficiency and reduce noise transmission.
The successful completion of the joist replacement involves meticulous attention to detail, adherence to safety precautions, and a thorough understanding of structural principles. While this guide provides a comprehensive overview of the process, it is essential to consult with a qualified professional if there are any doubts or concerns about the structural integrity of the building.

Fix Replace Damaged Floor Joists How To Sister A Joist

How To Replace A Floor Joist

How To Repair A Butchered Floor Joist Fine Homebuilding

Fixing A Broken Floor Joist

Everything You Need To Know About Floor Joist Repair

How To Fix A Broken Joist

How To Fix Sagging Floor Joists Rogue Engineer

A Quick Trick For Fixing Broken Floor Joists Fine Homebuilding

Sistering A Damaged Floor Joist

How To Repair Cut Or Damaged Floor Joist Bolting New Existing
See Also