How To Replace Damaged Floating Floor Boards
Damaged floating floor boards detract from the aesthetic appeal of a room and, if left unaddressed, can lead to further damage and structural issues. Fortunately, replacing individual boards in a floating floor system is a manageable DIY project with the right tools and approach.
Tools and Materials Required
Gathering the necessary tools and materials beforehand streamlines the repair process. This list ensures all required items are readily available:
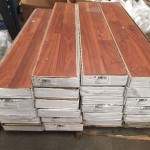
*Replacement floor boards
*Pull bar
*Tapping block
*Safety glasses
*Utility knife
*Measuring tape
*Pencil
*Hammer
*Pliers
*Optional: Circular saw with fine-tooth blade
Preparing the Damaged Board for Removal
Careful preparation prevents damage to surrounding boards during the removal process. The damaged board must be cut to allow for easier extraction:
*Score the damaged board along its length and width using a utility knife. Multiple passes with the knife will ensure a clean cut through the decorative layer and slightly into the core.
*Break the board into smaller pieces along the scored lines. This minimizes stress on the surrounding boards and tongue-and-groove locking mechanism.
Removing the Damaged Board Pieces
Once the board is sectioned, individual pieces can be removed. Care should be taken to avoid damaging the surrounding boards:
*Use a hammer and chisel or a pry bar to carefully remove the cut pieces of the damaged board. Start from the center and work outwards.
*Remove any remaining fragments of the damaged board and clean the area to ensure a proper fit for the replacement board.
Preparing the Replacement Board
The replacement board must be cut to the correct size and its edges prepared for a seamless fit:
*Measure the dimensions of the removed board precisely.
*Cut the replacement board to the exact measurements using a circular saw or utility knife. Ensure a square cut for optimal fit.
*Remove a portion of the bottom lip of the long side and short end edges of the replacement board. This will allow the board to be angled into place over the existing boards. A utility knife or a sharp chisel works well for this task.
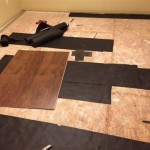
Installing the Replacement Board
Proper installation of the replacement board ensures a flush fit and restores the floor's integrity:
*Apply a small amount of wood glue to the edges of the adjacent boards where the new board will be installed. This will help secure the board in place and minimize movement. Be sure to select a glue compatible with the flooring material.
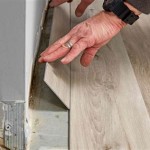
*Angle the long edge of the replacement board into the groove of the adjacent board and lower it into place. A tapping block placed against the short edge and gentle taps with a hammer will ensure a snug fit. Avoid direct hammering on the new board's surface, which could cause damage.
*Once the board is positioned, use the pull bar to secure the short end of the replacement board into place.
Finishing the Repair
The final steps are essential for a polished and completed repair:
*Clean any excess glue immediately. Allow the glue to dry completely according to the manufacturer's instructions.
*Place a heavy object, such as a stack of books, on the newly installed board for 24 hours to ensure proper bonding and prevent movement.
Troubleshooting Common Issues
Sometimes challenges arise during the replacement process. These tips address common issues:
*Difficulty removing damaged board: If the board is difficult to remove, try scoring it again with the utility knife or using a reciprocating saw with a fine-tooth blade.
*Gapping between boards: Ensure the replacement board is cut to the correct size. If a small gap persists, use wood filler that matches the floor color to fill the void.
*Damaged adjacent boards: If surrounding boards are damaged during removal, they may also need to be replaced following the same process.
Preventing Future Damage
Proactive measures can minimize the risk of future damage to floating floors:
*Use floor protectors under furniture legs to prevent scratches and dents.
*Clean up spills immediately to prevent moisture damage.
*Avoid dragging heavy objects across the floor.
*Place mats at entrances to trap dirt and grit which can scratch the floor surface.

How To Replace Damaged Flooring Plank Diy

Laminate Floor Repair Diy Family Handyman

How To Replace Warped Water Damaged Laminate Floor Boards

How To Replace A Damaged Hardwood Floor Board Diy Family Handyman

How To Replace Flooring Floor Experts Tips On Replacement

How To Repair Laminate Flooring The Home

Replace A Damaged Board In Laminate Floor Rw Supply Design

How To Replace Damaged Hardwood Floorboards Dans Le Lakehouse

Removing Replacing A Damaged Hardwood Flooring Board

How To Replace A Damaged Hardwood Floor Board Diy Family Handyman
See Also