How To Replace Damaged Laminate Floor Boards
Laminate flooring offers an attractive and durable flooring solution for many homeowners. However, accidents happen, and individual boards can become damaged through impacts, scratches, or water damage. Fortunately, replacing individual laminate planks is often possible without needing to replace the entire floor. This article provides a step-by-step guide for replacing damaged laminate floorboards.
Assessing the Damage: Before beginning the replacement process, assess the extent of the damage. Minor scratches can sometimes be repaired with laminate repair kits. However, deep gouges, chips, or water-damaged boards require replacement.
Gathering the Necessary Tools and Materials: Proper tools are essential for a successful repair. Gather the following:
- Replacement laminate plank (matching the existing floor)
- Pull bar
- Tapping block
- Hammer
- Utility knife
- Safety glasses
- Measuring tape
- Pencil
- Vacuum
- Gloves (optional)
Locating a Matching Replacement Plank: Finding an exact match for older laminate flooring can be challenging. Check closets, basements, or attics for leftover planks from the initial installation. If no extras are available, contact the flooring manufacturer or retailer. Providing the product name and information can assist them in finding a match. In cases where a perfect match isn't available, consider replacing a less conspicuous plank (e.g., under furniture) with the damaged one and using the new plank in the more visible area.
Preparing the Area: Clear the area around the damaged plank of furniture and any obstructions. Thoroughly vacuum the floor to remove dust and debris that could interfere with the repair process.
Removing the Damaged Plank: This process requires carefully dismantling the affected area to avoid damaging surrounding planks. Start by scoring the damaged plank's surface with a utility knife. This helps prevent the laminate's decorative layer from chipping during removal. Next, insert the pull bar between the wall and the edge of the damaged plank. Gently pry up the plank's edge. If the plank is in the middle of the floor, carefully lift it enough to insert the tapping block underneath. Gently tap the pull bar to lift the plank further. Continue working along the length of the plank, gradually lifting it higher until it disengages from the adjacent planks.
Disconnecting the Damaged Plank: Once the damaged plank is lifted, it needs to be disconnected from the adjacent planks. Laminate planks typically interlock. Angle the lifted plank upwards and carefully slide it towards the wall (or towards the open end of the row, if the plank is at the end). This disengages the locking mechanism and allows for removal. Depending on the locking system, the plank may require a slight twisting motion to release it.
Preparing the Replacement Plank: The replacement plank often needs adjustments to fit correctly. If the damaged plank was cut to size, measure the dimensions and transfer them to the replacement plank. Cut the replacement plank to the correct size using a utility knife and a straight edge. Ensure accurate measurements for a seamless fit.
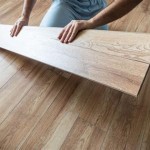
Installing the New Plank: Angle the replacement plank at a similar angle to the one used for removal. Align the tongue and groove locking system with the adjacent planks. Gently lower the plank into place. Use the tapping block and hammer to tap the plank firmly into place, ensuring it sits flush with the surrounding floor. Avoid hitting the plank directly with the hammer, as this could damage the surface.
Testing the New Plank: Once installed, walk over the replaced plank to ensure it sits securely and doesn't move or creak. Check for any gaps between the new plank and the surrounding planks. If any gaps exist, gently tap the plank further into place using the tapping block and hammer.
Cleaning Up: After the replacement is complete, vacuum the area to remove any dust or debris generated during the process. Dispose of the damaged plank and any leftover materials.
Replacing a damaged laminate floorboard requires patience and attention to detail. Following these steps can often restore the floor's appearance and prevent further damage. However, for extensive damage or complex repairs, consulting a professional flooring installer is advisable. They possess the expertise and tools to handle more challenging situations and ensure a seamless repair.

Laminate Floor Repair Diy Family Handyman

How To Replace Damaged Flooring Plank Diy

How To Replace Warped Water Damaged Laminate Floor Boards

How To Fix A De Laminated Board Without Removing The

Replace A Damaged Board In Laminate Floor Rw Supply Design

How To Repair Damaged Laminate Floor Checkatrade

How To Repair Laminate Flooring The Home

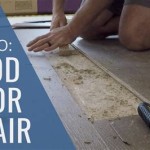
How To Replace A Damaged Hardwood Floor Board Diy Family Handyman

How To Repair Laminate Flooring The Home

Replacing A Damaged Laminate Floor Board Can I Do It Without Taking The Whole Up
See Also