How To Replace Engineered Wood Floor Planks
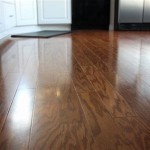
Damaged engineered wood flooring can detract from the overall aesthetic of a room. Fortunately, replacing individual planks is often a manageable DIY project, saving the cost of professional flooring installation. This article will guide you through the process of replacing engineered wood floor planks, providing a step-by-step approach for a successful repair.
1. Gathering the Necessary Tools and Materials
Before beginning the replacement process, gather all the necessary tools and materials. This preparation will streamline the project and prevent interruptions. Essential tools typically include a circular saw, oscillating multi-tool, pry bar, hammer, safety glasses, measuring tape, pencil, and vacuum cleaner. Materials will include replacement planks, wood glue, and matching wood filler.
2. Identifying the Damaged Plank and Surrounding Area
Carefully inspect the damaged plank and the surrounding area. Note the plank's position relative to other planks and any specific locking mechanisms used. Understanding the layout will help determine the best approach for removal and replacement.
3. Cutting Out the Damaged Plank
Using a circular saw set to a shallow depth, score the damaged plank along its length, creating multiple parallel cuts. These cuts will help prevent the saw from splintering the surrounding wood. Next, use an oscillating multi-tool to cut along the edges of the plank, separating it from the adjacent boards. The depth of the cut should be slightly deeper than the thickness of the engineered wood flooring to prevent damaging the subfloor.
4. Removing the Damaged Plank Pieces
Carefully insert a pry bar beneath the scored sections of the damaged plank. Gently lift the pieces, working from the center outwards to minimize stress on the surrounding planks. If the plank is stubborn, use a hammer to tap the pry bar further underneath. Once the majority of the plank is removed, any remaining smaller pieces can often be removed by hand or with pliers. Thoroughly clean the area of any debris, including glue residue, using a vacuum cleaner.
5. Preparing the Replacement Plank
Measure the dimensions of the removed plank and carefully cut the replacement plank to match. Ensure precise measurements for a seamless fit. If the replacement plank has a pre-attached underlayment, trim it to match the existing flooring. Dry-fit the replacement plank to verify the fit before applying any adhesive.
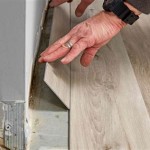
6. Installing the Replacement Plank
Apply a thin layer of wood glue to the exposed tongue and groove edges of the surrounding planks. Carefully insert the replacement plank, aligning the tongue and groove, and press it firmly into place. Use a tapping block and hammer to gently tap the replacement plank into place, ensuring it is flush with the surrounding flooring. Remove any excess glue immediately with a damp cloth.
7. Finishing Touches
Once the glue has dried according to the manufacturer's instructions, fill any small gaps between the replacement plank and surrounding boards with wood filler. Choose a filler that matches the color of the flooring for a seamless repair. After the filler has dried, lightly sand the area smooth and apply a matching finish to blend the repair with the existing floor. Allow ample drying time before placing furniture or walking on the repaired area.
Important Considerations for Click-Lock Flooring
For click-lock engineered wood flooring, the removal process may differ slightly. Instead of cutting the damaged plank, it may be possible to disengage the locking mechanism and remove the plank intact. Consult the manufacturer's instructions for specific guidance on removing and replacing click-lock flooring.
Addressing Subfloor Issues
If the subfloor is damaged, address the issue before installing the replacement plank. Uneven or damaged subfloors can cause problems with the new plank and may lead to future damage. Level the subfloor as needed before proceeding with the replacement.
Seeking Professional Assistance
While replacing individual engineered wood planks can be a DIY project, complex repairs or extensive damage may require professional assistance. If you are unsure about any aspect of the process, consult a qualified flooring installer for guidance.

How To Install Hardwood Flooring For Beginners

A Comprehensive Guide On Engineered Wood Flooring Installation Mersey

How To Replace Engineered Hardwood Floor Planks Diy Repair

How I Fit Engineered Oak Wood Flooring

How To Install An Engineered Hardwood Floor

How To Repair Engineered Wood Flooring A Step By Guide

The Ultimate Guide To Installing Engineered Hardwood Flooring

Engineered Wood Floor Installation In London Homes At Mr Sander

How To Install Lock Engineered Hardwood Flooring

Wooden Flooring Installation Step By Guide
See Also