How To Replace Engineered Wood Floor Planks In Taiwan
Replacing damaged engineered wood floor planks in Taiwan requires careful planning and execution to ensure a seamless and professional finish. This guide outlines the process, encompassing tool acquisition, material selection, and the replacement procedure itself.
1. Assessing the Damage and Gathering Necessary Tools
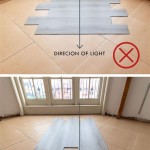
Before beginning the replacement process, the extent of the damage should be thoroughly assessed. Determine how many planks require replacement and if the subfloor has sustained any damage. Common tools required for this project include a pry bar, hammer, tapping block, measuring tape, jigsaw, safety glasses, and a pencil. Depending on the specific flooring system, additional specialized tools might be necessary. For instance, if the planks are glued down, a heat gun or solvent may be needed to soften the adhesive.
2. Sourcing Replacement Planks in Taiwan
Locating matching replacement planks is crucial for maintaining the floor's aesthetic consistency. Contacting the original flooring supplier or visiting local flooring retailers in Taiwan is recommended. Providing the manufacturer's name, product code, and color name will assist in finding an exact match. If an exact match is unavailable, consider replacing a larger section of flooring to incorporate the new planks less conspicuously. Keeping leftover planks from the original installation is highly beneficial in these situations.
3. Preparing the Damaged Area
Preparation involves isolating the damaged plank for removal. Using a utility knife, score along the edges of the damaged plank to break the existing sealant and prevent damage to adjacent planks. This step is particularly important for click-lock flooring systems. For glued-down planks, applying heat or solvent might be necessary to loosen the adhesive. Exercise caution to avoid damaging the subfloor during this process.
4. Removing the Damaged Plank
Carefully insert a pry bar beneath the edge of the damaged plank. Using a tapping block against the pry bar, gently lift the plank. Avoid excessive force, which could damage the surrounding planks or subfloor. For click-lock systems, start removing the plank from the shorter end, working towards the longer edge by disengaging the locking mechanism. If working with glued-down planks, work the pry bar slowly and methodically to lift the plank from the adhesive. Remove any remaining adhesive residue from the subfloor using a scraper.
5. Preparing the Replacement Plank
The replacement plank needs to be cut to the exact dimensions of the removed plank. Precise measurements are essential for a snug fit. Use the removed plank as a template to ensure accuracy. Utilize a jigsaw for precise cutting, ensuring the cut edges are clean and smooth. Test fit the replacement plank before applying any adhesive or engaging the click-lock mechanism. Minor adjustments can be made using a file or sandpaper.
6. Installing the Replacement Plank
For click-lock systems, angle the replacement plank into the adjacent planks, ensuring the locking mechanism engages correctly. Gently tap the plank into place using a tapping block and hammer. Avoid excessive force, which could damage the locking mechanism. For glued-down planks, apply a thin, even layer of adhesive to the subfloor where the replacement plank will be placed. Carefully position the replacement plank and press firmly to ensure proper adhesion. Remove any excess adhesive immediately.
7. Finishing and Cleanup
Once the replacement plank is securely in place, ensure the surrounding planks are properly aligned. Apply sealant along the edges of the new plank to prevent moisture penetration and create a seamless finish. Clean the area thoroughly, removing any debris or excess sealant. Allow the sealant to dry completely before subjecting the floor to normal traffic. The drying time will vary depending on the specific sealant used. Refer to the manufacturer's instructions for specific drying times.
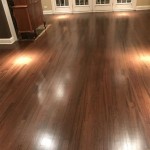
Replacing engineered wood flooring planks can be a manageable DIY project with proper planning and execution. Following these steps, homeowners in Taiwan can effectively address damaged planks and maintain the aesthetic appeal of their floors. However, if the damage is extensive or the homeowner is uncomfortable with the process, consulting a professional flooring installer is always recommended.

Blog Interior Surface Solutions Kd Panels

Engineered Wood Flooring Manufacturer Look At The Ion Ecowood

The Ultimate Guide To Understanding Engineered Wood Floors Homify

Engineered Oak Wood Flooring Manufacturer And Supplier Ecowood

Engineered Wood Flooring Costco

Engineered Oak Wood Flooring Manufacturer And Supplier Ecowood

3lp 1l Oak Abc Brushed Oiled T G 14 3x190x1900 Mm Alpod Eu

Special Shaped Oak Wood Floor Customized Parquet Chevron Engineered Flooring For Indoor Easy To Maintain Explore Whole And Plank

Kervignac Oak Engineered Hardwood Flooring Ua Floors

Engineered Flooring Selection Full Strategy Kd Blog Into The Woods Interior Surface Solutions Panels
See Also