How To Replace Floating Floor Boards
Floating floors offer a relatively easy installation and maintenance process compared to traditional flooring options. Their click-lock system allows for individual planks or tiles to be replaced without requiring extensive demolition. This guide outlines the steps involved in replacing damaged floating floor boards.
Necessary Tools and Materials: Before commencing the replacement process, gather the required tools and materials. These typically include a pull bar, tapping block, rubber mallet, utility knife, measuring tape, replacement flooring planks, and potentially a circular saw or jigsaw for cutting planks.
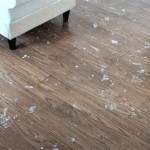
Locating the Damaged Board: Identify the damaged board requiring replacement. It is essential to assess the extent of the damage. Minor scratches or scuffs can often be repaired with specialized repair kits. However, deep gouges, chips, or warping necessitate complete board replacement.
Disassembling from the Wall: The replacement process begins by removing the baseboard or quarter-round molding closest to the damaged board. This provides access to the edge of the floating floor and facilitates the removal of the damaged plank. A pry bar can be carefully used to detach the molding without causing damage.
Disconnecting the Damaged Board: Floating floor boards connect via a tongue-and-groove system. The objective is to disengage this connection. Starting from the wall closest to the damaged board, carefully lift the planks from the row leading to the damaged piece. The pull bar is a crucial tool for this process. It’s inserted into the small gap between planks and gently levered upwards to separate the interlocking mechanism. A tapping block and rubber mallet can be used to assist in this process, ensuring even pressure and preventing damage to adjacent boards.
Removing the Damaged Plank: Once the pathway to the damaged board is clear, gently lift and remove the plank. Depending on the click-lock system, it might be necessary to angle the board slightly to disengage it fully.
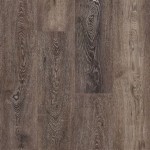
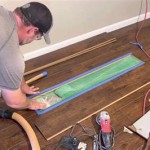
Preparing the Replacement Board: In most cases, the replacement board will require cutting to fit the specific location. Measure the dimensions of the removed plank carefully and transfer those measurements to the new board. Using a circular saw or jigsaw equipped with a fine-toothed blade ensures a clean, precise cut. Always remember to follow safety precautions when operating power tools.
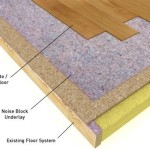
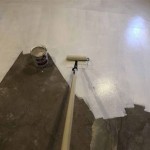
Installing the Replacement Board: Before installing the new plank, ensure the subfloor beneath is clean and free of debris. Insert the tongue of the replacement board into the groove of the adjacent plank. Angle the board slightly downwards and press firmly into place until the click-lock mechanism engages. Use the tapping block and rubber mallet to ensure a tight, secure fit. Avoid excessive force which could damage the board.
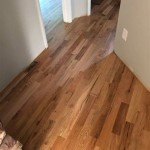
Reconnecting the Remaining Planks: Once the replacement board is securely in place, the previously removed planks can be reconnected. Work systematically, angling each plank downwards and pressing into place until the click-lock engages. The tapping block and rubber mallet can be used to ensure a flush, even surface. Inspect the reconnected planks to confirm they are securely locked together.
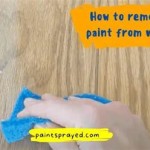
Reinstalling the Molding: The final step involves reinstalling the baseboard or quarter-round molding. Carefully align the molding and secure it back in place using the original fasteners or new ones as needed. Fill any nail holes with wood filler and touch up the paint if necessary.
Addressing Specific Challenges: While this guide provides a general overview, certain situations might require additional considerations. For instance, replacing boards in the middle of a large floor might require disassembling a larger section. Damaged boards near doorways might require removing or adjusting door jambs.
Maintenance After Replacement: Regular cleaning and maintenance are crucial to preserving the lifespan of a floating floor. Sweep or vacuum regularly to remove dirt and grit. Clean spills promptly to prevent staining or warping. Avoid using abrasive cleaners or excessive moisture, as these can damage the surface of the floor.
Seeking Professional Assistance: While replacing individual floating floor boards is often manageable as a DIY project, complex situations or extensive damage might require professional assistance. Consulting a qualified flooring installer ensures the replacement is carried out correctly and minimizes the risk of further damage.

How To Replace Floating Floor Boards Bunnings Work Community

How To Replace Lock Vinyl Flooring

How To Replace A Damaged Laminate Board That S In The Middle Of Floor

How To Replace Floating Floor Boards Bunnings Work Community

Replace A Damaged Board In Laminate Floor Rw Supply Design

How To Replace A Damaged Hardwood Floor Board Diy Family Handyman

How To Replace Warped Water Damaged Laminate Floor Boards

How To Replace A Floorboard Fine Homebuilding

How To Install Laminate Flooring For Beginners

How To Replace Flooring Floor Experts Tips On Replacement
See Also