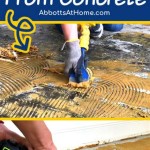
How to Replace Water Damaged Floor Joists
Water damage to floor joists is a common problem in many homes, especially in basements, crawl spaces, and areas prone to leaks. Ignoring water damage can lead to serious structural issues, including sagging floors, mold growth, and potential collapse. Replacing damaged joists is a complex process that requires careful planning, precise execution, and a thorough understanding of building codes and safety protocols. This article provides a step-by-step guide on how to replace water-damaged floor joists.
Before beginning any work, it is crucial to identify the extent of the damage. This involves a thorough inspection of the joists to determine the areas affected by rot, mold, or structural weakening. Look for signs of discoloration, soft spots, and crumbling wood. A moisture meter can be used to assess the moisture content of the wood, which can indicate the presence of hidden water damage. Probing the wood with a screwdriver or awl can also help identify areas where the wood has deteriorated.
Safety is paramount throughout this project. Wear appropriate personal protective equipment (PPE), including safety glasses, a dust mask or respirator, gloves, and sturdy work boots. Ensure the work area is well-ventilated to prevent the inhalation of dust and mold spores. Properly support the floor above the joists being replaced to prevent collapse. It is also essential to be aware of electrical wiring and plumbing running through the joists and to take precautions to avoid damaging them.
Understanding the structural implications of removing and replacing joists is essential. Floor joists are structural members that support the weight of the floor above. Removing a joist without proper support can cause the floor to sag or collapse. Consult with a structural engineer or experienced contractor if you are unsure about the structural integrity of your floor system. They can provide guidance on the appropriate methods for supporting the floor and selecting the correct replacement joists.
1. Preparation and Assessment
The first step in replacing water-damaged floor joists is preparing the work area and assessing the extent of the damage. This involves gathering the necessary tools and materials, identifying the source of the water damage, and determining the scope of the repair.
Tools and Materials: You will need a variety of tools and materials for this project, including:
- Safety Glasses
- Dust Mask or Respirator
- Gloves
- Work Boots
- Circular Saw
- Reciprocating Saw
- Drill with various bits
- Hammer
- Level
- Tape Measure
- Pry Bar
- Screwdrivers
- Moisture Meter
- Screws and Nails (appropriate for framing)
- Construction Adhesive
- Wood Preservative
- Replacement Joists (same dimensions and grade as the original)
- Temporary Support Posts and Beams
- Shims
Identifying the Source of Water Damage: Before replacing the joists, it is crucial to identify and address the source of the water damage. If the leak is not fixed, the new joists will eventually suffer the same fate as the old ones. Common sources of water damage include leaky pipes, roof leaks, foundation cracks, and poor drainage. Inspect the area above and around the damaged joists to identify the source of the water and make the necessary repairs.
Determining the Scope of Repair: Once the source of the water damage has been addressed, determine the scope of the repair. This involves assessing the extent of the damage to the joists and any adjacent structural members. It may be necessary to replace multiple joists or to sister new joists alongside the damaged ones. The amount of damage will dictate the extent of the necessary repair.
Proper Joist Spacing and Dimensions: Ensure that the new joists are spaced correctly and match the dimensions of the original joists. Improper spacing or dimensions can compromise the structural integrity of the floor. Adhere to local building codes and consult with a structural engineer if you are unsure about the appropriate spacing or dimensions.
2. Temporary Support and Removal of Damaged Joists
Providing adequate temporary support to the floor above is critical to prevent collapse during the joist replacement process. Once support is established, the damaged joists can be safely removed.
Installing Temporary Support: Before removing any joists, install temporary support to the floor above. This can be done using adjustable support posts and heavy-duty beams. Position the support posts directly under the floor joists and adjust them to provide firm support. The number and spacing of the support posts will depend on the span of the floor and the weight it is supporting. Consult with a structural engineer or experienced contractor for guidance on the appropriate support system.
Cutting and Removing the Damaged Joists: Once the temporary support is in place, the damaged joists can be cut and removed. Use a reciprocating saw to cut the joists at both ends, making sure to cut through any nails or screws that are holding them in place. Be careful not to damage any adjacent structural members or wiring during the removal process. It may be necessary to use a pry bar to help loosen the joists and remove them from their framing pockets.
Inspecting for Additional Damage: After removing the damaged joists, inspect the surrounding areas for any additional signs of water damage or rot. This includes the subfloor, sill plates, and adjacent joists. If additional damage is found, it should be addressed before installing the new joists.
Cleaning the Area: Thoroughly clean the area where the damaged joists were removed. Remove any debris, mold, or mildew. Apply a mold inhibitor to the surrounding wood to prevent future mold growth. A clean and dry environment is essential for the proper installation of the new joists.
3. Installing the New Joists
Installing the new joists requires careful measurement, precise cutting, and secure fastening to ensure the structural integrity of the floor. The steps below outline the proper procedure.
Cutting the New Joists to Size: Measure the distance between the support beams or walls where the new joists will be installed. Cut the new joists to the correct length, making sure to account for any angles or irregularities in the framing. It is better to cut the joists slightly longer than necessary and then trim them to fit perfectly.
Applying Wood Preservative: Before installing the new joists, apply a wood preservative to all sides. This will help protect the wood from future water damage, rot, and insect infestation. Allow the preservative to dry completely before installing the joists.
Installing the New Joists: Carefully lift the new joists into place, aligning them with the existing framing. Use shims to ensure that the tops of the new joists are flush with the tops of the adjacent joists. Secure the new joists to the support beams or walls using appropriate fasteners, such as nails, screws, or construction adhesive. Ensure the fasteners are properly sized and spaced to provide adequate support.
Fastening and Securing the Joists: Secure the new joists using appropriate fasteners, such as nails, screws, or construction adhesive. Use galvanized or stainless steel fasteners to prevent corrosion. Toenail the joists to the sill plate and the header joist. Install blocking between the joists to provide additional support and prevent twisting. Blocking should be spaced no more than 8 feet apart.
Checking for Level and Alignment: Use a level to check that the new joists are level with the existing joists. Make any necessary adjustments by adding or removing shims. Ensure that the joists are properly aligned and that there are no gaps or irregularities in the framing.
Removing Temporary Support: Once the new joists are securely installed and all connections are checked, gradually remove the temporary support. Monitor the floor for any signs of sagging or movement. If any problems are detected, reinstall the temporary support and re-evaluate the installation.
Post-Installation Inspection: Conduct a thorough inspection of the newly installed joists and surrounding areas. Check for any signs of weakness, instability, or improper installation. Address any issues immediately to ensure the long-term structural integrity of the floor system. It may be beneficial to have a structural engineer or experienced contractor review the work.
Replacing water-damaged floor joists is a significant undertaking that requires careful planning and execution. By following the steps outlined in this article and taking appropriate safety precautions, homeowners can successfully complete this project and restore the structural integrity of their homes. However, if you are uncomfortable performing this work yourself, it is always best to hire a qualified contractor.

How To Repair Floor Joists With Water Damage Ctr

Fix Replace Damaged Floor Joists How To Sister A Joist

Bathroom How To Treat Joist That Has Wet Rot Before Sistering A New It Home Improvement Stack Exchange

How To Repair A Butchered Floor Joist Fine Homebuilding

How To Remove And Replace Rotten Subfloors Diy For Beginners

Everything You Need To Know About Floor Joist Repair

How To Repair Floor Joists With Water Damage

Everything You Need To Know About Floor Joist Repair

How To Repair Floor Joists With Water Damage Major Restoration Services

How To Replace A Floor Joist
See Also